Note Block Maestro
A physical note block that plays MIDI files as note block audio with a visualizer, and can also convert them to schematic or data pack form for use in-game.
Total time spent on project: 34 hours
June 28th: Planning
Today was spent planning out the project just to make sure it's technically feasible, as well as doing some basic setup and preparation. As for hardware, this is what I've come up with so far (very tentative and incomplete list):
- Raspberry Pi 4 B 2GB for main processing, playback, and converting of files
- 32 GB MicroSD card for OS files, programs, and audio files
- HiFiBerry MiniAmp (3 W × 2) as the amplifier
- Some kind of speakers for audio playback
- Push buttons w/ LEDs for basic controls
- USB-C PSU to power Pi and MiniAmp
- Any wood I have lying around for the box
I also took a look into software to use for the project:
- Hyperchoron as the tool to convert sequence files to Minecraft-compatible formats
- pynbs and pygame to play audio from the speakers
Next I'll work on actually submitting the project, testing software from my PC, and figuring out specific hardware models to purchase as well as costs.
Total time spent: 2 hours
June 29th: Planning, shopping, and finalizing
The past day has mostly been spent just planning and shopping for parts. I think I have figured out every part that I want to use:
- Raspberry Pi 5 4GB for all processing
- 64 GB MicroSD card for storage
- USB MicroSD reader for my PC
- MAX98357 I²S mono amp (3 W) for speaker output
- Dayton PC105-4 4" speaker for good audio playback; should hit >90dB
- 2.8″ SPI Arducam TFT with 5 MP camera and 320x240 display. It seems like an odd choice, but it has a really great deal right now, and the camera and touchscreen open up lots of future possibilities
- 10x 12-mm push buttons
- 2x KY‑040 encoders
- Dupont jumper wire bundle
- 600‑pc M3 nylon standoffs in case I don't have any lying around
- Premium soldering kit in case I don't have one somewhere
- Official Pi 5 Active Cooler
- Either 3D printing filament or plywood for the container. I really hope to be able to 3d-print this, but we'll see
- Screws and nuts, which I almost certainly have lying around
- Possibly Pololu's power switch for smart shutdown, but only if I have the money to spare
Already filled my cart on Amazon and Vilros and am ready to submit my order anytime
The software stack remains similar, but I realized that instead of decoding .nbs files in real time, I can take in .mid, .midi or .nbs files as input, then export both a .nbs file and a .flac file. The .flac will be used for audio playback, as it will run very lightweight on the Pi 5, then the .nbs file can be decoded into .json and used for the visualizer. The visualizer is a new idea, and is essentially this: The parser reads how many instruments are in the song about to be played, and adds one note block sprite for each instrument, with their respective block sprite underneath it. Then, synced to the audio, every time a note plays from an instrument, that note block will output a music note. In the real game the notes are colored based on what frequency is playing, and I think the best way to do that for such a wide range is to see the highest and lowest notes in the song, then use that to change the hue of the notes. The bigger the range is, the smaller the difference in color between notes will be. I also plan to have a touchscreen and camera now, so touchscreen inputs are definitely going to happen, and I might incorporate some kind of camera controls with custom gestures. Still don't know exactly how I'll use all the features, but I will definitely try to use everything as much as possible. The next step will be submitting this project (still haven't done it) and beginning software testing on a VM.
Total time spent: 9 hours
July 1st: Beginning 3D Modeling
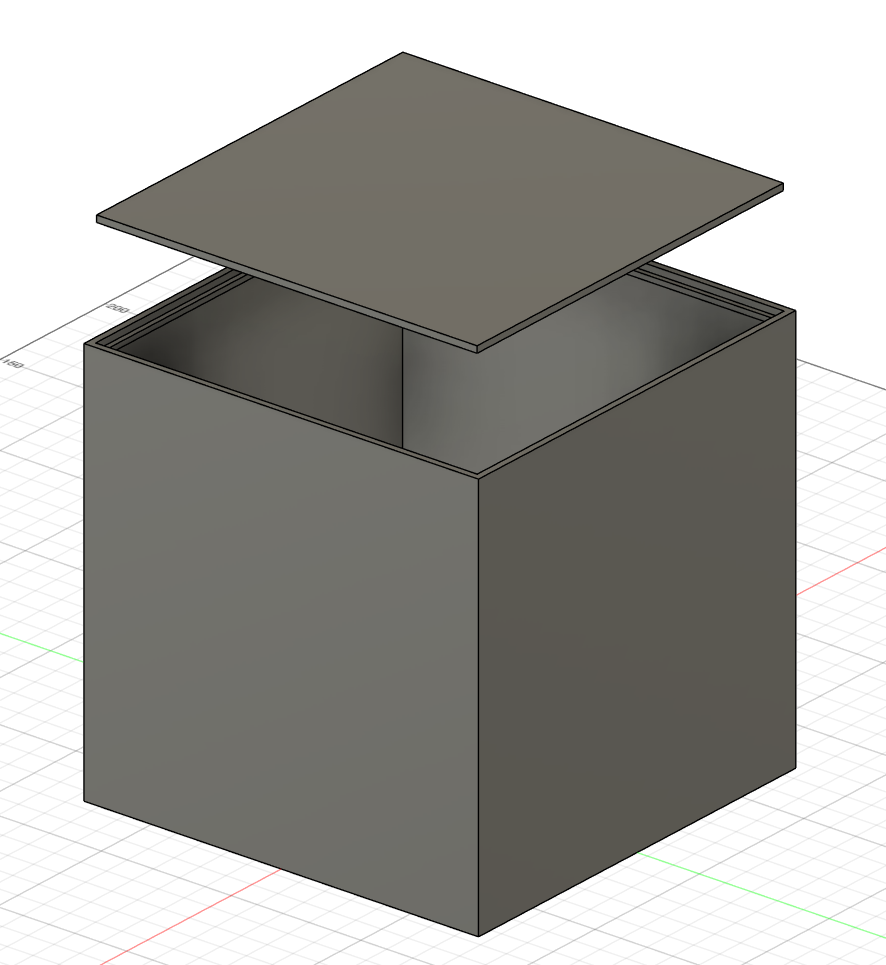
I talked with a friend with a 3D printer and figured out logistics for that. I then started designing the model for the note block. I didn't get a whole lot done, but I've had to learn to use Fusion 360 from scratch. So far I only have the main box and the lid done.
Total time spent: 12 hours
July 2nd: As much progress on the model as I can make for now
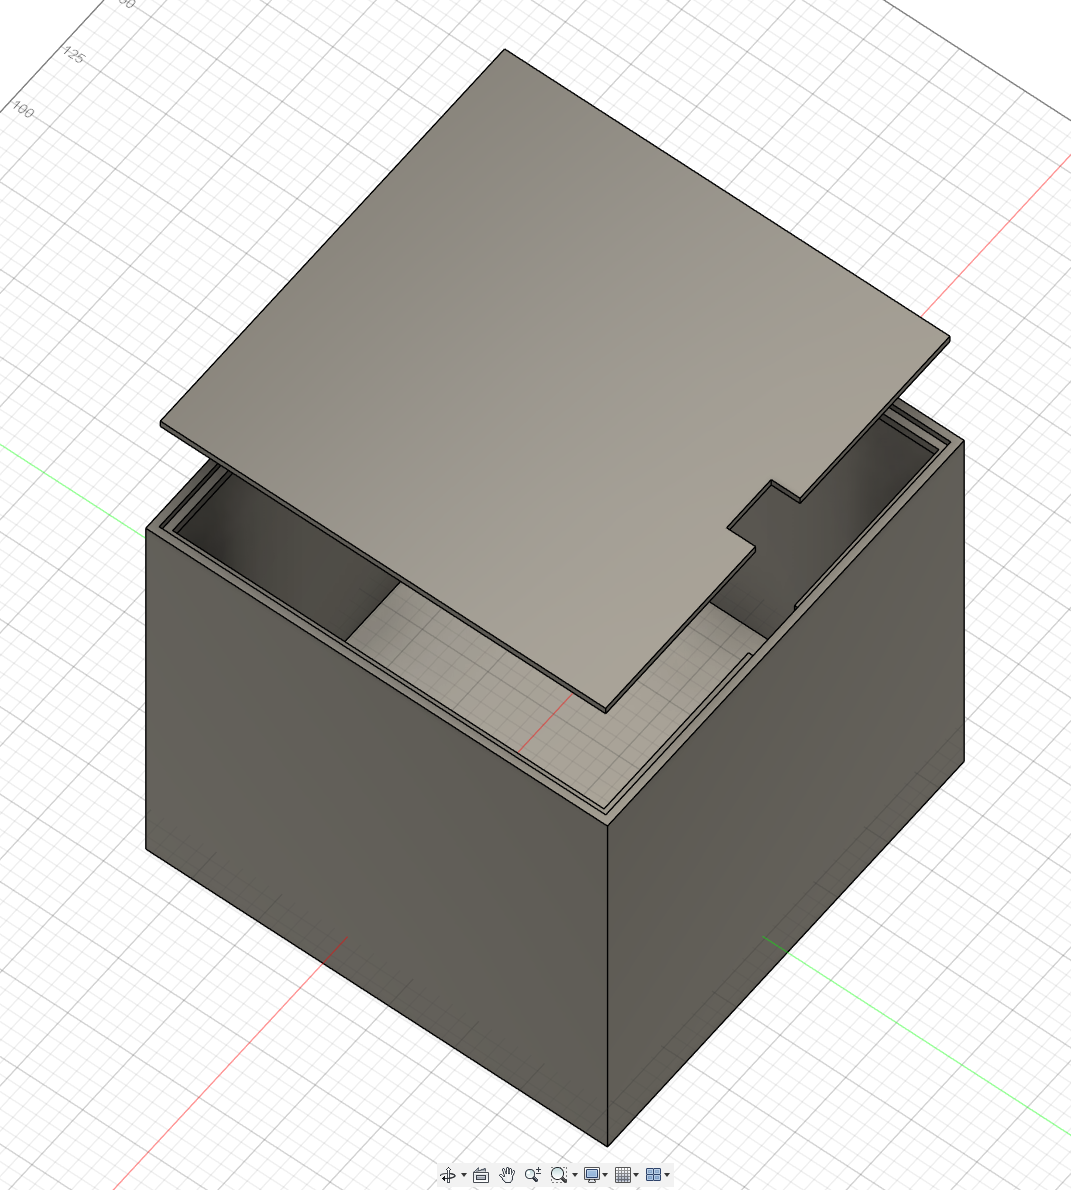
I finalized the lid in the model, increased the size by about an inch as my original calculations were too small, and then realized I need to measure the parts before I finish the model. So I'm going to have to call it here for the model until the parts have arrived. I also created the wire diagram, as shown on the README.
Total time spent: 18 hours
July 3rd: Testing libraries and code
I remembered I still hadn't tried the libraries that this device will need to run on. I tested Hyperchoron first, and got it to work without too much trouble. I then decided to drop pynbs for reading .nbs files and switched to simply exporting .csv from Hyperchoron and parsing that. I found nbswave, which is what I am going to need to use to render songs as audio files, because Hyperchoron currently doesn't support direct audio exports. I haven't got it to work yet because of dependency incompatibility, but I'll try to get pipx working to run separate environments there.

Total time spent: 21 hours
July 5th: Progressing on the model and project submission
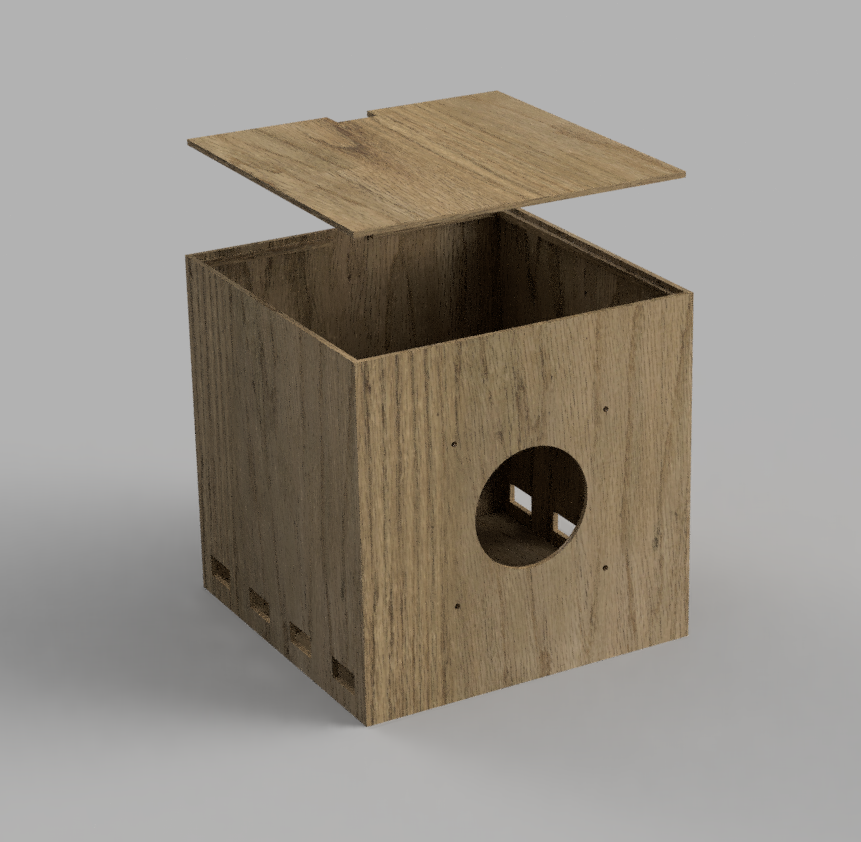
I spent way too long calculating dimensions for ventilation, but eventually did figure it out. Apart from that I modeled the speaker holes, double checked dimensions, and did my first render of the model. It will probably need some tweaking and will definitely need some checks once I get my actual parts, but it is very close as-is and should be nearly ready to print. I'm also submitting my project right after writing this, so wish me luck.
Total time spent: 24 hours
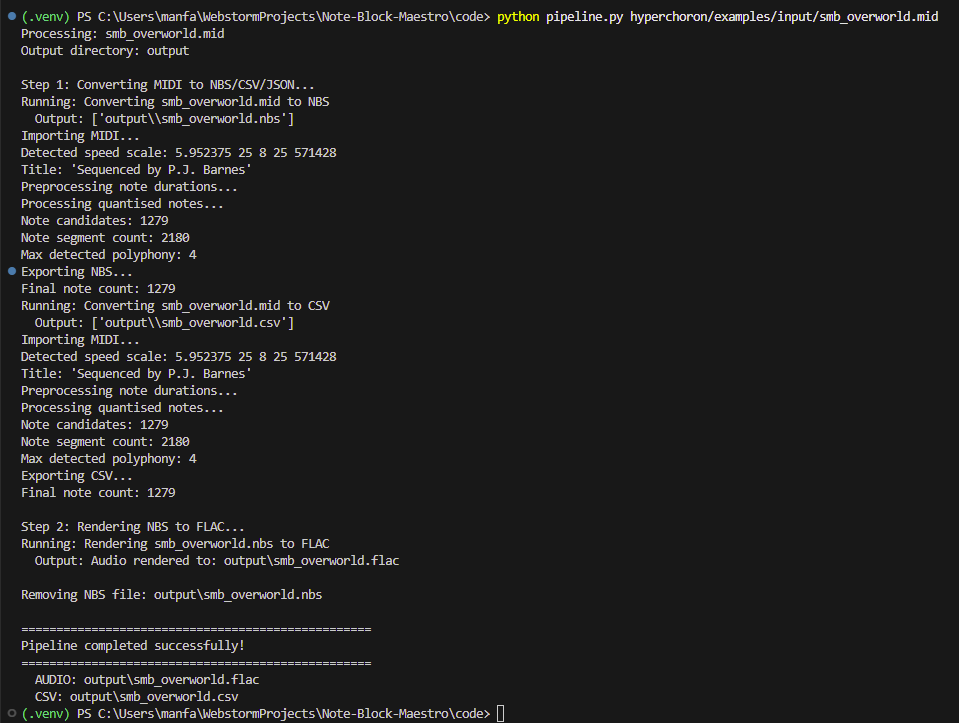
July 7th: Wrote the conversion pipeline
I finally started to take a stab at the real code for this. I wrote a pipeline which takes in a MIDI and outputs .nbs, .csv, and .flac. The .nbs is rendered to .flac and deleted by default, but with the option to keep it. I think the next step will be the web GUI, so I'll work on that next. I also finally got pipx working to fix dependency issues with nbswave.
Total time spent: 28 hours
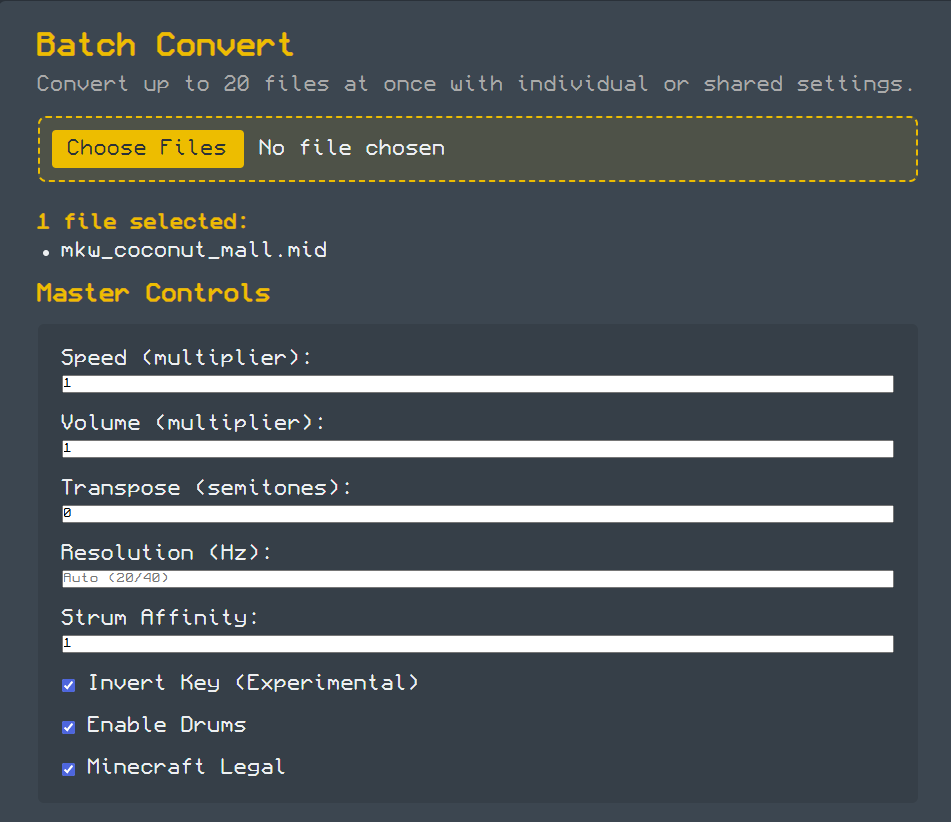
July 8th: Began web GUI and extensive testing + failure
A lot of the time was spent diagnosing issues, but things worked out decently in the end. The web GUI wasn't too difficult to make, and it is partially functional. The ephemeral conversion still 500s and I have no idea why, but that's a problem for another day. The interface is also rather buggy, both visually and mechanically, but I am overall fairly happy with the progress on it. I was also struggling to get Hyperchoron's speed parameter working and went on a huge rabbithole in the source code patching things, which technically worked, but broke basically everything else. Moving forward, I'll probably just not include the speed parameter unless it gets patched in the library itself. The next little while will just be fixing and improving things, but I have decent groundwork laid out now.