
RasPiCube
A Raspberry Pi powered Rubik's cube timer and scramble generator
TOTAL TIME: 35 hours
16/5/25
Update 1/1
In around 30 minutes I managed to create a Prove-of-Concept (PoC) version of a 3x3 Rubik's Cube scramble generator. The code is pretty simple and straightforward, so I'm not gonna waste time describing how it works.
Update 2/2
Another 1 hour and a bit, a proper timer and scramble generator was born. I integrated the old scrable generator into the new program, by importing it as a module.
I kind of struggled at first to make the timing work, because the code on line 31 somehow redefined
the time module, which gave me wheird errors:
Traceback (most recent call last):
  File "/home/qincai/PicoCube/test.py", line 76, in <module>
    main()
    ~~~~^^
  File "/home/qincai/PicoCube/test.py", line 51, in main
    start_time = time.time()
                 ^^^^
UnboundLocalError: cannot access local variable 'time' where it is not associated with a value
so i changed time to solve_time :))
Another challenge was to display the real-time timer, which every rubiks cube timer should have. In the older real-time version of this program, the user had to press CTRL+C to trigger the timer stop, which is not ideal. Fortunately I worked that out as well, using threading
19/5/25
Update 1/3
After about 1.5 hours of hard grind, behold -- the PiCubeZero. Okay, im not even sure if it works or not, since I don't have the necessary hardware to build the project physically. That also means there is no pictures to share :((.
The process was pretty straightforward, since there is sooo much documentation on the Internet about the modules I was/am after. I fed the completed program into GPT-4.1 to check for any mistakes and suggestions, and good -- no big mistakes, but a few changes were made, such as the font selection thing I do not know how it works, or if it's supposed to work...
Update 2/4
Another 50 -ish minutes later and I (sort of, and the stupid GPT-4.1 helped me a lot) made a version of PiCube, called PiCubePico
, since it is based on the Raspberry Pi Pico MCU. Check it out here on Wokwi Simulator: https://wokwi.com/projects/431347174552980481
Screenshot:
(pls ignore the inconsistency between the OLED screen and the 7-seg display. The simulator is extremely laggy, with one second simulated being 15+ secs in real life)
Update 3/5
Spent like 1.5 hours creating the BOM, and it is not even complete (yet). Here is the BOM for RasPiCube - PiCubeZero
20/5/25
Update 1/6
Just updated the RasPiCube - PiCubeZero program to use a Waveshare 2-inch IPS LCD Display (ST7789, 240x320), instead of a tiny SSD1306 128x64 OLED display. This time GPT-4.1 helped me a lot when updating the program since I made quite a lot of mistakes.
Time spent this session: ~1.5 hours
Update 2/7
For this session, I worked a lot on the PiCubeZero's BOM. I tried comparing the items I need on Aliexpress and Amazon. I almost got scammed by (likely) a scam on Aliexpress. Link here
The Sandian
branded uSD cards look sooo similar to the real SanDisk
ones.
A quick Internet search revealed that...... SanDian
is a scam. WHOO HOO. /j
Here are the posts: post1 post2
Maybe just don't buy uSD cards from AliExpress... Buy them on Amazon instead ig.
Time spent this session: ~1 hour
Update 3/8
Since I couldn't find one single NeoPixel (as in 1 LED), I decided to switch to a common-cathode RGB LED. Simple! Also saved a bit of cash....
Time spent this session: 25 minutes
21/5/25
Update 1/9
Updated the BOM to include all needed parts. This project is gonna cost a lot with a Pi 0 2WH, a battery, and a screen... (about $100 USD atm).
Time spent this session: 30 minutes
2/6/25
Update 1/10
Update the BOM once again to only include the parts that i need. This brings the cost down to ~$60. See BOM-needed.md.
Time spent this session: 20 minutes
Update 2/11
Cleanned up the repo!! There is nothing more i could say..
Time spent this session: 25 minutes
7/6/25
Update 1/12
Spent 1.5 hours looking for a better USB WiFi adapter. Ended up finding this one on AliExpress:
FENVI 1800Mbps WiFi 6 USB Adapter Dual Band 2.4G/5Ghz Wireless WiFi Receiver USB 3.0 Dongle Network Card
Turns out, this adapter is actually listed in morrownr's Linux USB WiFi compatibility list, so it should work just fine out of the box. It’s the Fenvi FU-AX1800 (uses the mt7921au chipset), which is pretty much plug-and-play on any recent Linux, as long as you’re not running some ancient kernel from the Stone Age (ahem, looking at Raspberry Pi OS, which just migrated to 6.12).
Some random thoughts:
- mt7921au = good chipset, Linux likes it, no weird drivers, just works (or so i hope).
- Loads of positive reviews from other Linux nerds online, especially on AliExpress and in that repo.
- It’s super cheap ($1.72 with Welcome Deal). Not gonna break HC's bank.
- Just double check you don’t get tricked into buying the Realtek version — only mt7921au is the good one. -- from the repo
Added this to my BOM cos I need WiFi. Anyway, very happy with this find!
(surprisingly, this much better wifi adapter only brought up my BOM by about $5. It's prob Aliexpress' Welcome Deal thingy)
see (BOM)[https://github.com/QinCai-rui/RasPiCube/blob/432650de670bce71bf1978ce57de217eb192d6ab/BOM/BOM-needed.md] for my BOM at the time of writing
Time spent: 1 hour (browsing, comparing, reading reviews, dodging dodgy sellers on Ali)
19/6/25 - 23/6/25
Update 1/13
YAY I got my packages for my project, and I immediately started putting it together. To my surprise, AliExpress' stuff are not that bad. Since my Raspberry Pi Zero 2 W from #raspap, which I planned to use initially, still hasn't even shipped (!!!!!!) (SMH, insert sad face, insert :heavy-sob: emoji)
Since I do not wait another 6 months for my Pi to ship from the USA to New Zealand, I put my idle Raspberry Pi Pico (WH) into work. Surprisingly (again), there is a library for the LCD screen I am using. So I installed MicroPython on the Pico, copied the library across in the lib/ directory, and discovered -- that I need fonts libraries
to display text. Thankfully (why are there so many adverbs..), the GitHub repo of that library includes some so-called ROM Fonts
, so again, I downloaded the 32x16 and 16x8 fonts onto the Pico, in the lib/ directory.
I then started to convert the previously made-for-the-better-and-faster-pi02w Python program into the MicroPython version the Pico requires. I had to keep in mind the different pin allocations and stuff, which was pretty annoying, but manageable. It took like 2 and a bit hours, but there it is - a fully functional (Micro)Python code that can run the the Pico, or so I hoped. I named the file main.py so that it automatically starts on boot.
Things are not as easy as i thought, however. The screen's rotation was wrong; I wanted it to be horizontal, but instead it was verticle. Also, some text are clipped off the screen. To make matter even worse, the touch sensor did not do anything. I left some of hard work to GitHub Copilot to fix the rotation and text clipping, and I tried to change to a different touch sensor, since it came in a pack of 5.
To my surprise (this time negatively), the touch sensor I was initially using is faulty; a quick test with another sensor quickly comfirmed that. Ahhh, AliExpress, maybe you are not that reliable.
upon repeatition of the test on other sensors, another one (with clearly visible damage) turned out to be faulty... OOF. Two in a row, that leaves 3 working sensors left, and 2 in use, leaving only 1 backup sensor. URGHHH.. I WANT SOME BACKUP SENSORS SO I DONT HAVE TO FEAR THAT A TOUCH WILL BREAK ONE (given the reliability, or lack thereof AliExpress items) But it is what it is, and I decided it was enough work for one day.
The next day, although I forgot the date, I started fixing the remaining of the not-working parts of the program. Copilot did most of the work, fixing my logic errors and stuff. This makes me think, if in the future, LLMs like Claude, get even smarter
and more reliable
, would there be any demand for programmers at all? Even program testers would not be needed anymore if the LLMs could self-test their program. And just a month ago (iirc), GitHub introduced Agent Mode for their GitHub Copilot. According to their blog, the Agent Mode Copilot is capable of:
Analyze your codebase to grasp the full context.
Plan and execute multi-step solutions.
Run commands or tests.
Reach out to external tools for specialized tasks.
Suggest architectural improvements.
Run and refine its own work through an agentic loop, including planning, applying changes, testing, and iterating.
This makes me think: isn't that myself, and most other human programmers are currently doing? If LLMs really do became more powerful, again, would there be any point at all having programmers around in that stage? What would be the point of learning programming, for future programmers, if LLMs can do it better than us? I guess we will have to wait and see.
Anyways, GitHub Copilot did help me a lot, and I managed to get the program working. I then tested it on the Pico, and it worked! The touch sensor was working, the screen was displaying the text correctly, and the timer was working as expected. I was very happy with the result, and I decided to call it a day.
But nope. I had more ideas to implement, but I thought I should leave them for another day. I had a lot of fun working on and playing with this project.
Time spent this session: 7 hours (including the time unboxing the stuff, testing the touch sensors, and fixing the program)
24/6/25
Update 1/14
For this session, I fixed most of the bugs introduced by the previous session. For example, there is the issue that the timer does not start when the user releases the touch sensor, but only when the user presses it. This is not ideal, since the user might accidentally release the touch sensor before they are ready to start the timer. I fixed this by adding a delay of 0.4 seconds before starting the timer, so that the user has time to get ready.
Time spent this session: 2 hours (including the time to test the program on the Pico and fix the bugs)
25/6/25 - 28/6/25
Update 1/15
These sessions were spent on soldering the header pins onto the Raspberry Pi Zero 2W, downloading the latest Raspberry Pi OS, and setting up the Pi Zero 2W. I also had to install the necessary libraries and dependencies for the program to run. This took a lot of time, since I had to figure out how to do it on a headless Raspberry Pi, without a monitor or keyboard. I had to use SSH to connect to the Pi and run the commands. Good thing I enabled SSH on the Pi before I started, otherwise I would have been stuck; I also enabled the rc-local service to run commands on boot, just in case, you never know. I also configured Ethernet Gadget mode, so that I can connect the Pi to my computer via USB and access the internet. This is very useful, since I don't have a monitor or keyboard for the Pi. Unfortunately I could not figure out how to make a bridge network between the Pi and my Linux computer, so internet access is not available on the Pi. I will have to figure that out later.
Time spent this session: 4 hours (including the time to solder the header pins, download the Raspberry Pi OS, and set up the Pi Zero 2W)
Update 2/16
Since I ordered a USB WiFi adapter, I connected it to the Pi, and, surprisingly, it worked out of the box. I was able to connect to my WiFi network and access the internet. This is very useful, since I can now update the Pi and install the necessary libraries and dependencies for the program to run. I also installed the git command, so that I can clone the repository and run the program on the Pi. Some more libraries also had to be installed, but the pi02w is sooooo slow that it took like 30 minutes to install the libraries using pip. btop later showed that the Pi's CPU only goes up to 700MHz for some reason, even though I set the arm_freq to 1150MHz in the config.txt file. So I had to set the arm_freq_min option to 900 in the config.txt file, which allows the Pi to run at full speed all the time. This is not ideal, since it will drain power faster, but I don't have a choice.
Time spent this session: 2 hours (including the time to connect the USB WiFi adapter, update the Pi, and install the necessary libraries and dependencies)
Update 3/17
I spent this session working on the program itself. I had to modify the program to work with the Raspberry Pi Zero 2W, since it has a different pin allocation and different libraries. I also had to modify the program to work with the Waveshare 2-inch IPS LCD Display, since it has a different library and different functions. I had to figure out how to use the st7789 library to display text and images on the screen.
For some reason, the st7789 library did not do anything to the screen, so I had to switch to the luma.lcd library, which is a more general library for LCD displays. I had to modify the program to use the luma.lcd library instead of the st7789 library, and it worked! I was able to display text and images on the screen, and the touch sensors weer working as expected.
Time spent this session: 4 hours (including the time to modify the program to work with the Raspberry Pi Zero 2W and the Waveshare 2-inch IPS LCD Display)
Update 4/18
This session was all about testing. Soo I did a bunch of solves :))
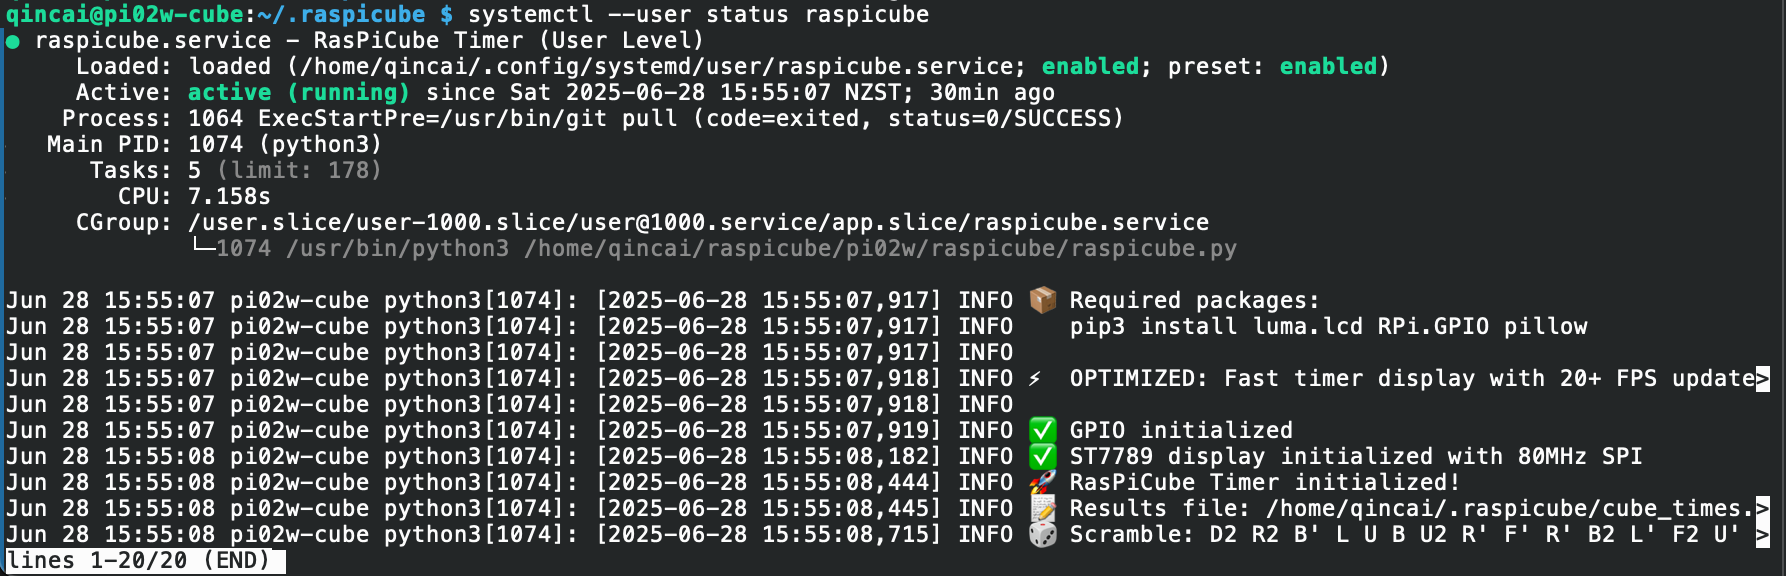
Unfortunately, if I unplug the USB WiFi adapter, the Pi will not be able to connect to the internet, since it does not have a built-in WiFi adapter that supports 5Ghz band. Therefore the ExecStartPre command (git pull) in the systemd service file will not work, and the service will not continue to start.

I had to modify the systemd service file make the ExecStartPre command always exit 0, no matter what.
Time spent this session: 5 hours