
Pyp-Boy
Fully-Functional recreation of the Pip-Boy 3000 Mark IV from Fallout 4
Total time spent: 25h
May 22nd-23rd: Started on Modeling the housing!
Did a bit of research on the size of the Pip Boy is, and started modeling it in Onshape. I figured out how to use some tools I haven't used before, including the wrap tool and split tool. The base shape of the Pip-Boy is somewhat complete, but I still have a long way to go until I am done with the polished design (still need to add a ton of details, knobs, screw holes, vents, and many other things.)

Time spent: 3h
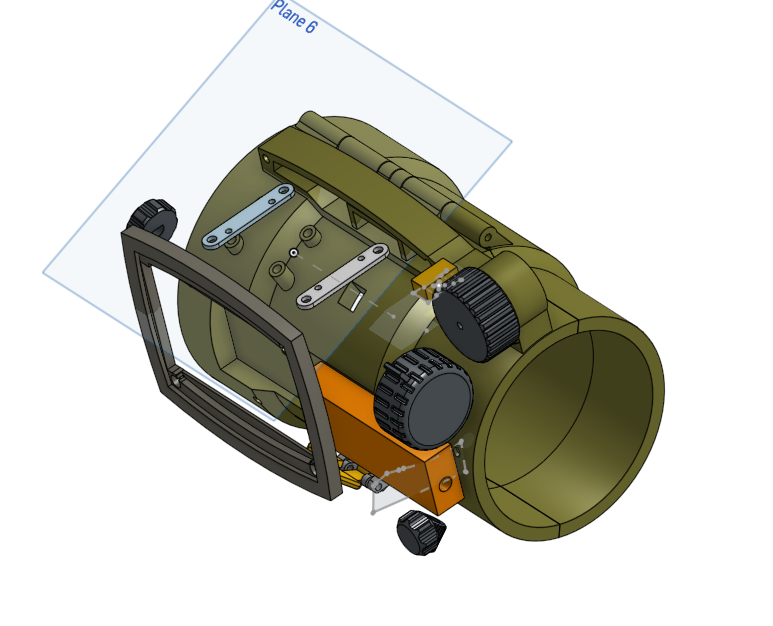
May 23rd-24th: Added some knobs!
I started to model where each of the knobs will go on the Pip-Boy. Also, I fixed some of the form factor of the overall arm section. I didn't really do a ton though
Time spent: 2h
May 26th: Continuing knobby things
I added a knob for secondary menu selection and radio tuning, as well as a select button and a radio tuner indicator spot


Time spent: 2h
May 27th: Finished knobby stuff
I added both of the navigation wheels, as well as split apart the tube and electronics housing sections.
Time spent: 1h
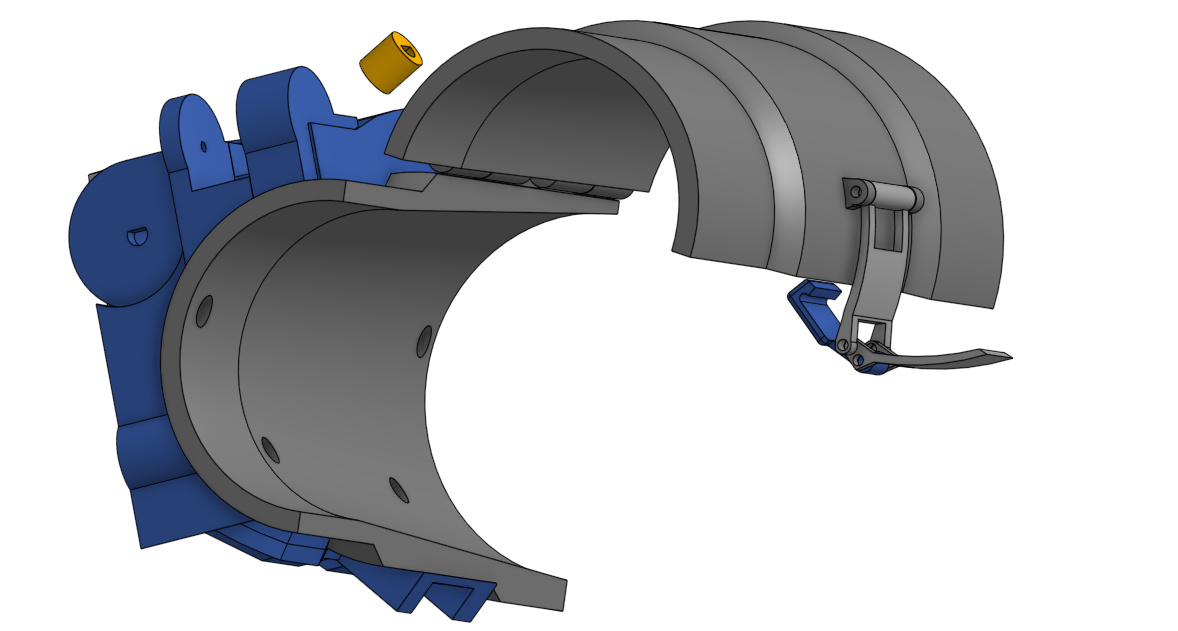
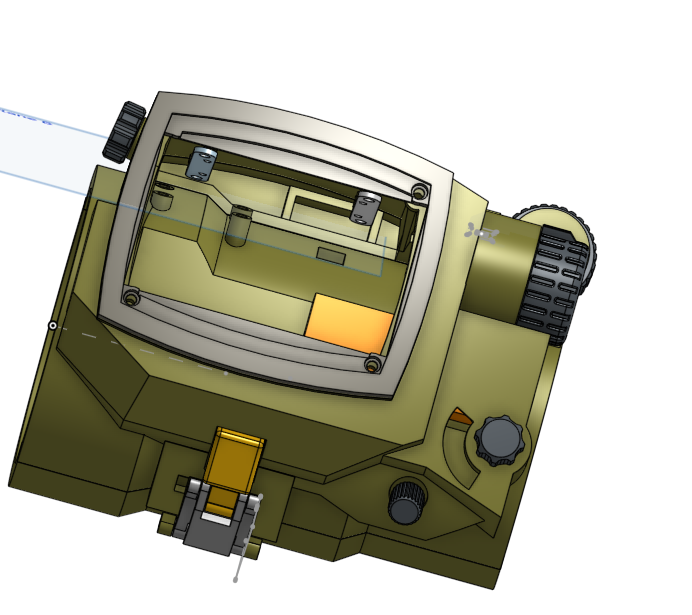
May 28th: Started Latch Mechanism, Arm Erginomics
I started work on the latch mecanism for the Pip-Boy, and also turned the cylendrical interior of the model into more of a cone shape.


Time spent: 1h
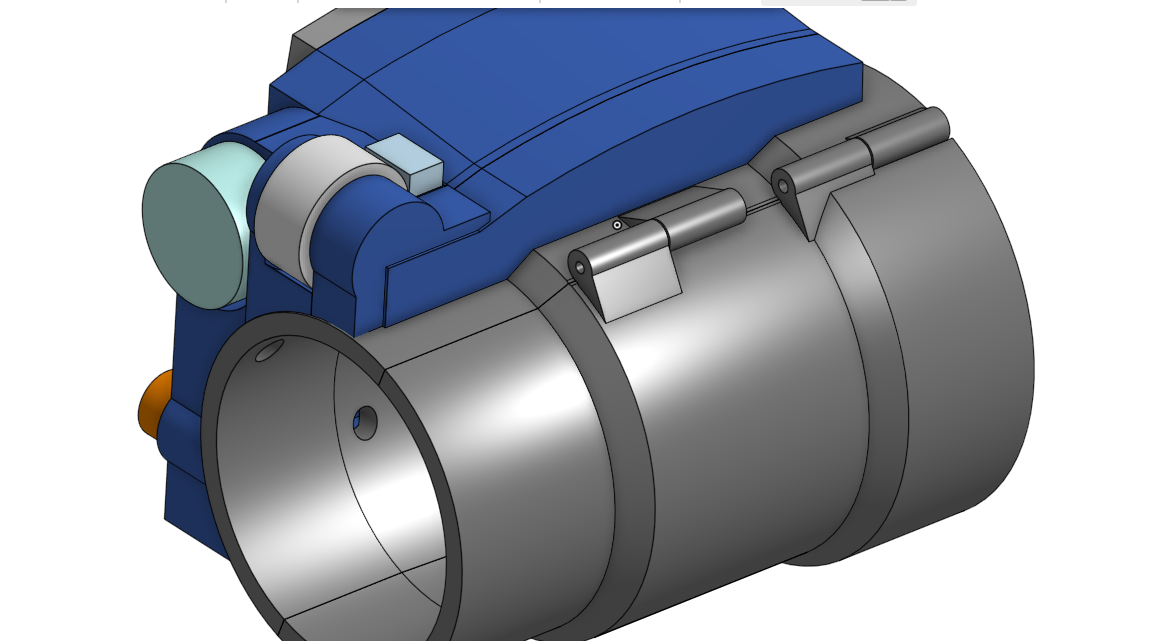
June 27th: Back From Break, Finished Latch Mechanism & Hinges, Added Encoder and Heatset Mounting Holes
I finally got the motivation to continue working on my project. I finished uo the latch mechanism and the upper hinge with some 3mm rods. Also, I added spots for the encoders on all of the knobs. In addition, I added a handful of heatset holes that are hidden from the frontside to secure it together.
Time spent: 4h
June 28th: Added Texture to the Knobs, did Research on RTL-SDR Modules
I added some nice details to each of the knobs, and gave them cool grips. Also, I fixed the latch tolerances so they actually work, and did some research on how I could get FM radio recieving on my device.
Time spent: 3h
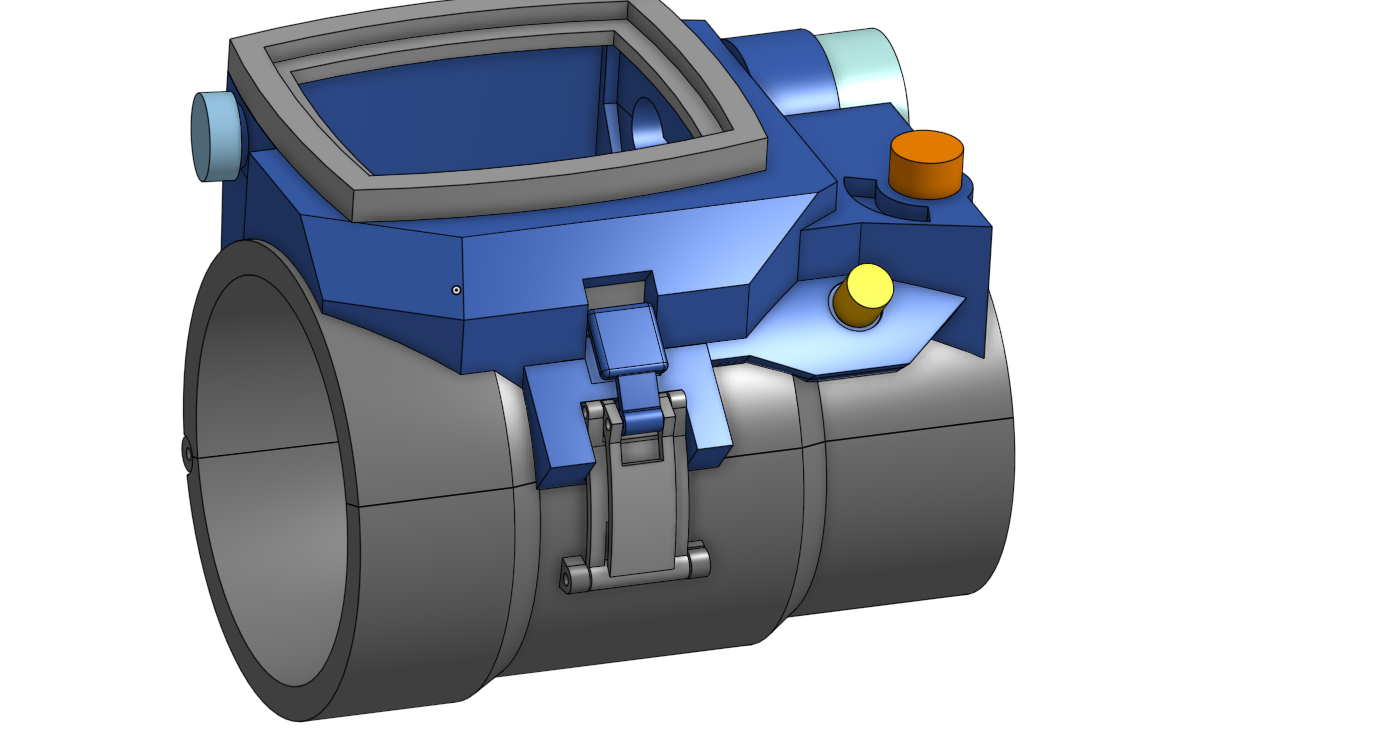
June 29th: Started Work on a BOM, Added Latch Pin Slot, Manufacturing Research
Today I decided to start working on a bill of materials for my project. I also took some time to figure out where/how I should get the case manufactured. After trying several CNC companies' auto quote, I determined that it would be way too expensive ($30.00 USD for just one simple latch part!). Instead, I will 3D print the parts and electroplate it at home. The only change I made to the CAD model today was adding a latch pin slot so that the latch can actually lock properly.

Time spent: 2h
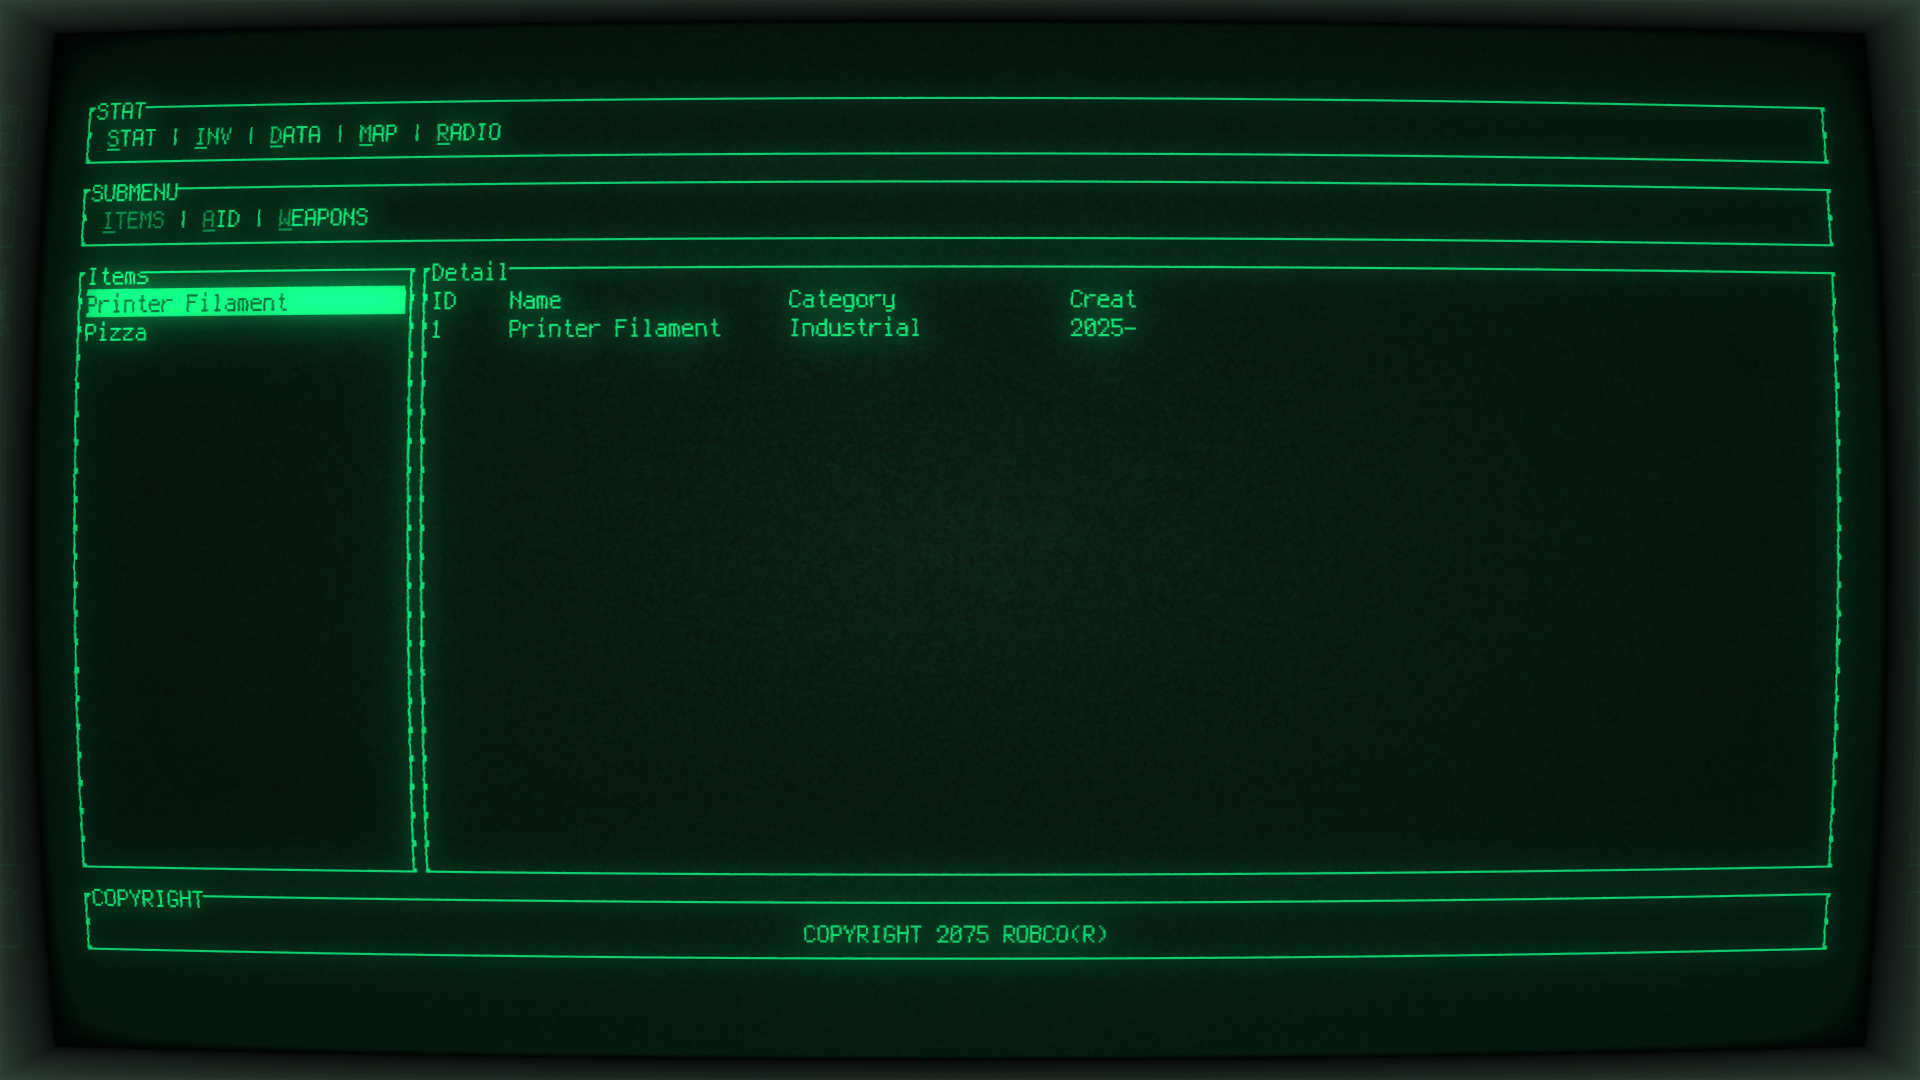
July 1-2nd: Started work on pyp-tui
I decided that I wanted to code a TUI (terminal user interface) using rust, to use as the main interface for my device. So far I have a basic inventory database, menus, and submenus. It still need some controls for the RTL-SDR module though.
Time spent: 2h
July 3-4: Working on Organization, Adding Map Data
I decided to start organizing my script, by breaking it up into seperate files. Also, I was able to finally get the map data stuff working. Origonally, I was going to go for a ascii art map centered on the coordinates from the gps module, but I couldn't get that working. It will just be data instead. And the best part? It works offline, with a small library size! Also, I implemented an escape button that erases any evidence of the tui being open! In addition, I fixed the inventory tabs so that they change content based on category.
https://github.com/user-attachments/assets/03545f6d-08a7-4fc2-ad75-7554e2540552
Time spent: 5h
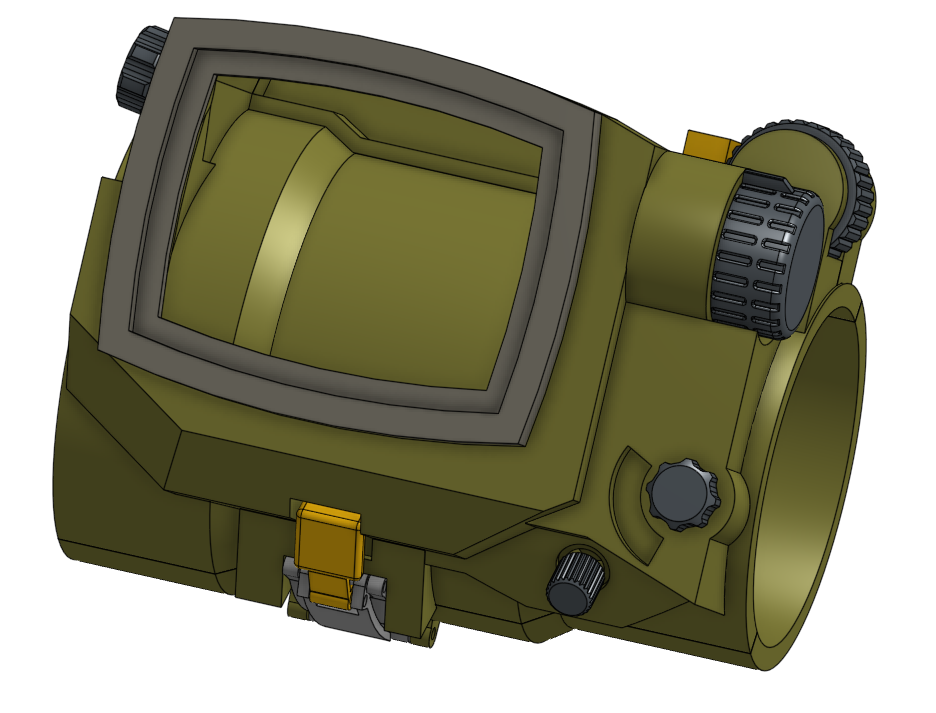
July 16-20: Case Design Fixes and Assembly
I finally got all the parts for my project! I started by fixing all of my case design files so that they could fit my components. This took about four hours, and I modified the encoder holes so they could fit more snugly, added mounting posts for the raspberry pi and gps module, and added a nice cutout for my battery and wiring stuff. I also worked a bit on assembling my project, and got everything put together!
Time spent: 7h
August 5-7th: Finished Assembly
I finally finished assembly, after getting the last part for the screen. Also, I fixed the inventory system's quantity system, because it had a glitch with the differences between the json and the filtered lists.
Time spent: 1h