
NeoNav Precision 3D
A three degrees of freedom mouse that allows for swift and efficient movement within 3D virtual environments.
Total Hours Spent: 13h
2025-06-02 - The Great Unravelling
I want to make a ✨ computer mouse ✨. Revolutionary idea I know right... but it's a mouse that can move in a 3D space. Using trackpad for Fusion 360 is pretty annoying so why not make a computer mouse that can pan, home, orbit and fit view by just moving your wrist a bit! There's already a product called 3Dconnexion Spacemouse but I am NOT paying A$299 for that...

So how do I make something that can turn hand movements into 3D movement on the screen? My system IPO looks like this: - Input: A control object moves from human hand movements - Process: The system captures the movement data of the control object - Output: The cursor position updates on the basis of the processed movement data.
I was initially thinking of using an IMU within a control cap that moves around but that would have drift so instead I chose instead to use a magnetometer with a permanent magnet that the user moves around the sensor to detect movement in x, y, z. I want something stationary like the 3Dconnexion Spacemouse butttt how could I move this magnet around whilst having it basically return to a home position? That's right!!! Using a Stewart Platform that relies on passive mechanical elements, specifically springs and elastic bands!! When the input element is pushed in any direction, springs will be stretched and in combination with rubber bands that provides the elastic restoring force; this generates a restoring force that pulls the element back to its home position when released. Basically this ensures that as the user moves the input element further from the centre, the restoring force increases, providing a predictable and smooth resistance that guides the element
back to its home position when released.
TDLR: Here's what I got in mind:

I want to first see if I can feasibly track in the x, y, z axis using a magnetometer so using a few parts that I borrowed,
I made this proof-of-concept!

It has a Adafruit TLV493D Triple-Axis Magnetometer connected to an Arduino Uno. Here is code to read it! ```c
include TLx493D_inc.hpp
include
using namespace ifx::tlx493d;
const uint8t POWERPIN = 7;
TLx493DA1B6 dut(Wire, TLx493DIICADDRA0_e);
void setup() { Serial.begin(9600); while (!Serial) { delay(10); } delay(3000);
dut.setPowerPin(POWER_PIN, OUTPUT, INPUT, HIGH, LOW, 50, 250000);

dut.begin();

Serial.println("B(x),B(y),B(z),Temperature");
}
void loop() { double temp, x, y, z;
if (dut.getMagneticFieldAndTemperature(&x, &y, &z, &temp)) {
    Serial.print(x);
    Serial.print(",");
    Serial.print(y);
    Serial.print(",");
    Serial.print(z);
    Serial.println(",");
}
} ``` And here it is in action, it works :D

Time spent: 5h
2025-06-24 - KiCADing: Failing and then not failing
Yeah so this idea was left in the dust for a while... but it's basically the school holidays! Time to design a PCB for the magnetometer and microcontroller. Off-camera grinding
led to this schematic:

A Seed Studio Xiao RP2040 as the brains (as I've had previous experience with it and it was very nice) with a TLV493DA1B6HTSA2 (basically the same as the one from the proof-of-concept) for the magnetometer sensor. Also level shifting to converting 5V to 3.3V.
And with that, PCB design:

Very nice design with cats and miku I know right. Showed this to one of my friends annndddd they're like why do you need level shifting...
which was a great question. Turns out, I don't need it. My beautiful tracing all going to waste :c


Some deleting and changes to the traces later, we have the final PCB design done!
Time spent: 7h
2025-08-01 - CAD Designing
We ignore the big time jump, a lot of things has happened... So some Fusion-ing later, here is the final
model
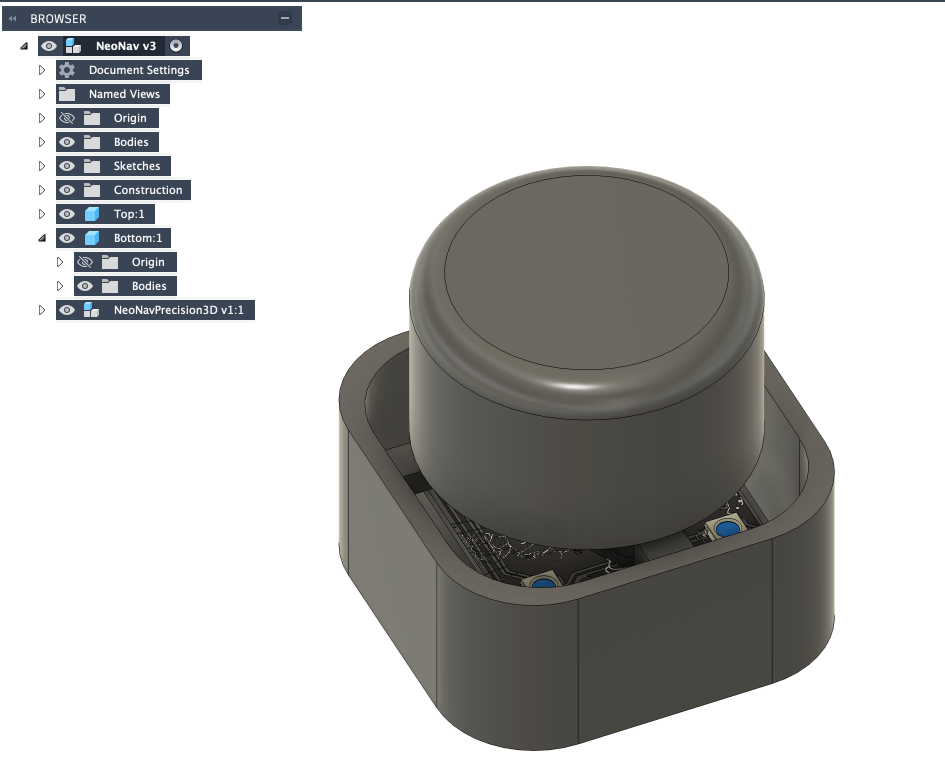
I hate Fusion, I hate 3D modelling
Time spent: 1h