
Swerve Bot
A swerve drivetrain that is 3D printed
Time Spent: 52 hours
Planning & Designing
June 23, 2025
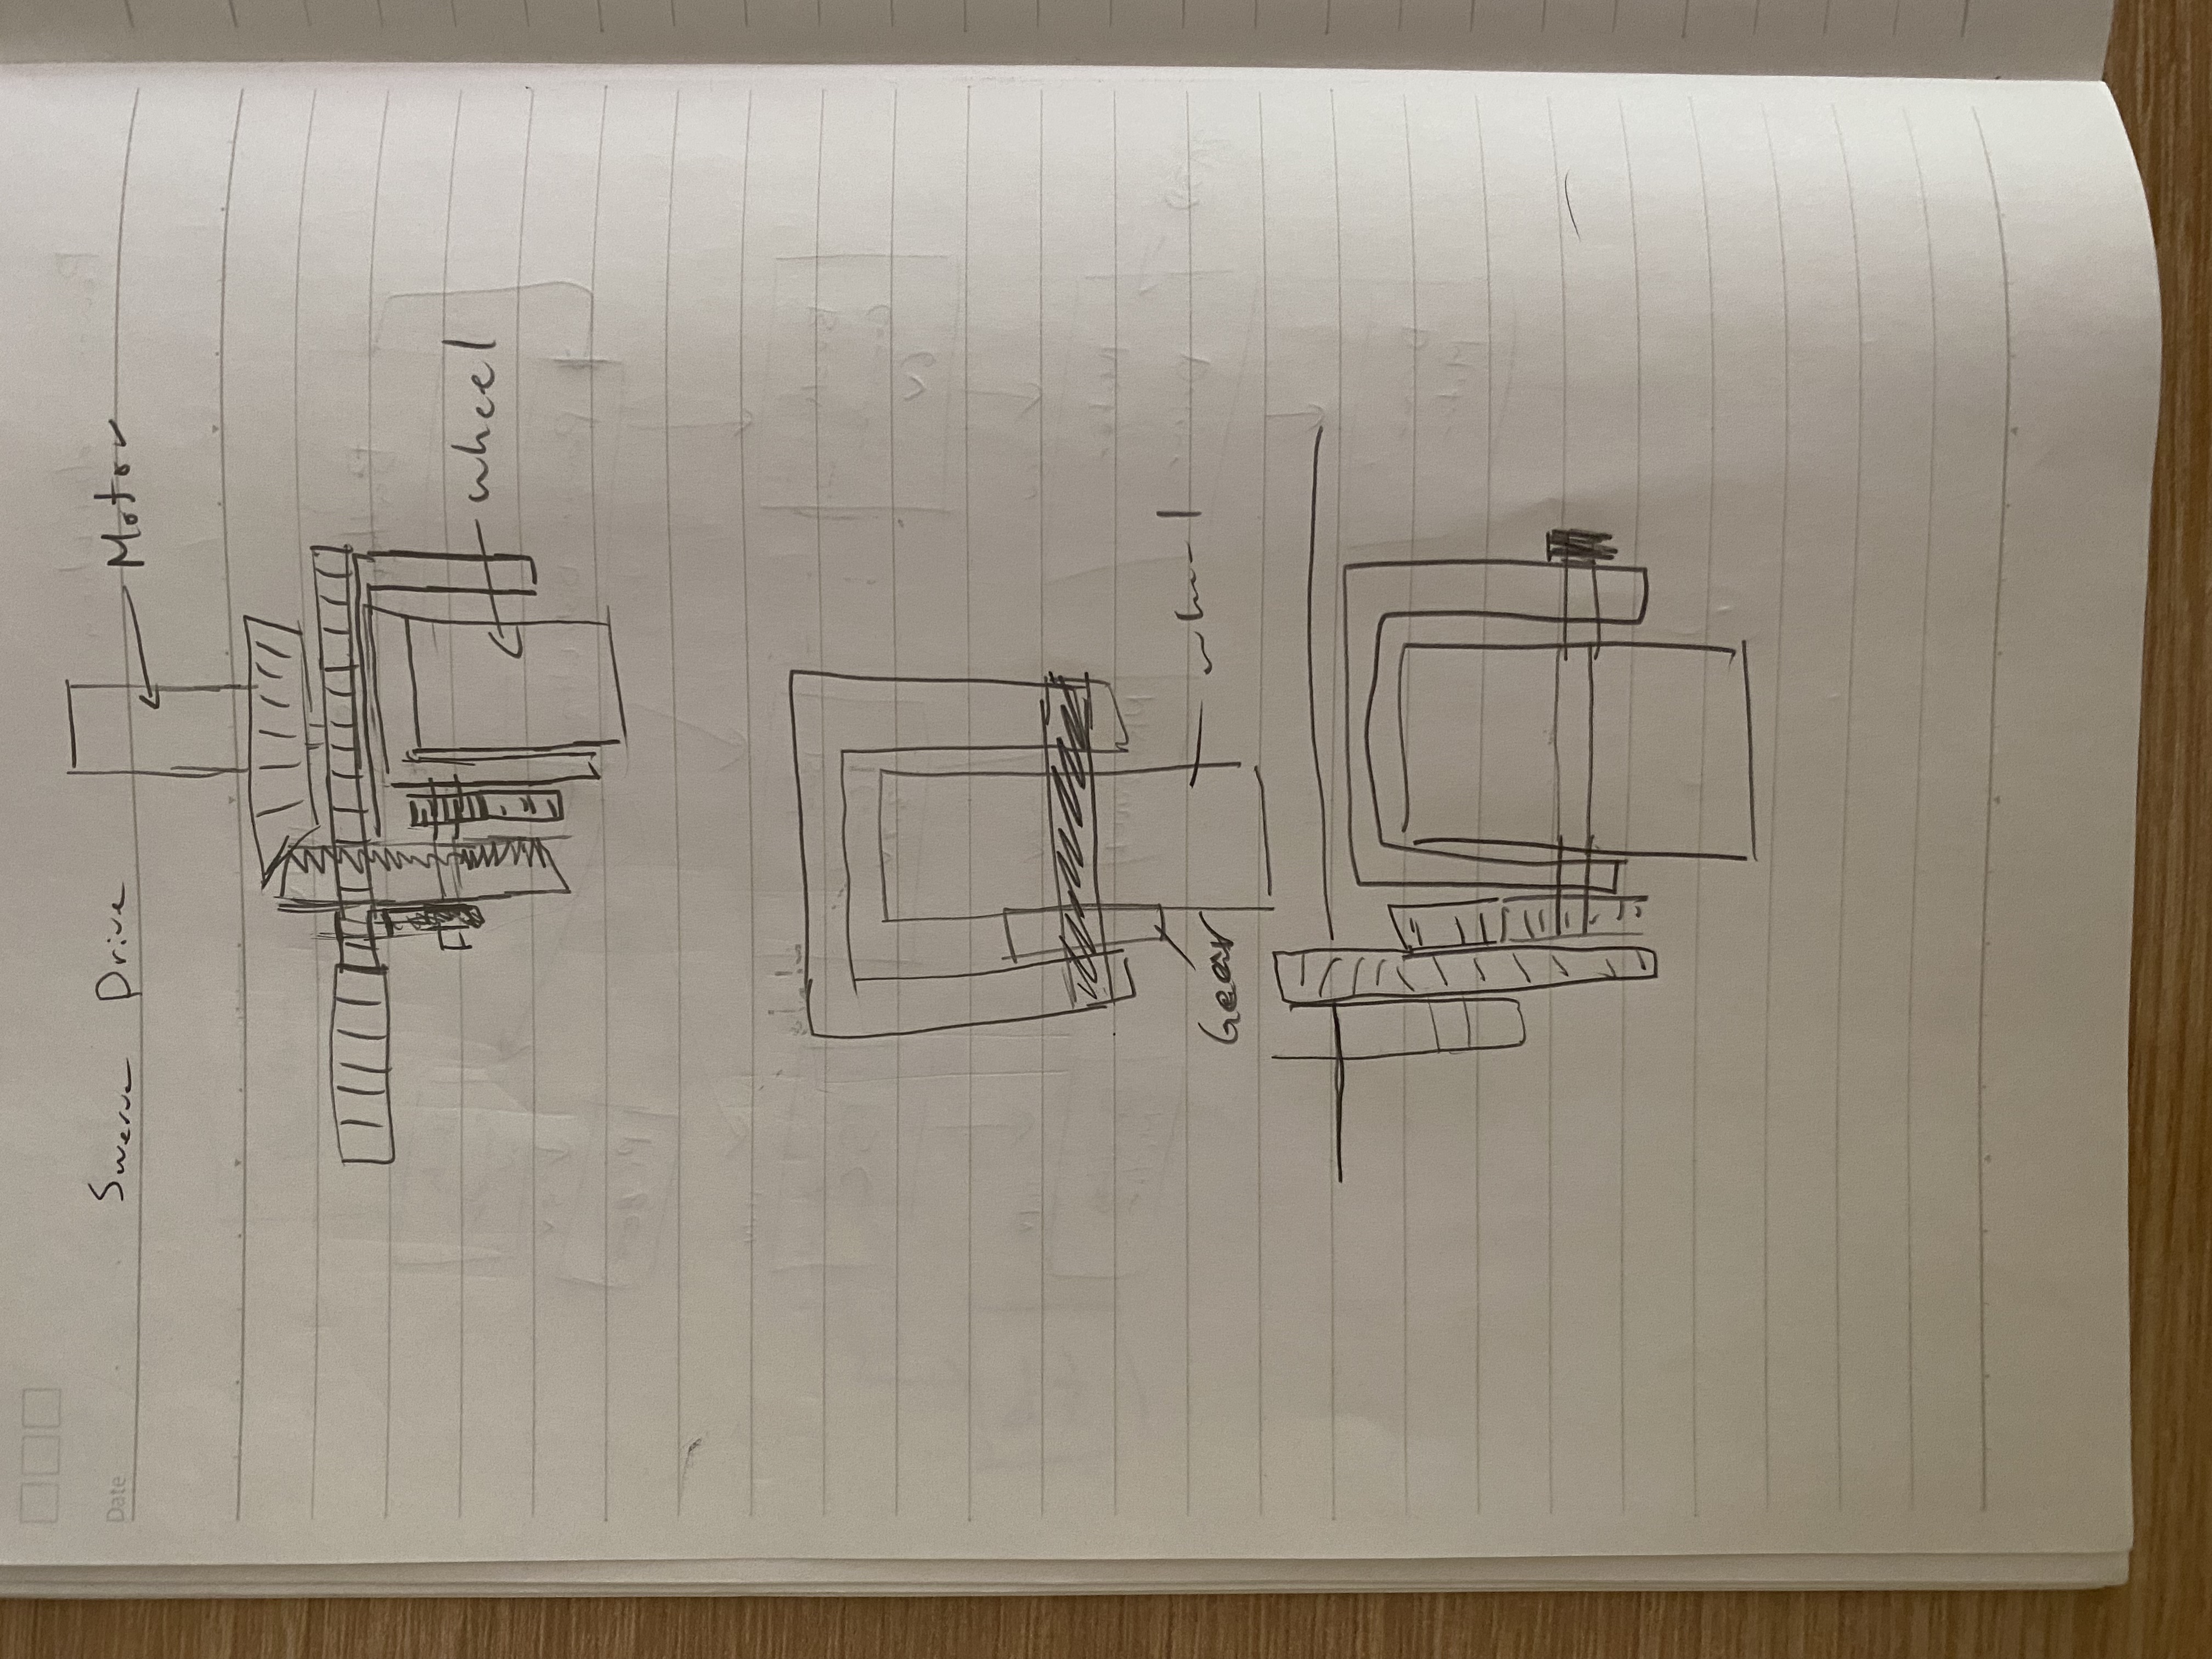
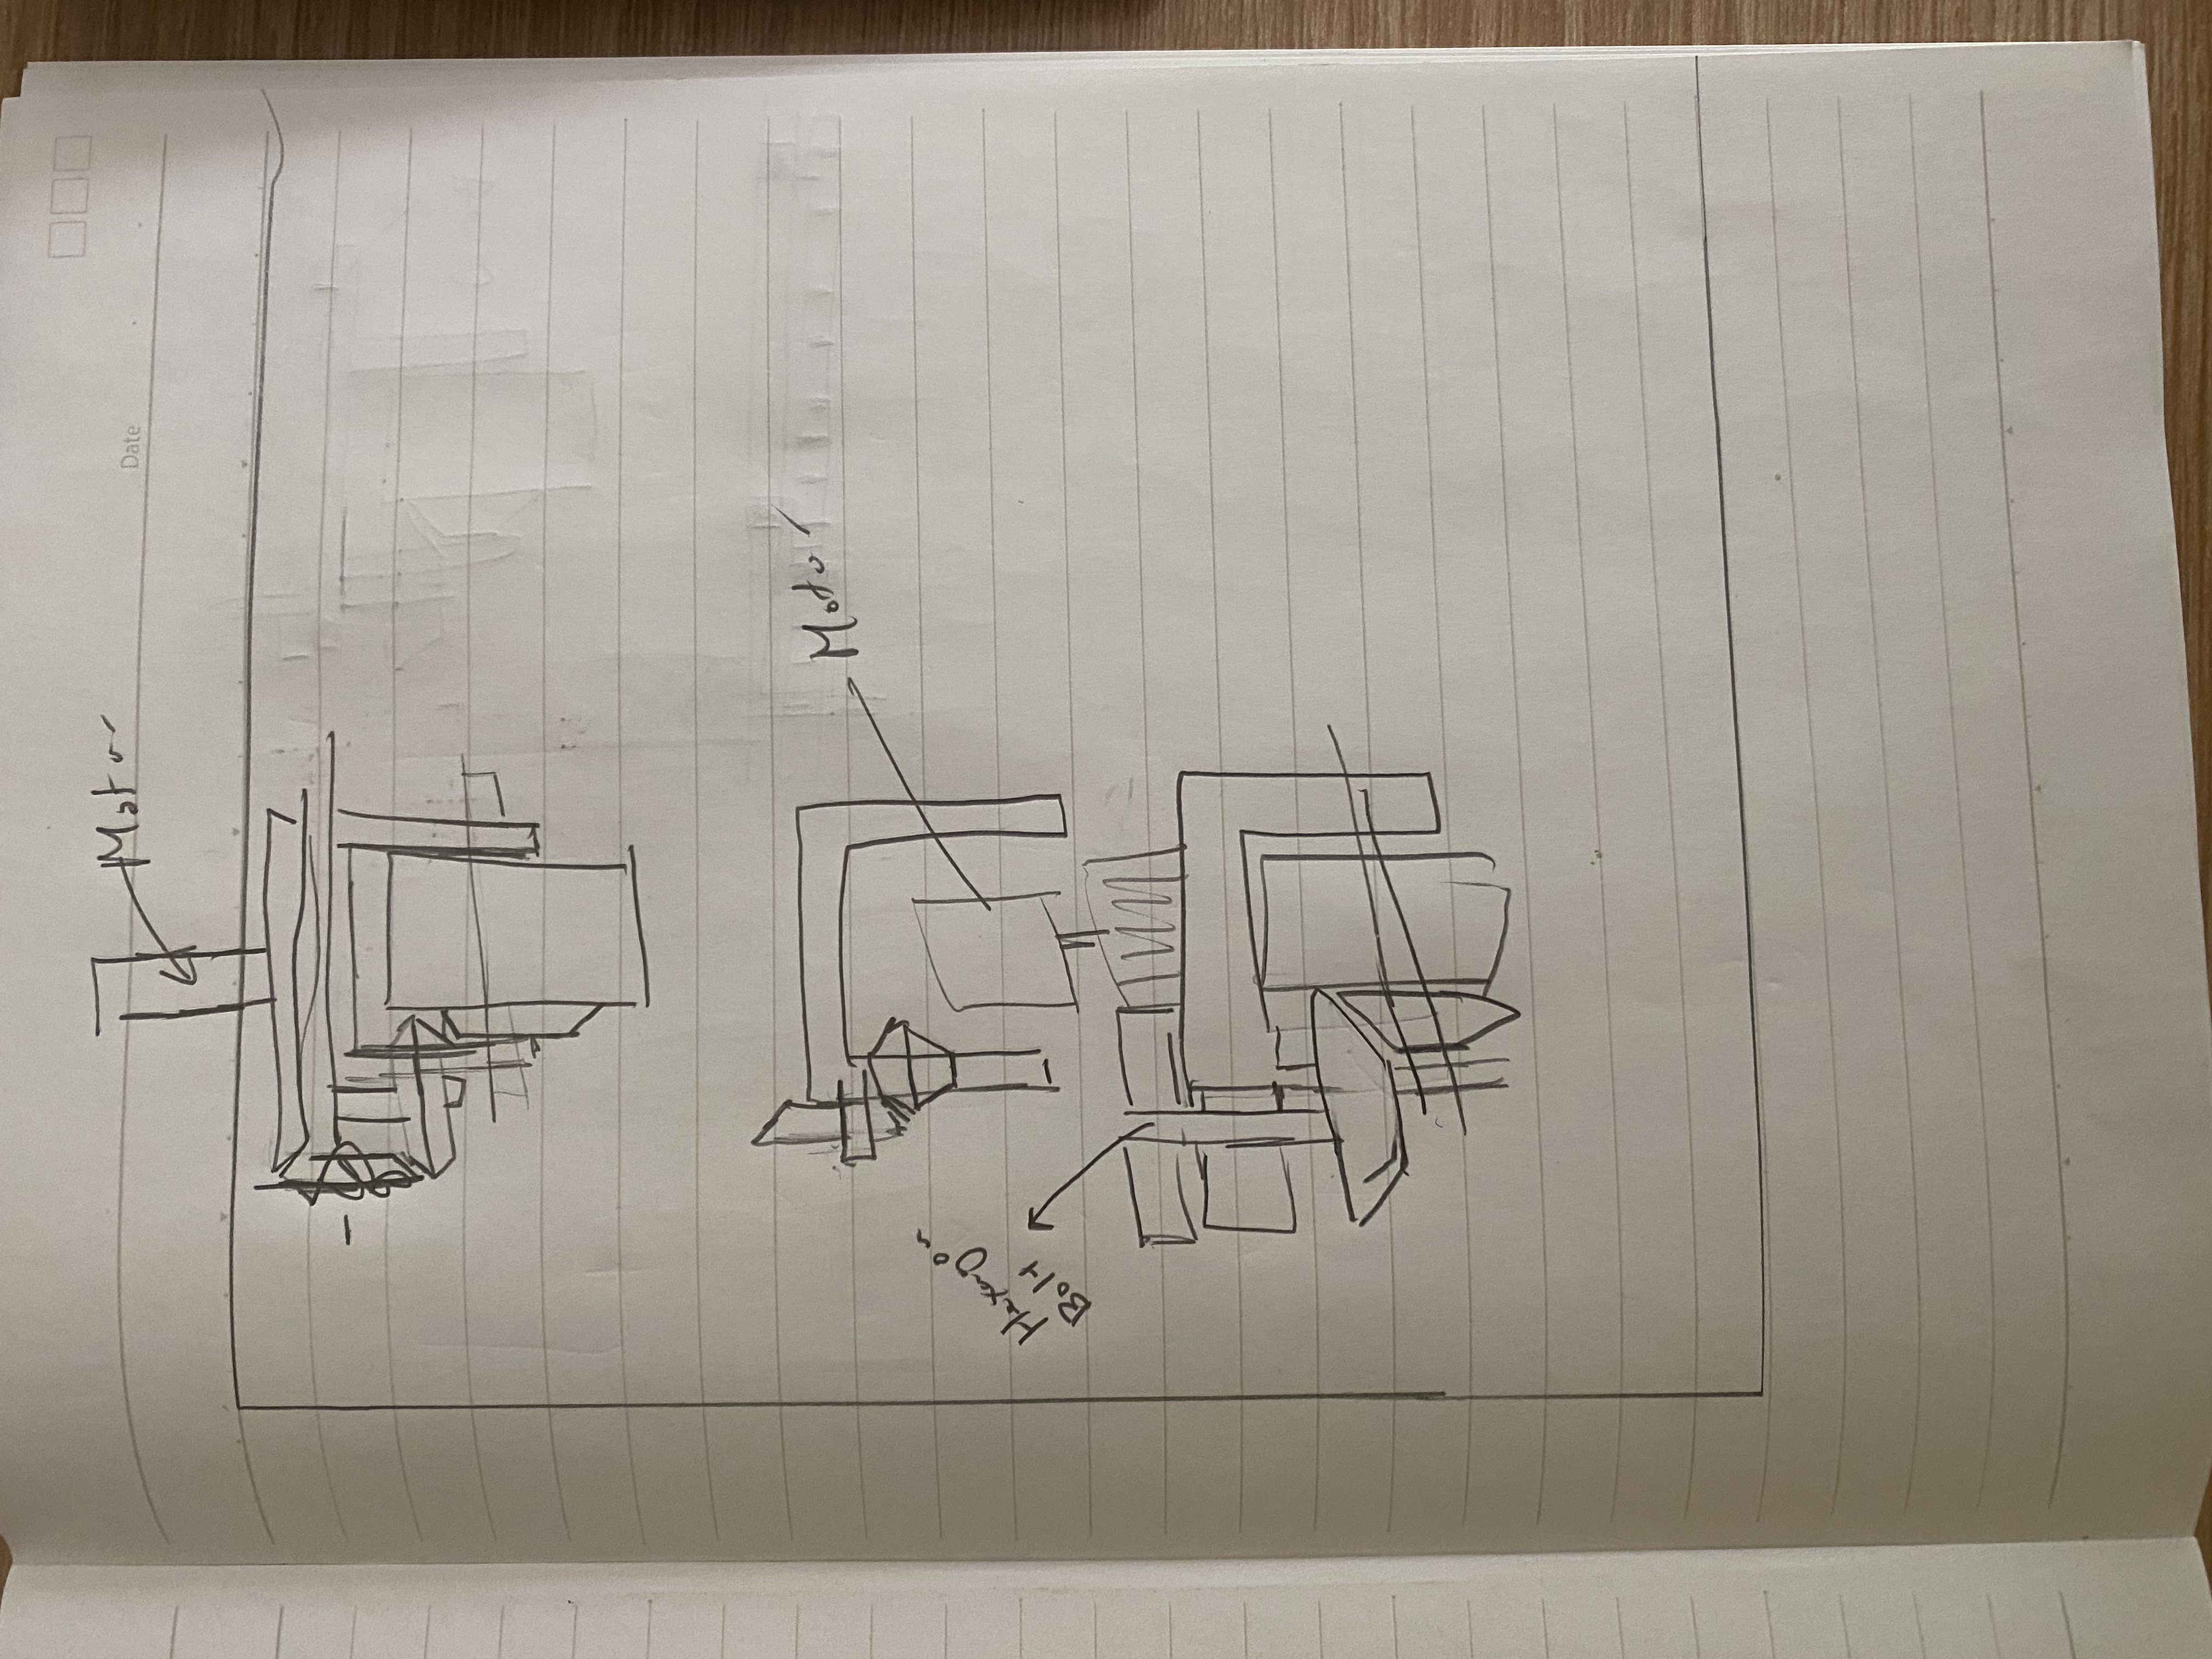
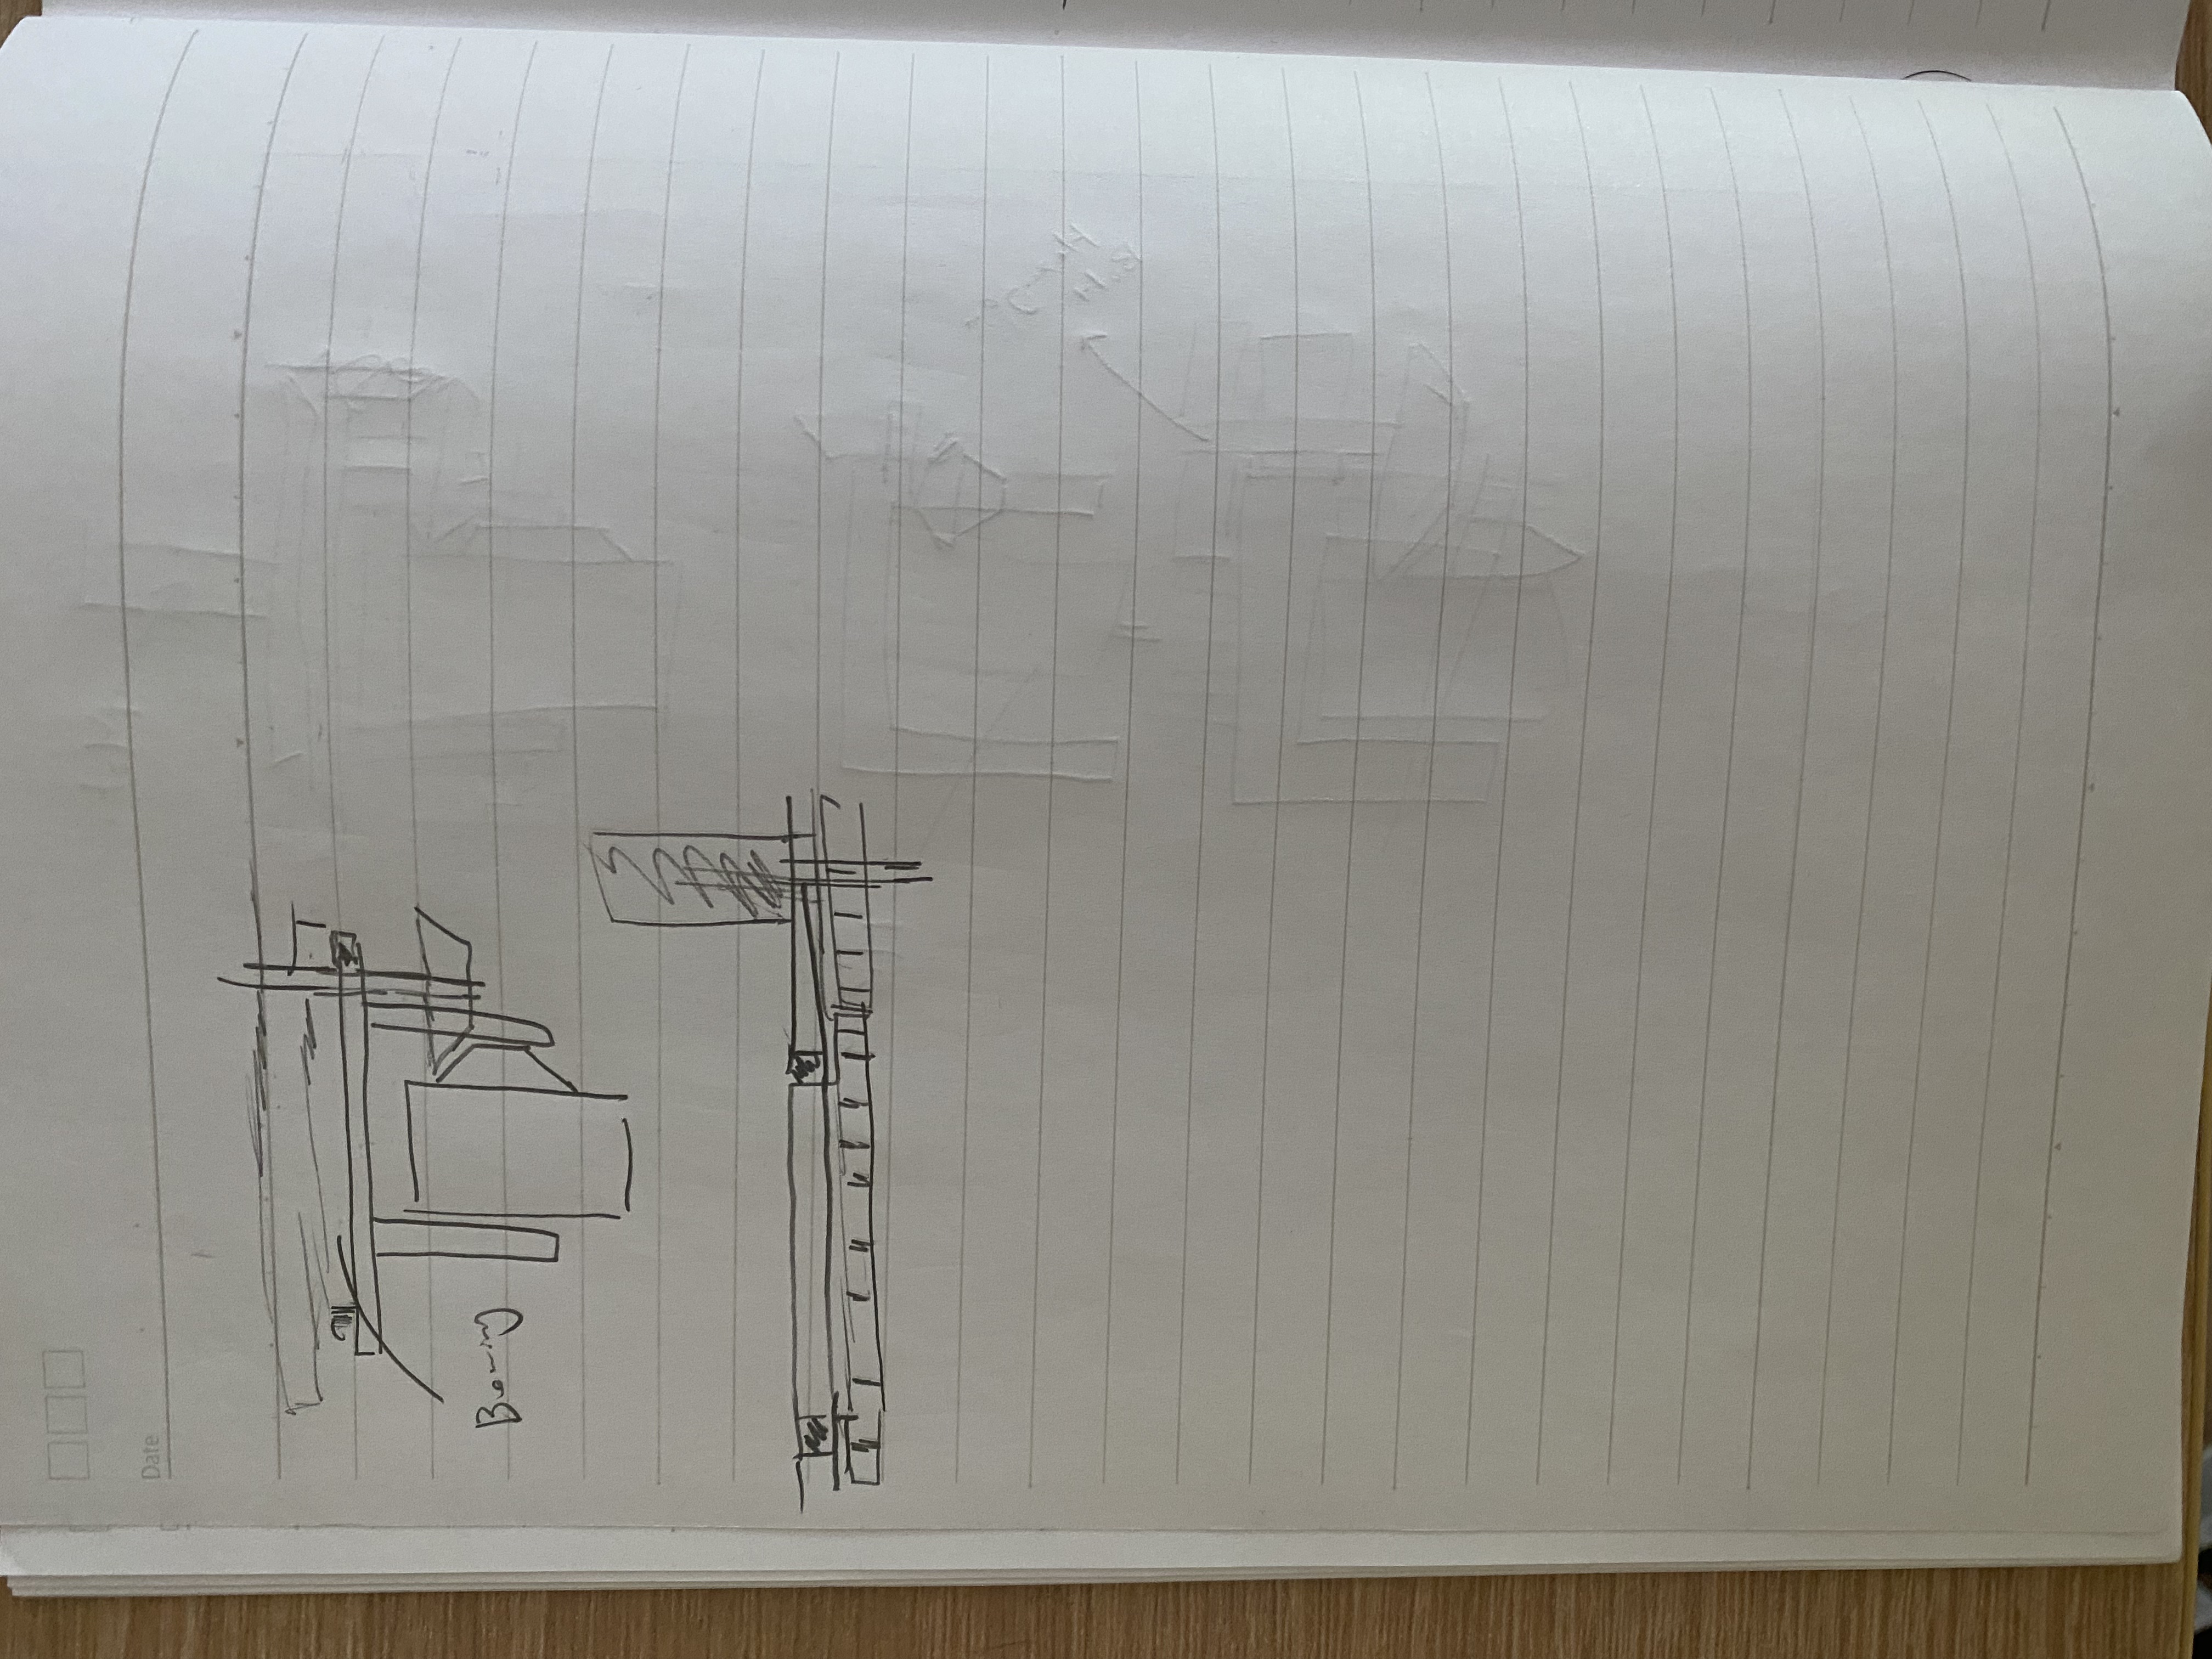
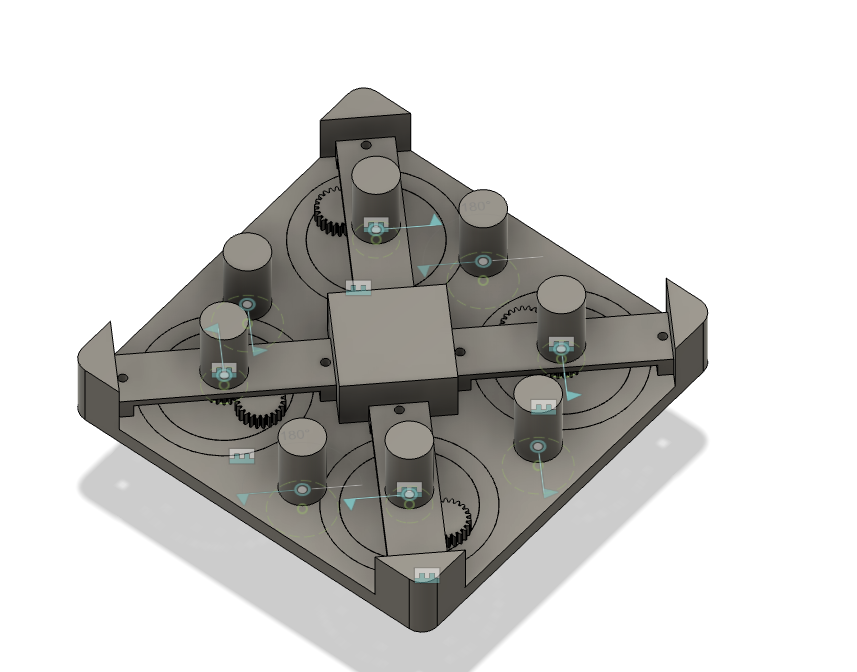
New idea. Create a swerve drive that had odometry. I started by drawing different designs to see which ones were possible. I then did a simple cad to test if it would work. The cad took the longest because I had to figure out the best dimensions.
Time Spent: 1 hour
June 24, 2025
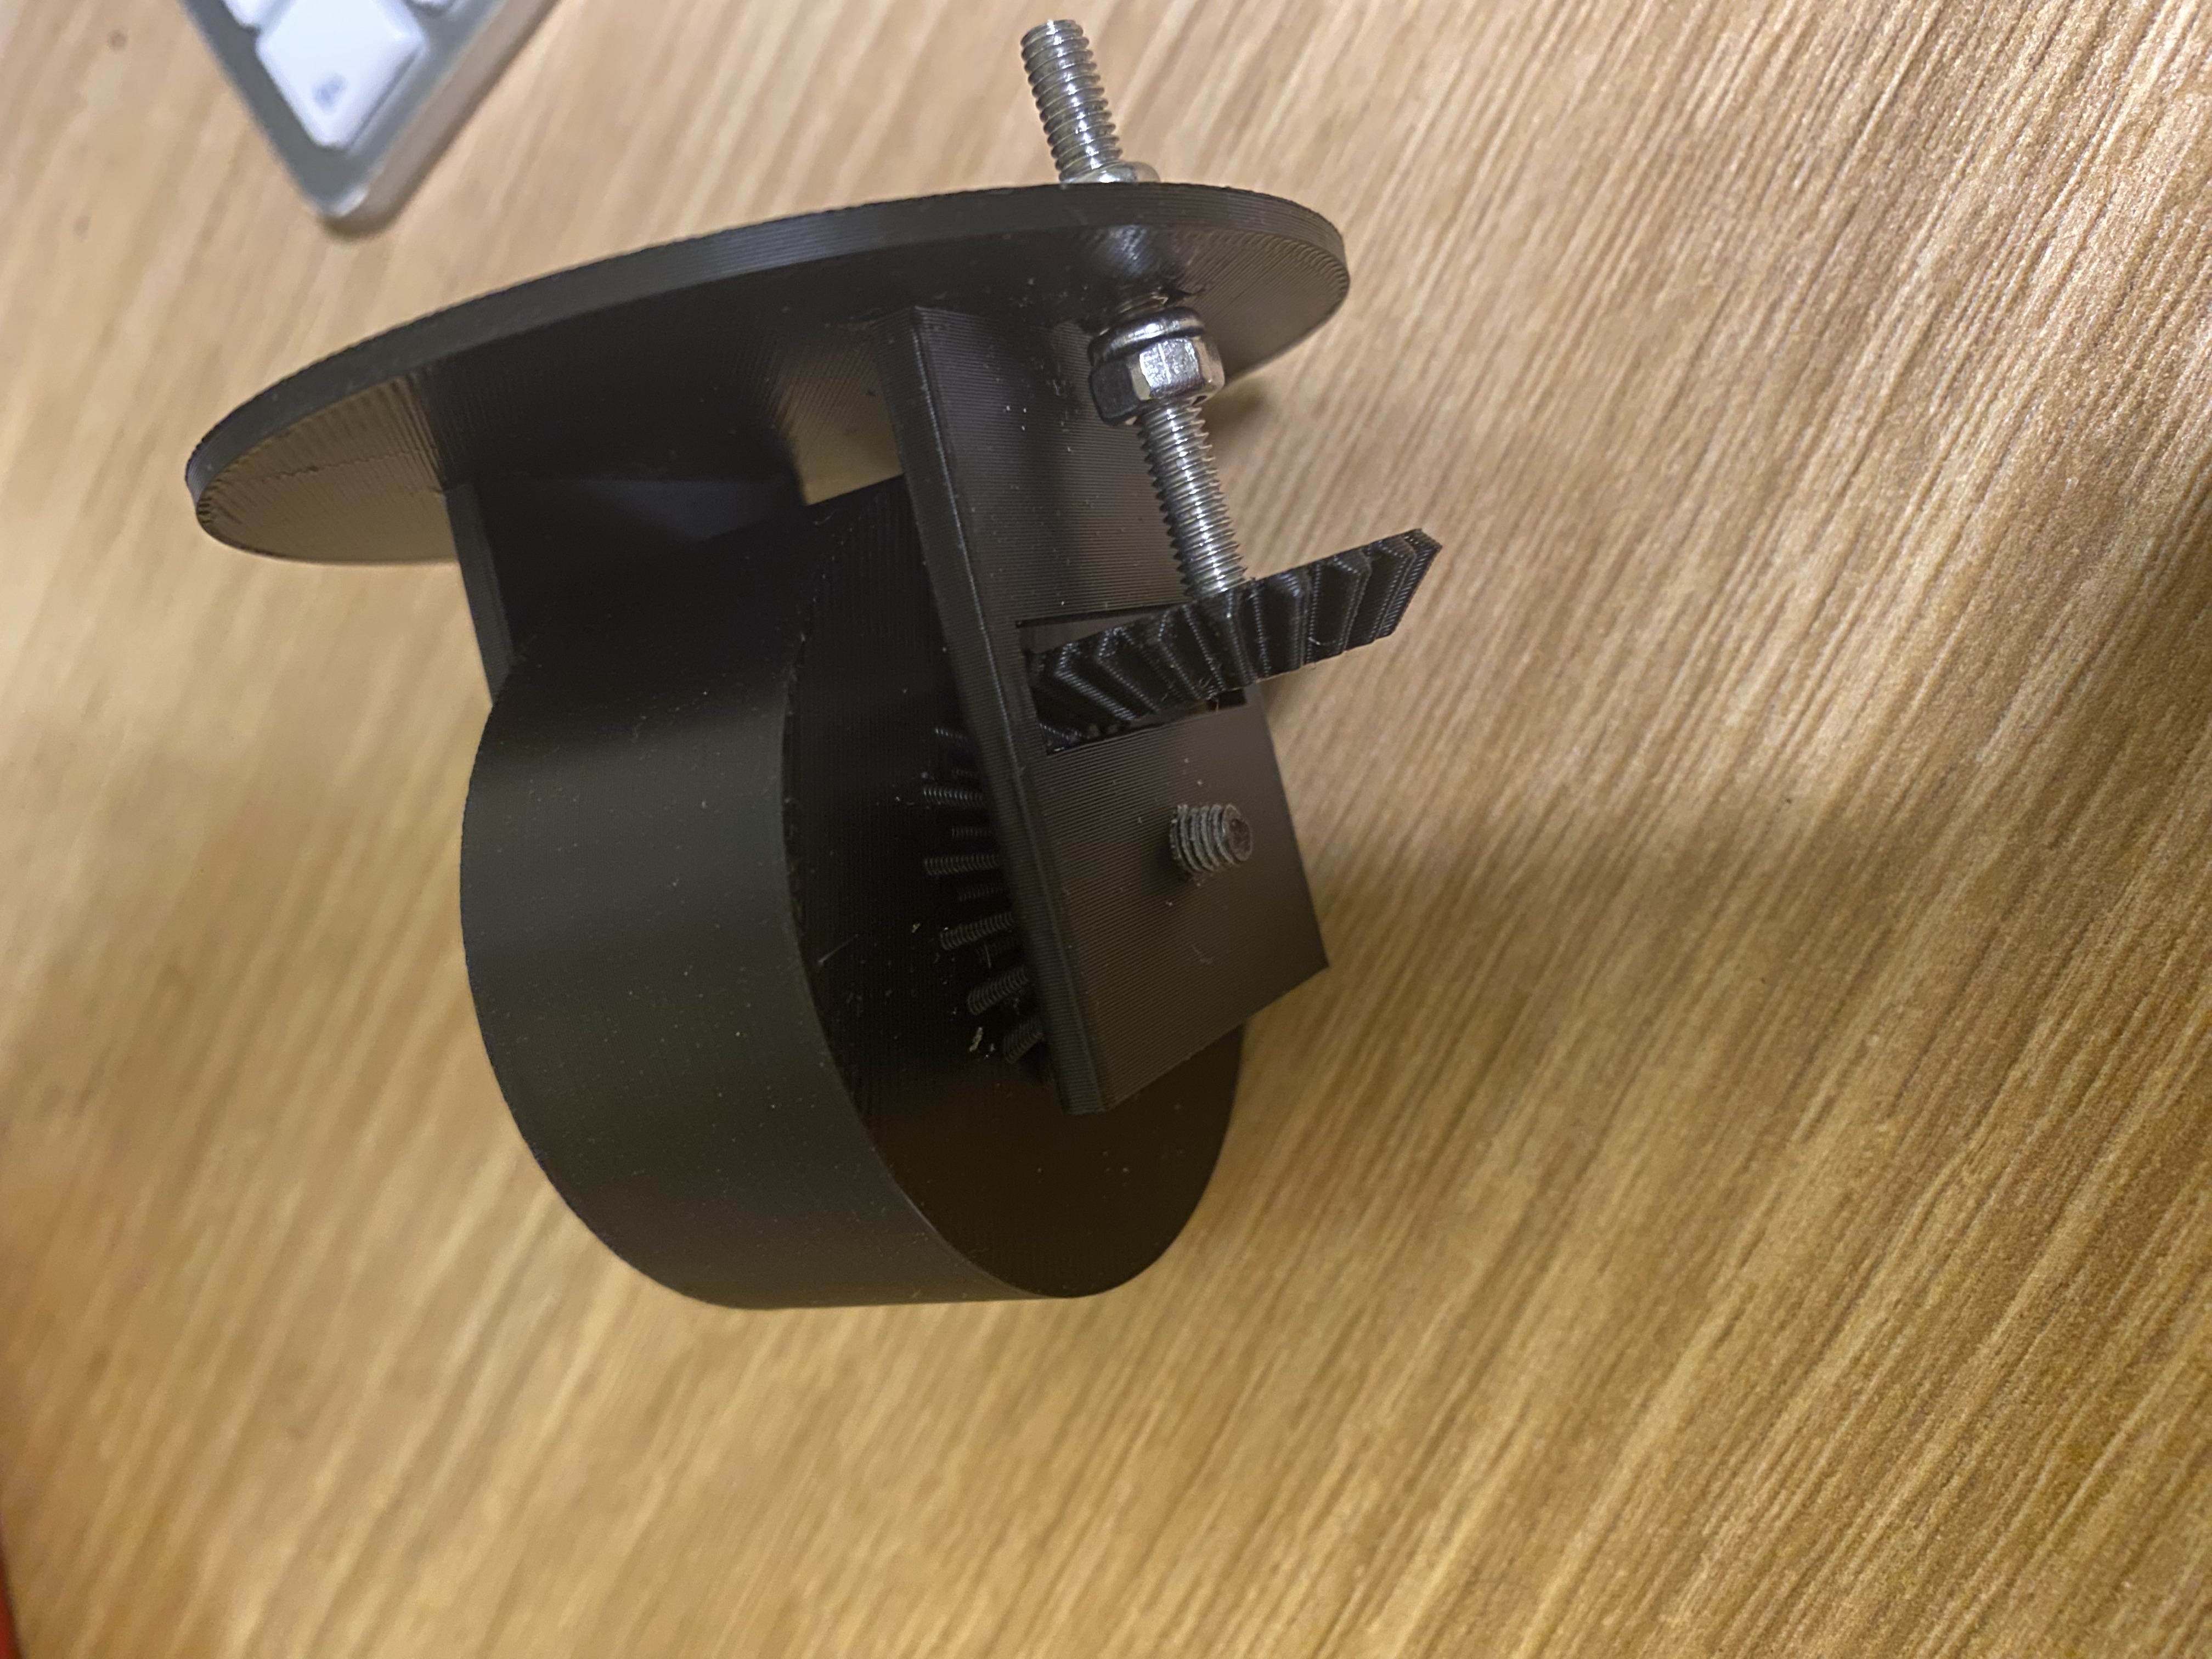
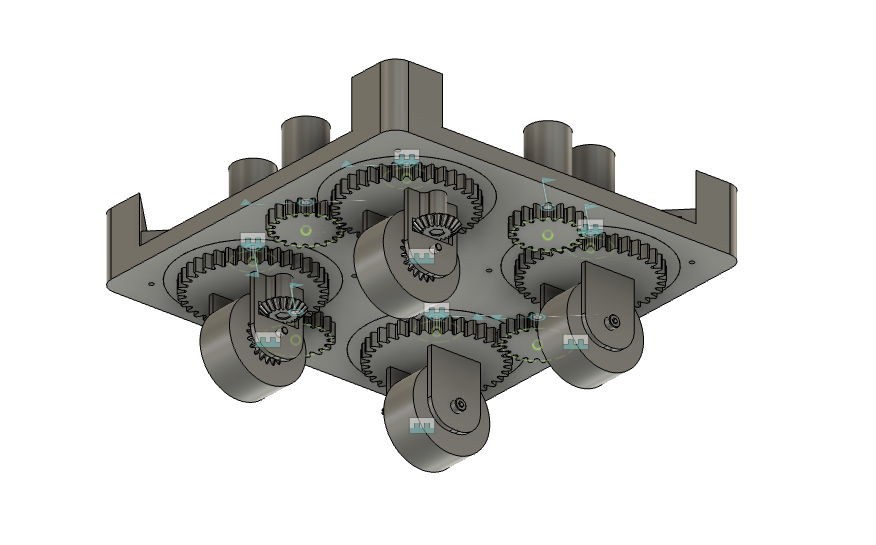
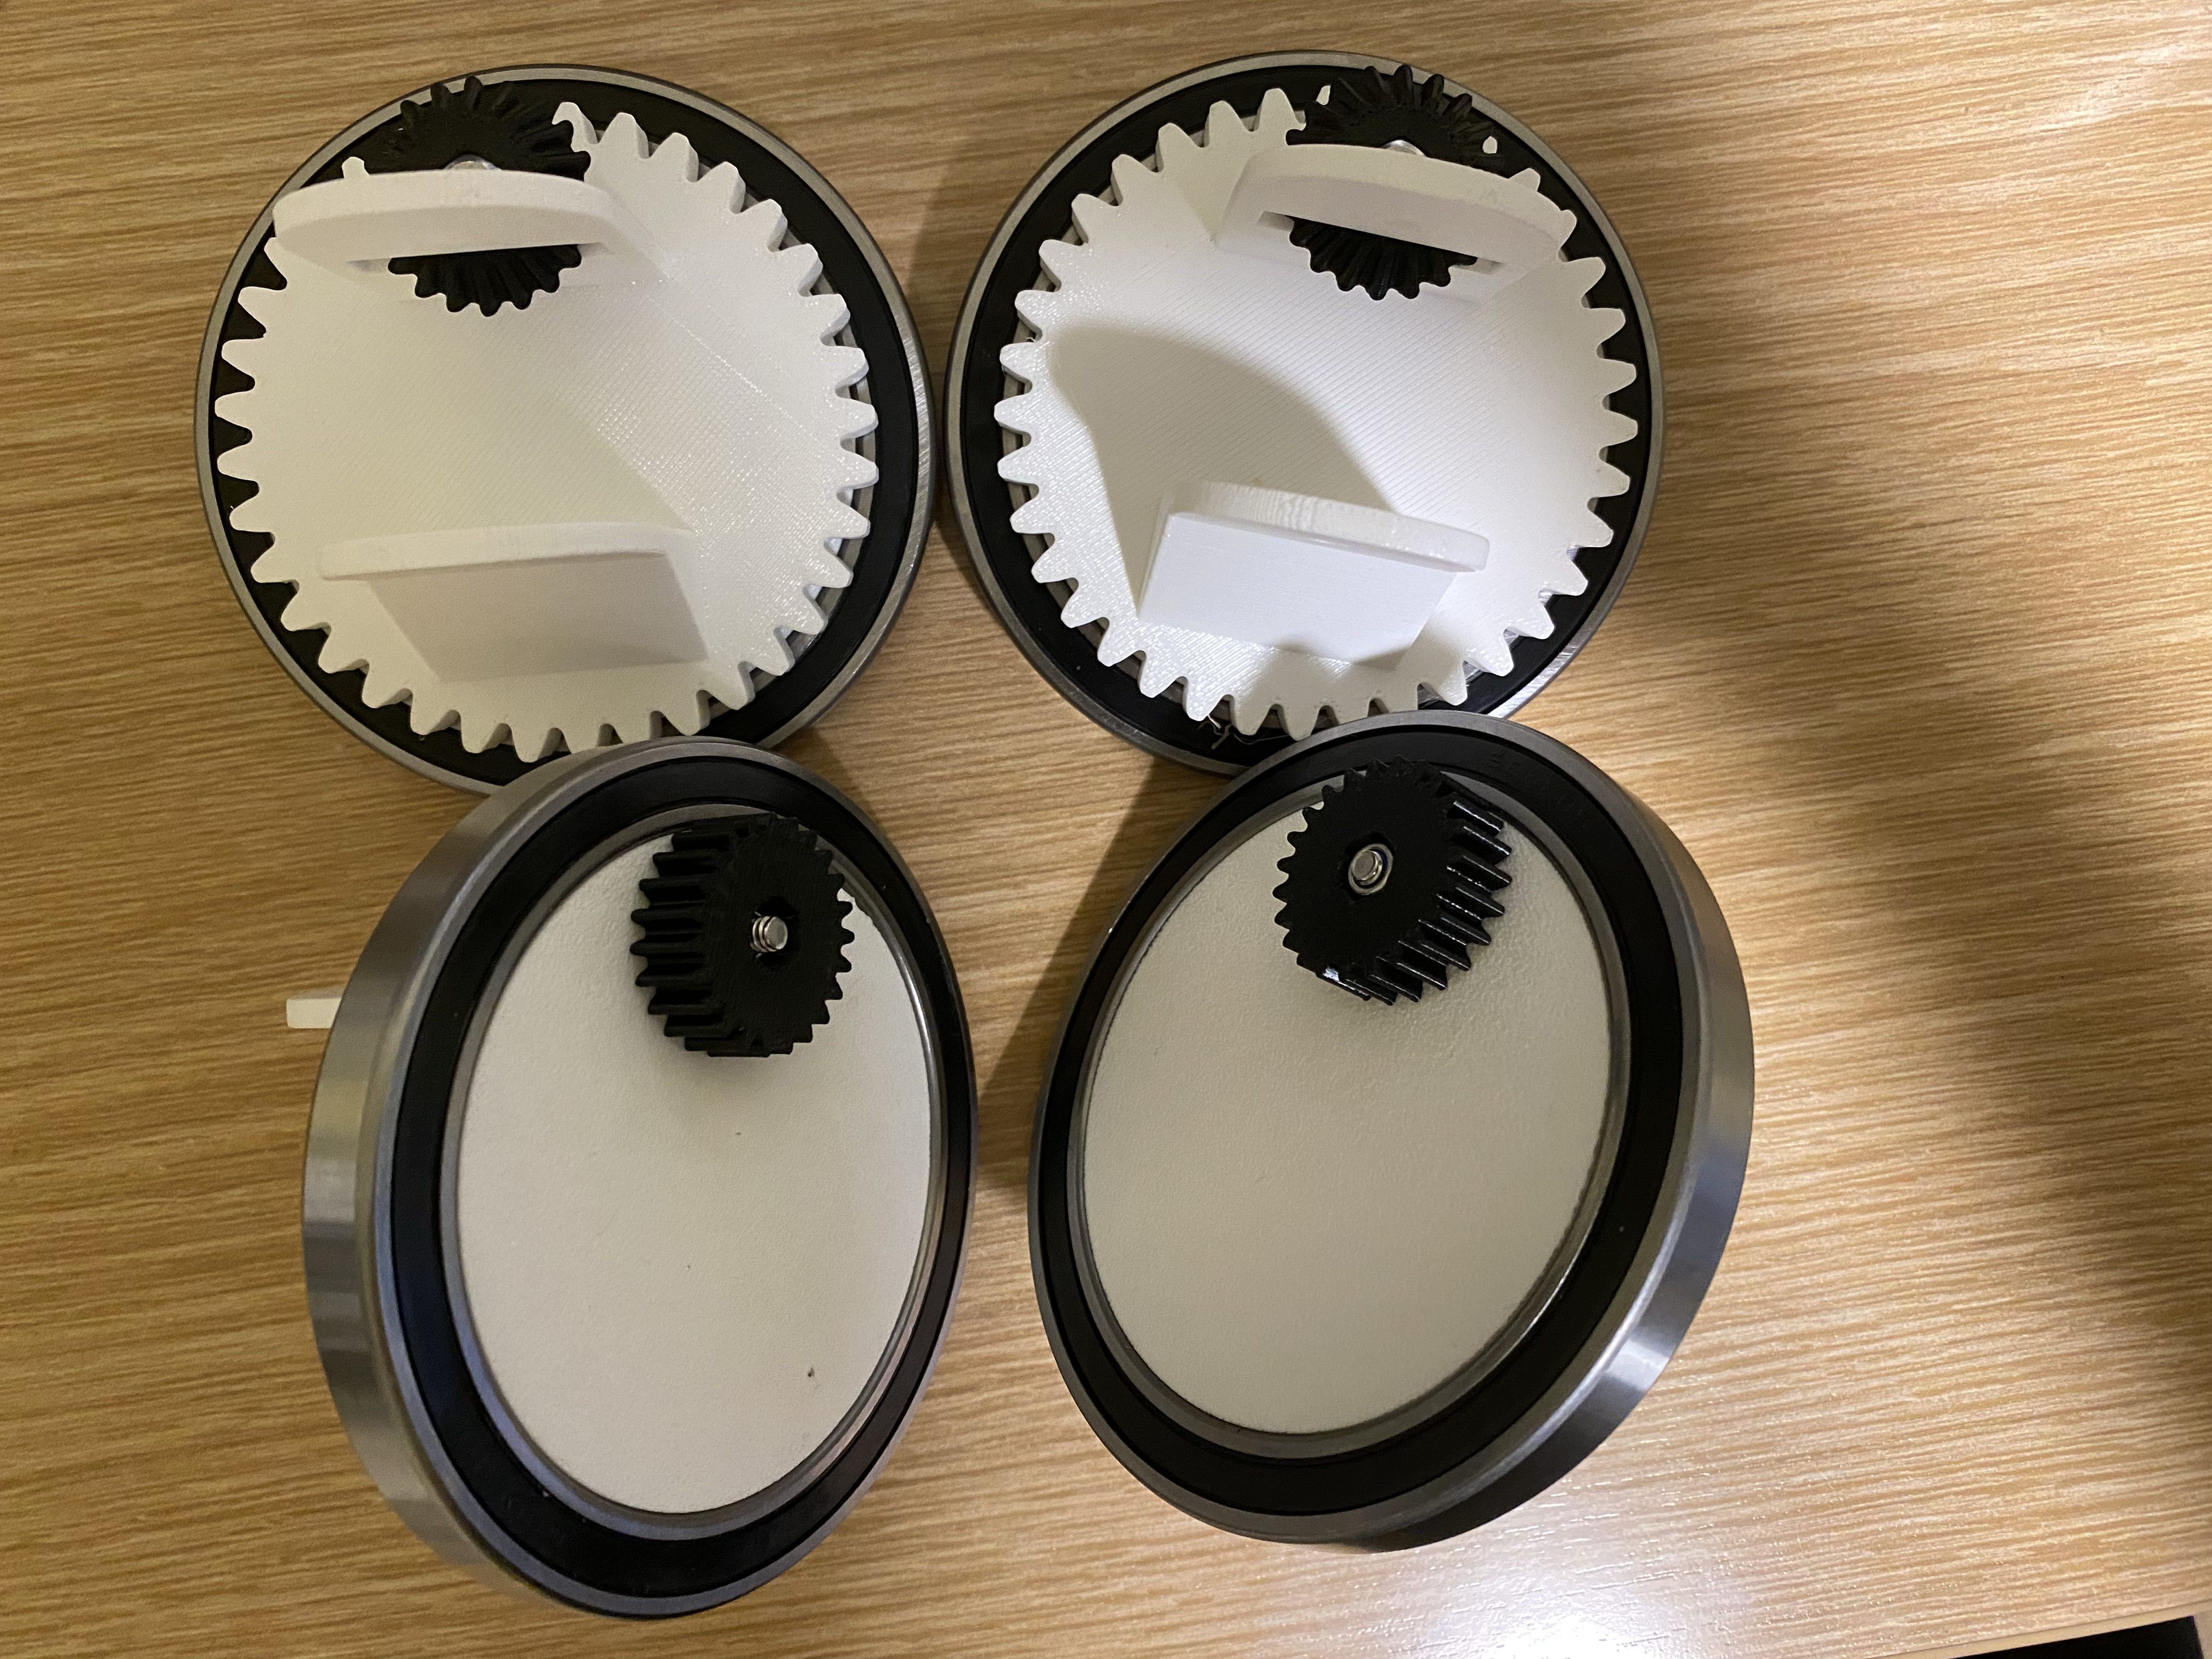
I assembled the prototype. It worked pretty well. I had to fix some dimensions in the cad. I caded a bigger prototype that had more gears. I basically made one module of the swerve drivetrain. I also researched about the motors I was going to use. I wanted to have encoder to be more precise.
Time Spent: 2 hours
June 25, 2025
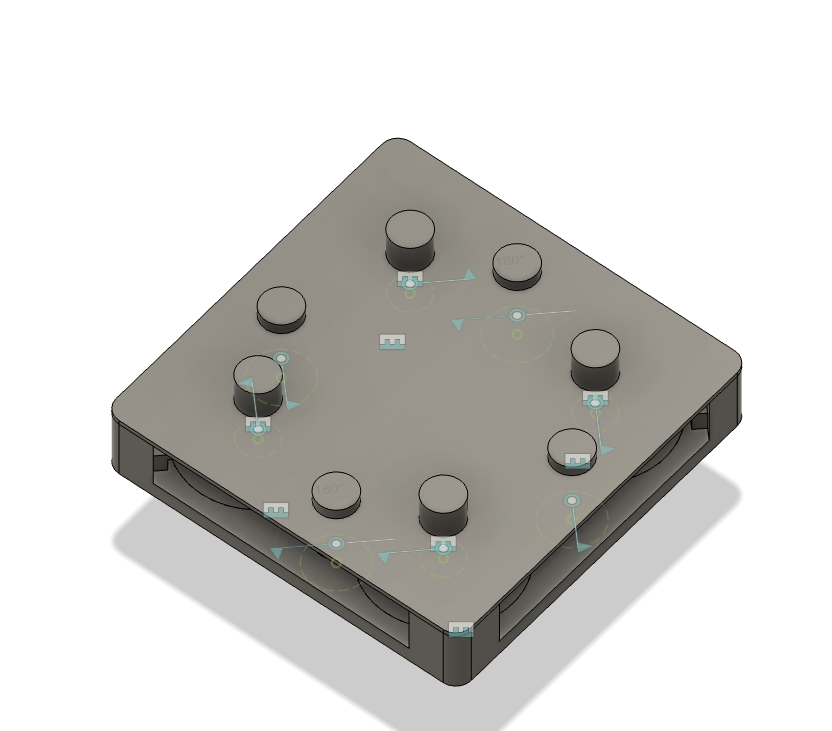
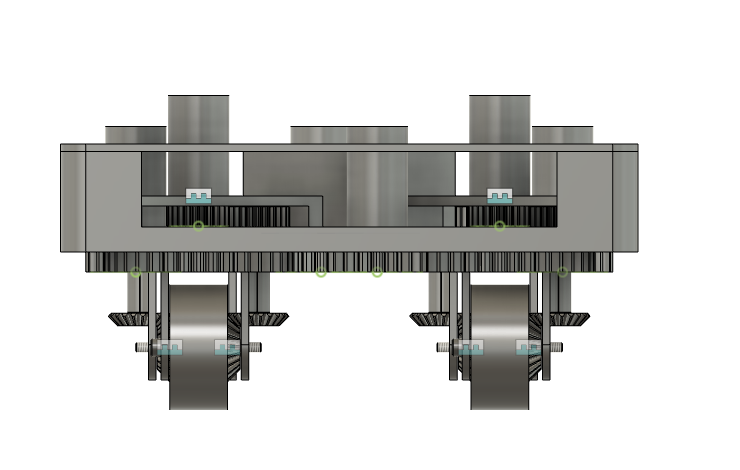
I tested the second prototype and it worked pretty well. I spent the day cadding the whole robot. It took a lot of time trying to get all the joints working. The animations work and it looks pretty cool.
Time Spent: 5 hours
June 26, 2025
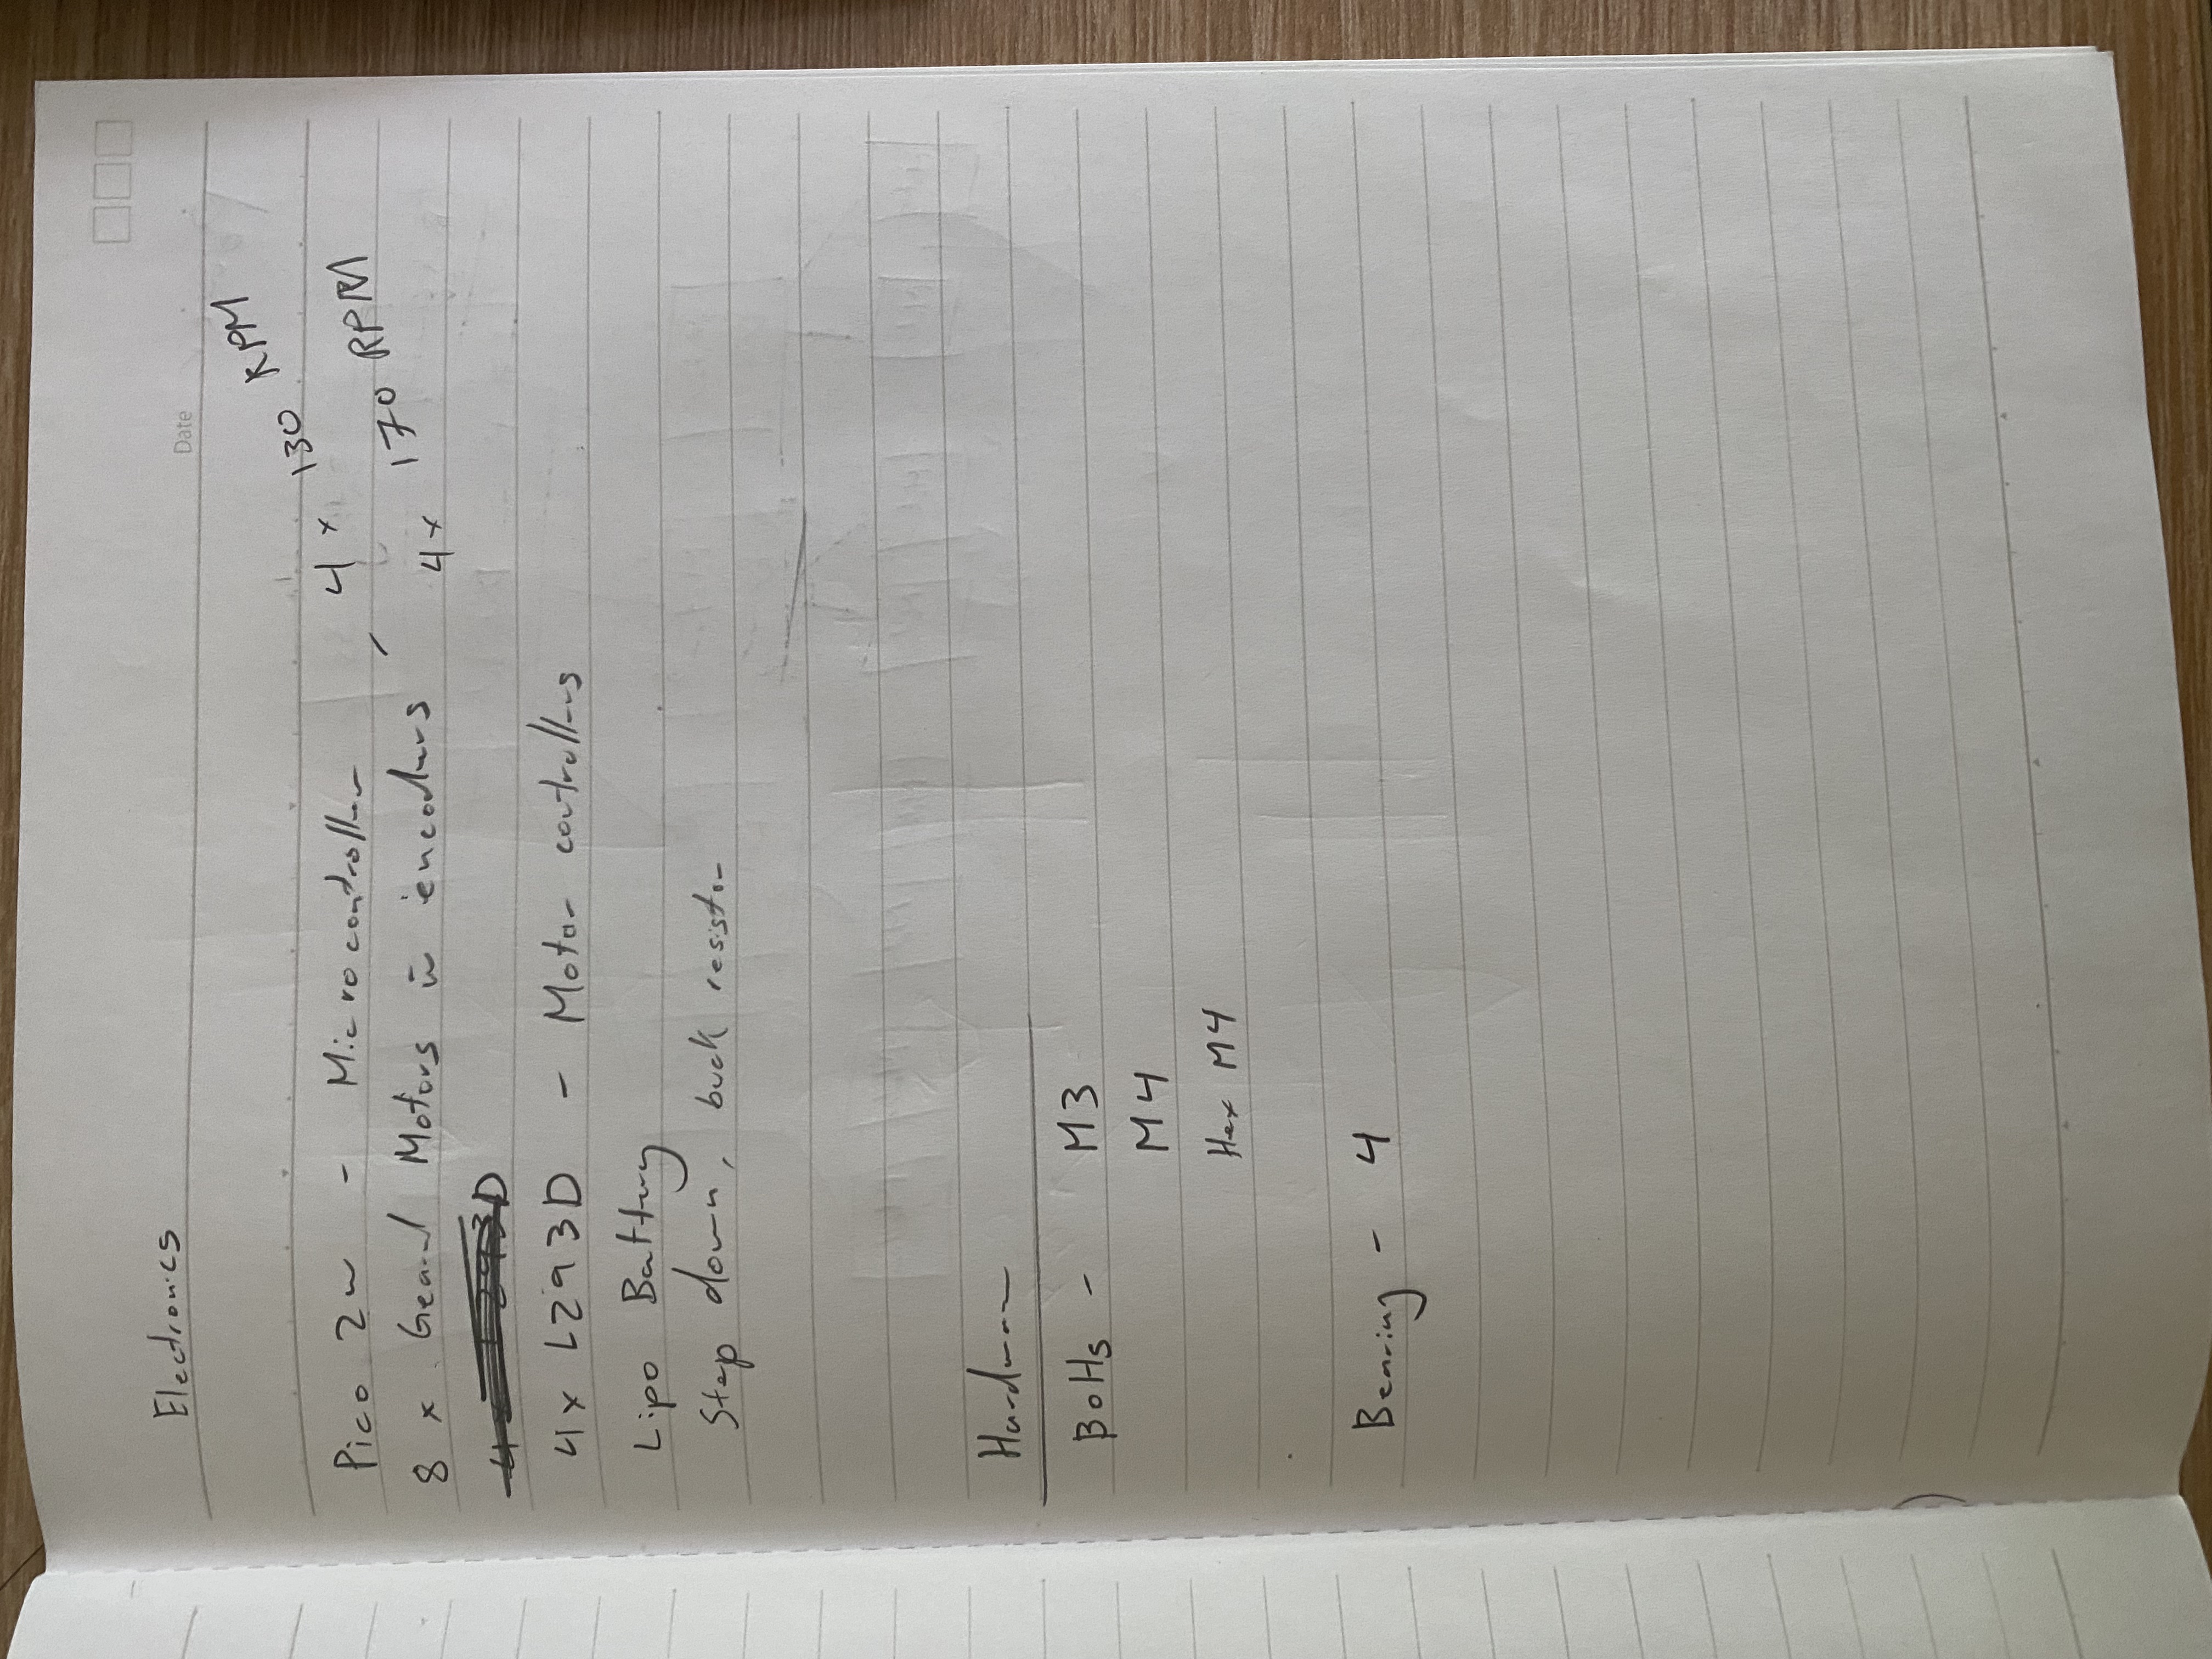
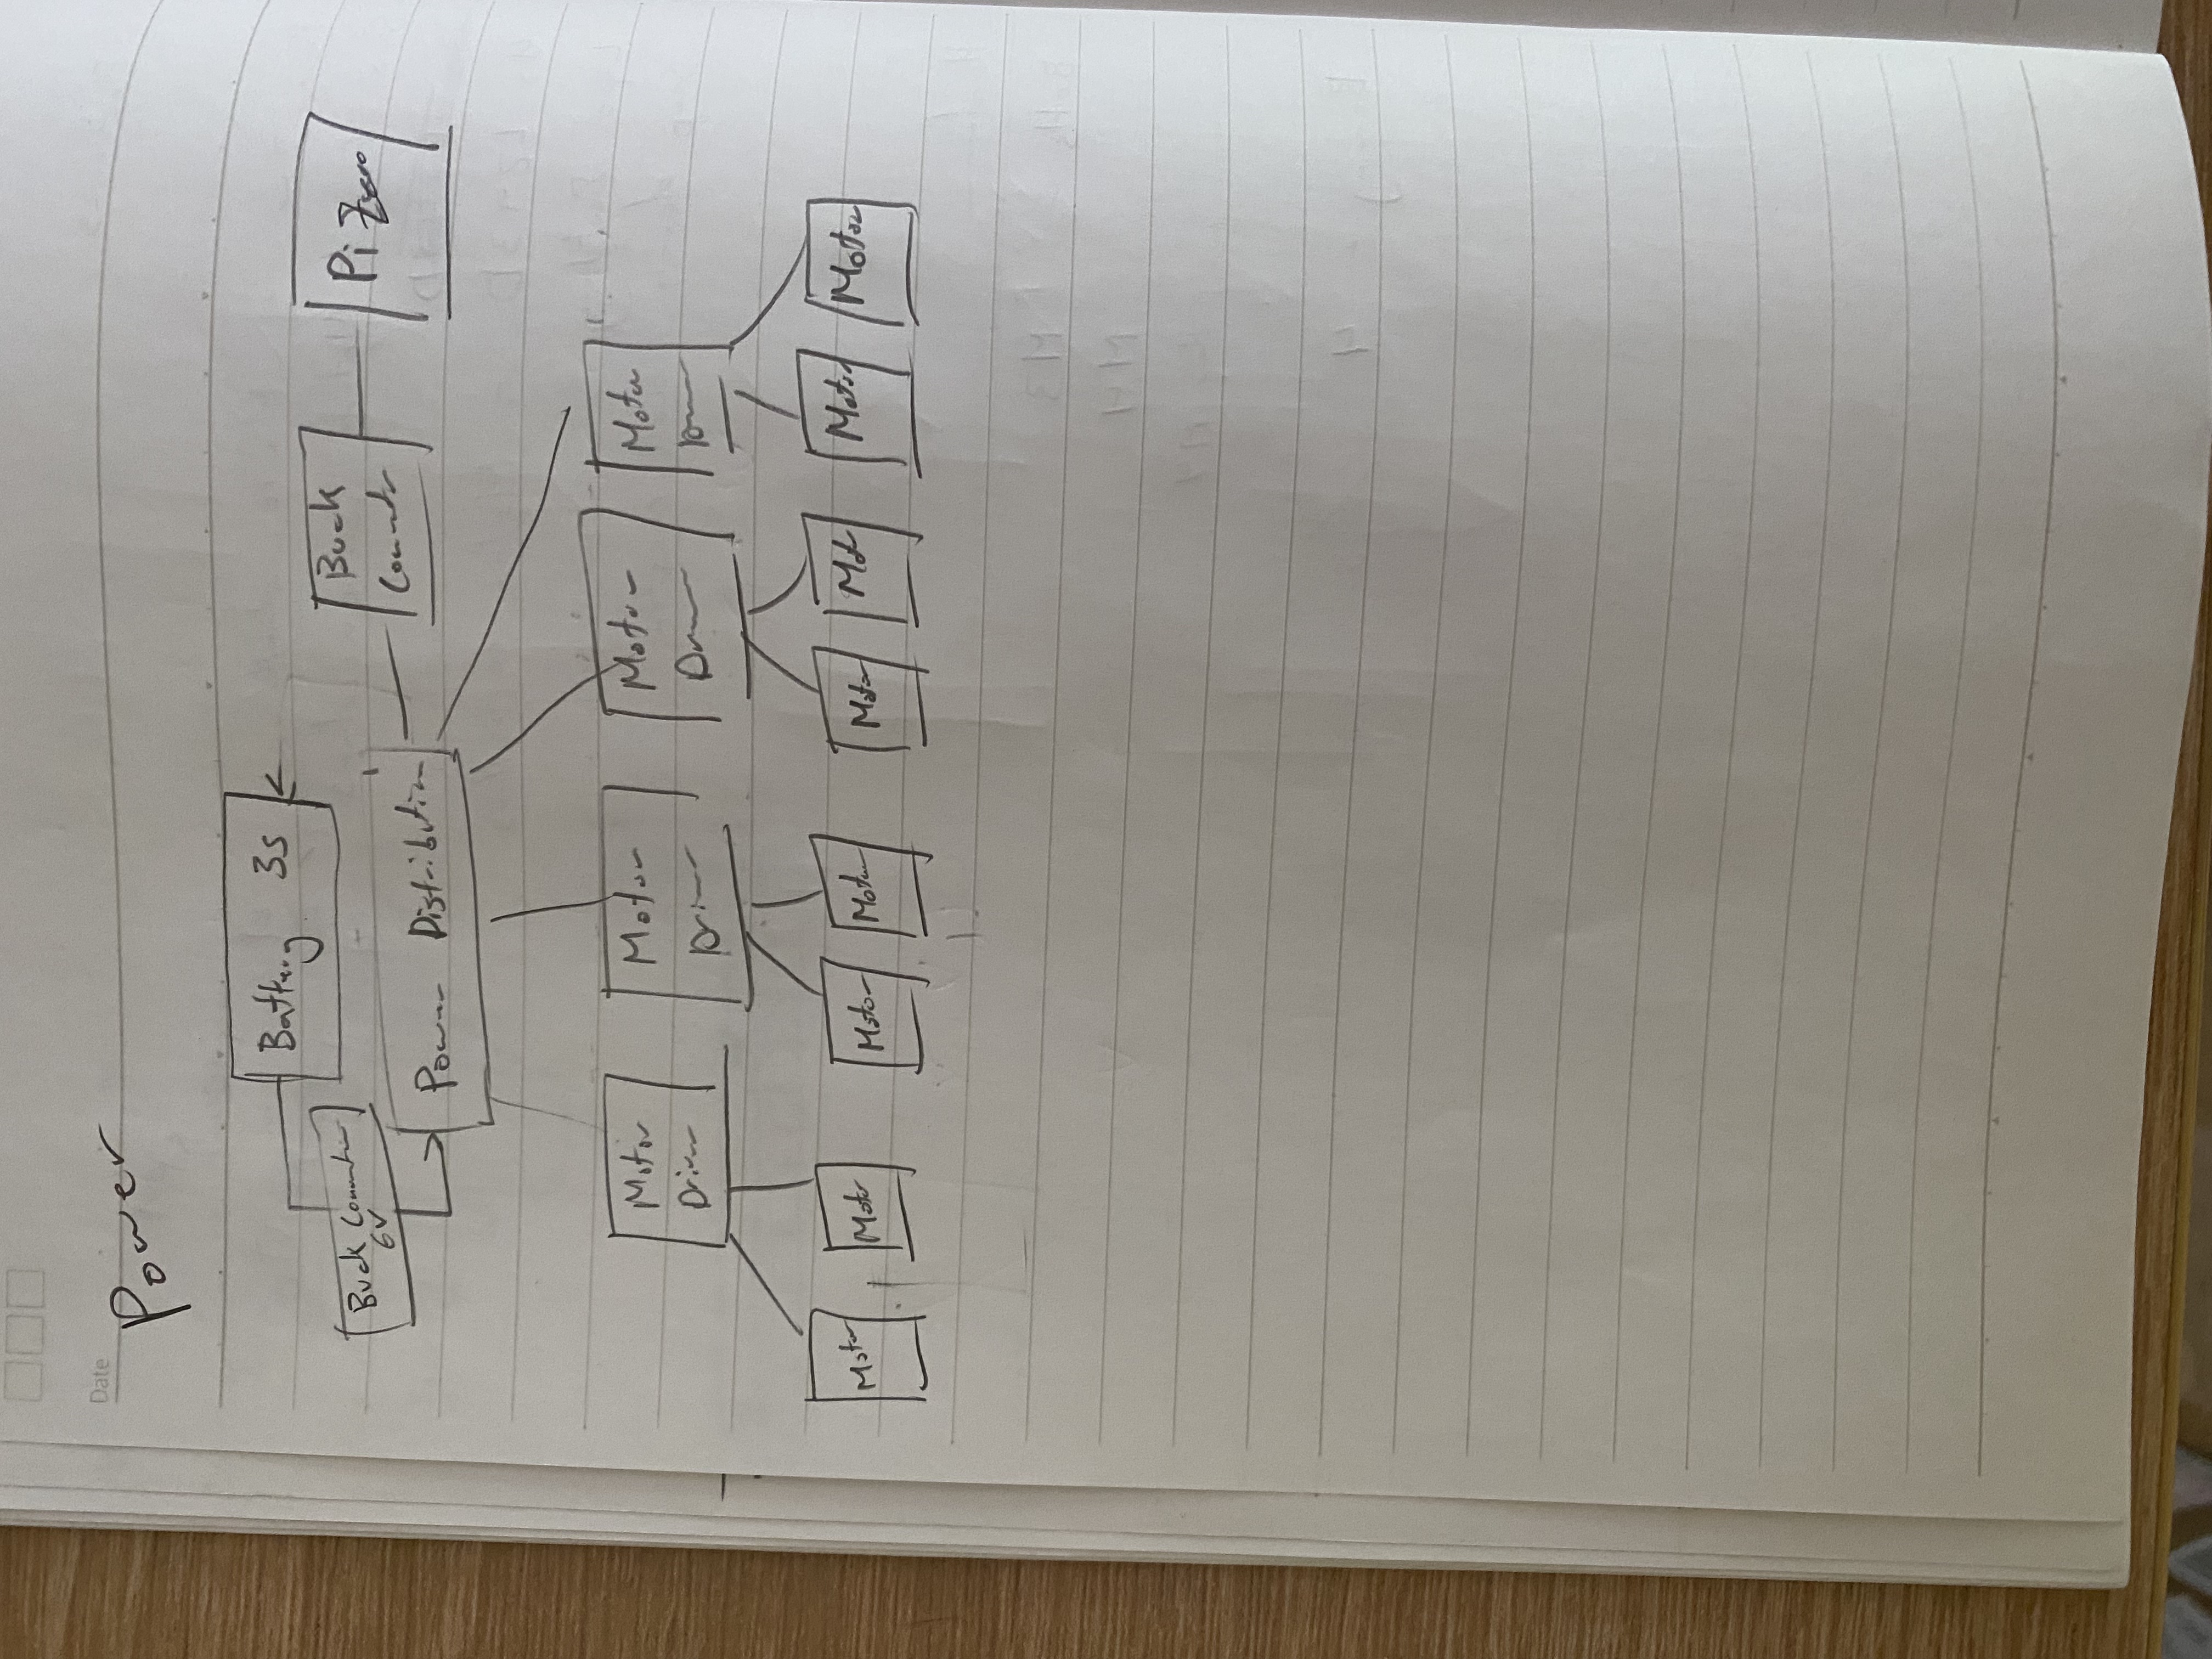
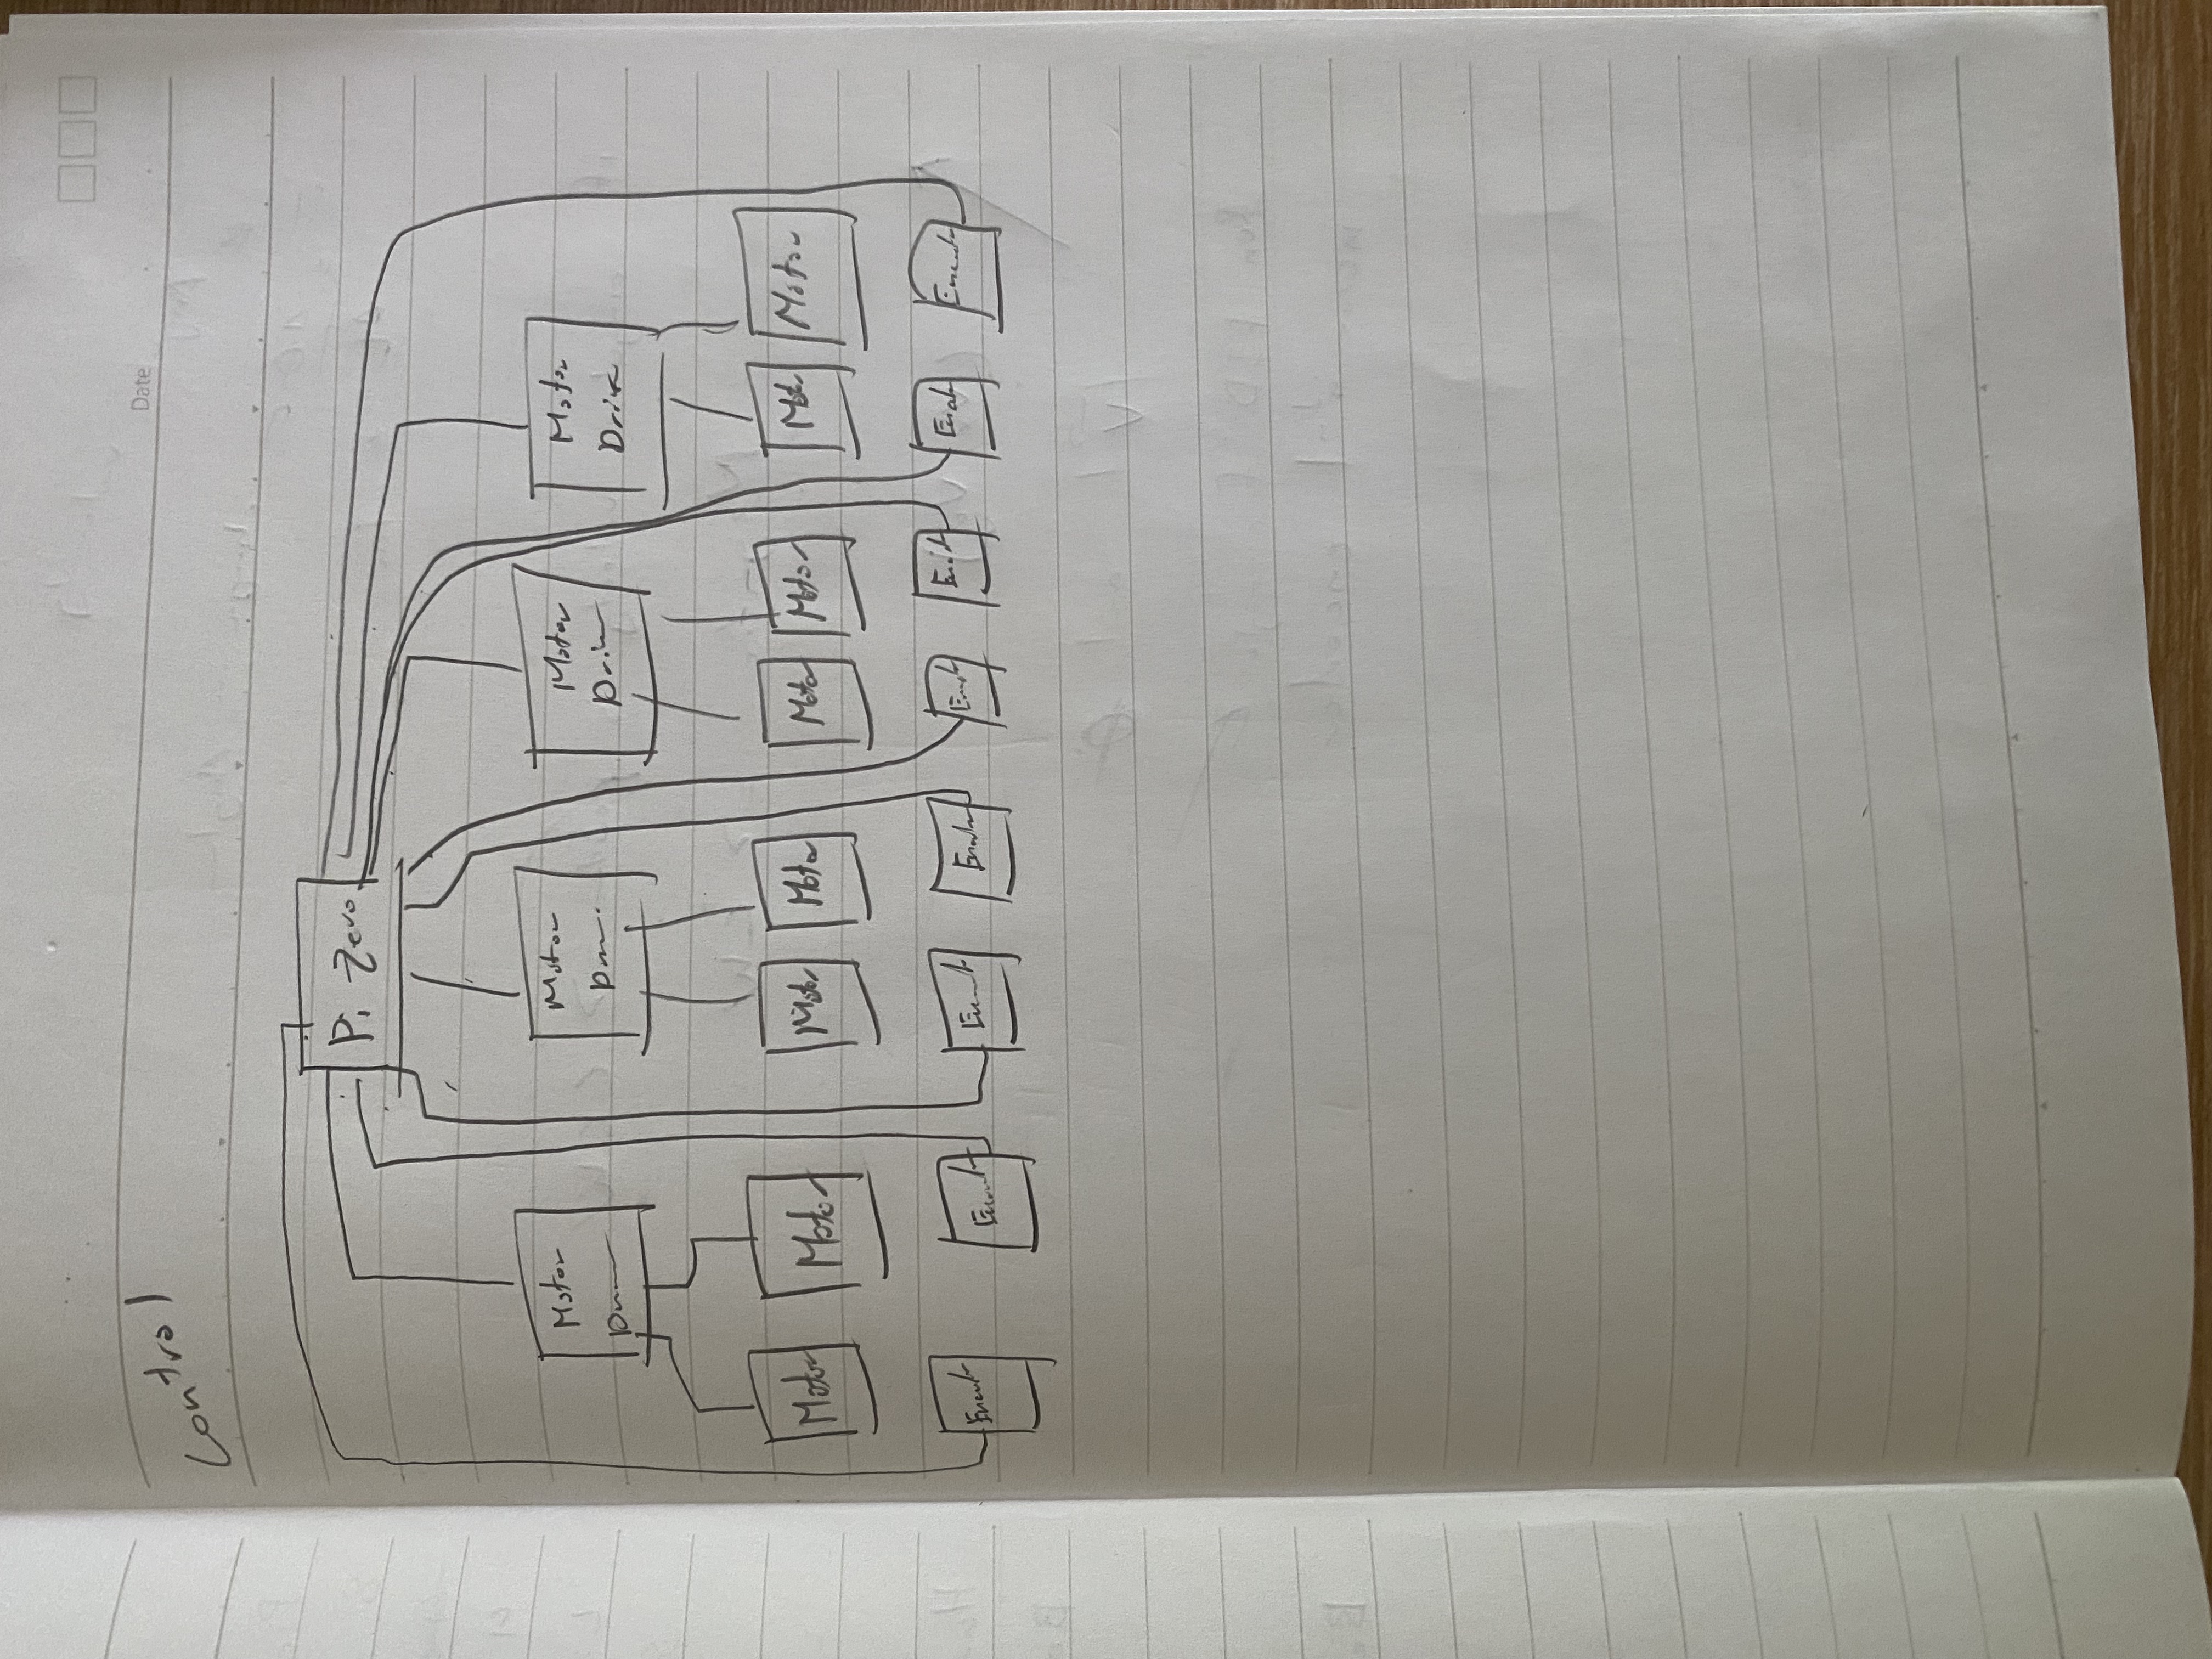
I now focused more on the electronics. I started off my listing the BOM. Then, I made a power distribution diagram with the control diagram.
Time Spent: 1 hour
June 27, 2025
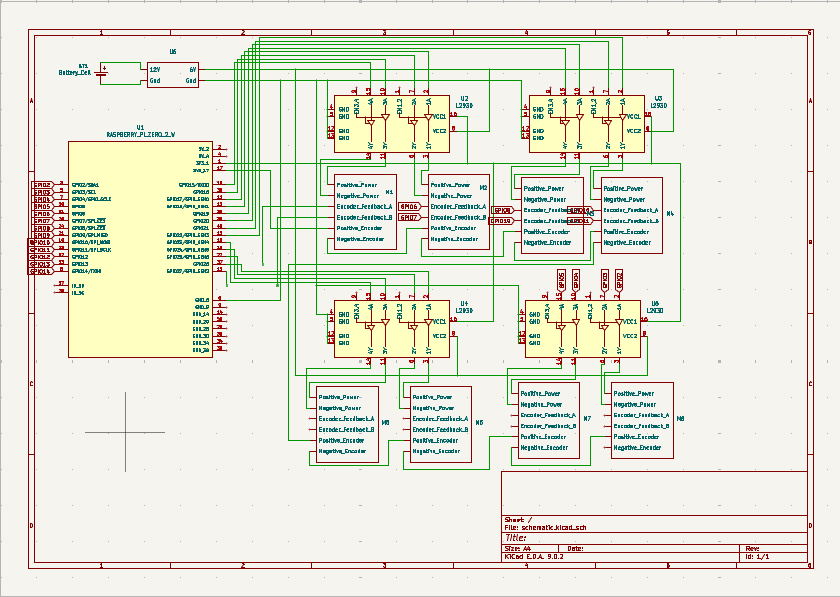
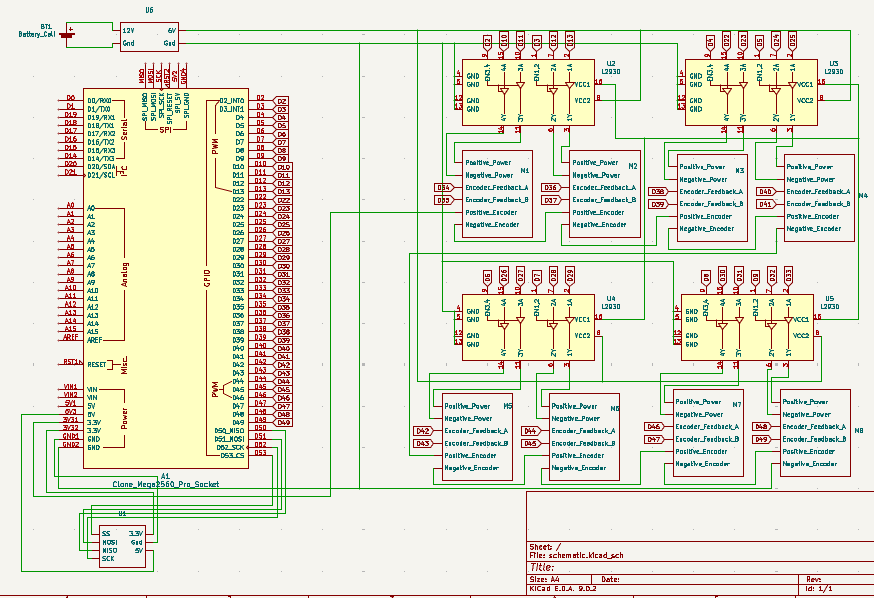
I moved on to doing the schematic. I made the necessary symbols then started wiring the whole robot. Halfway through, I realized that the raspberry pi zero did not have enough GPIO pins so I had to switch to Arduino mega. This took way too long but it was needed to be done.
Time Spent: 3 hours
June 28, 2025
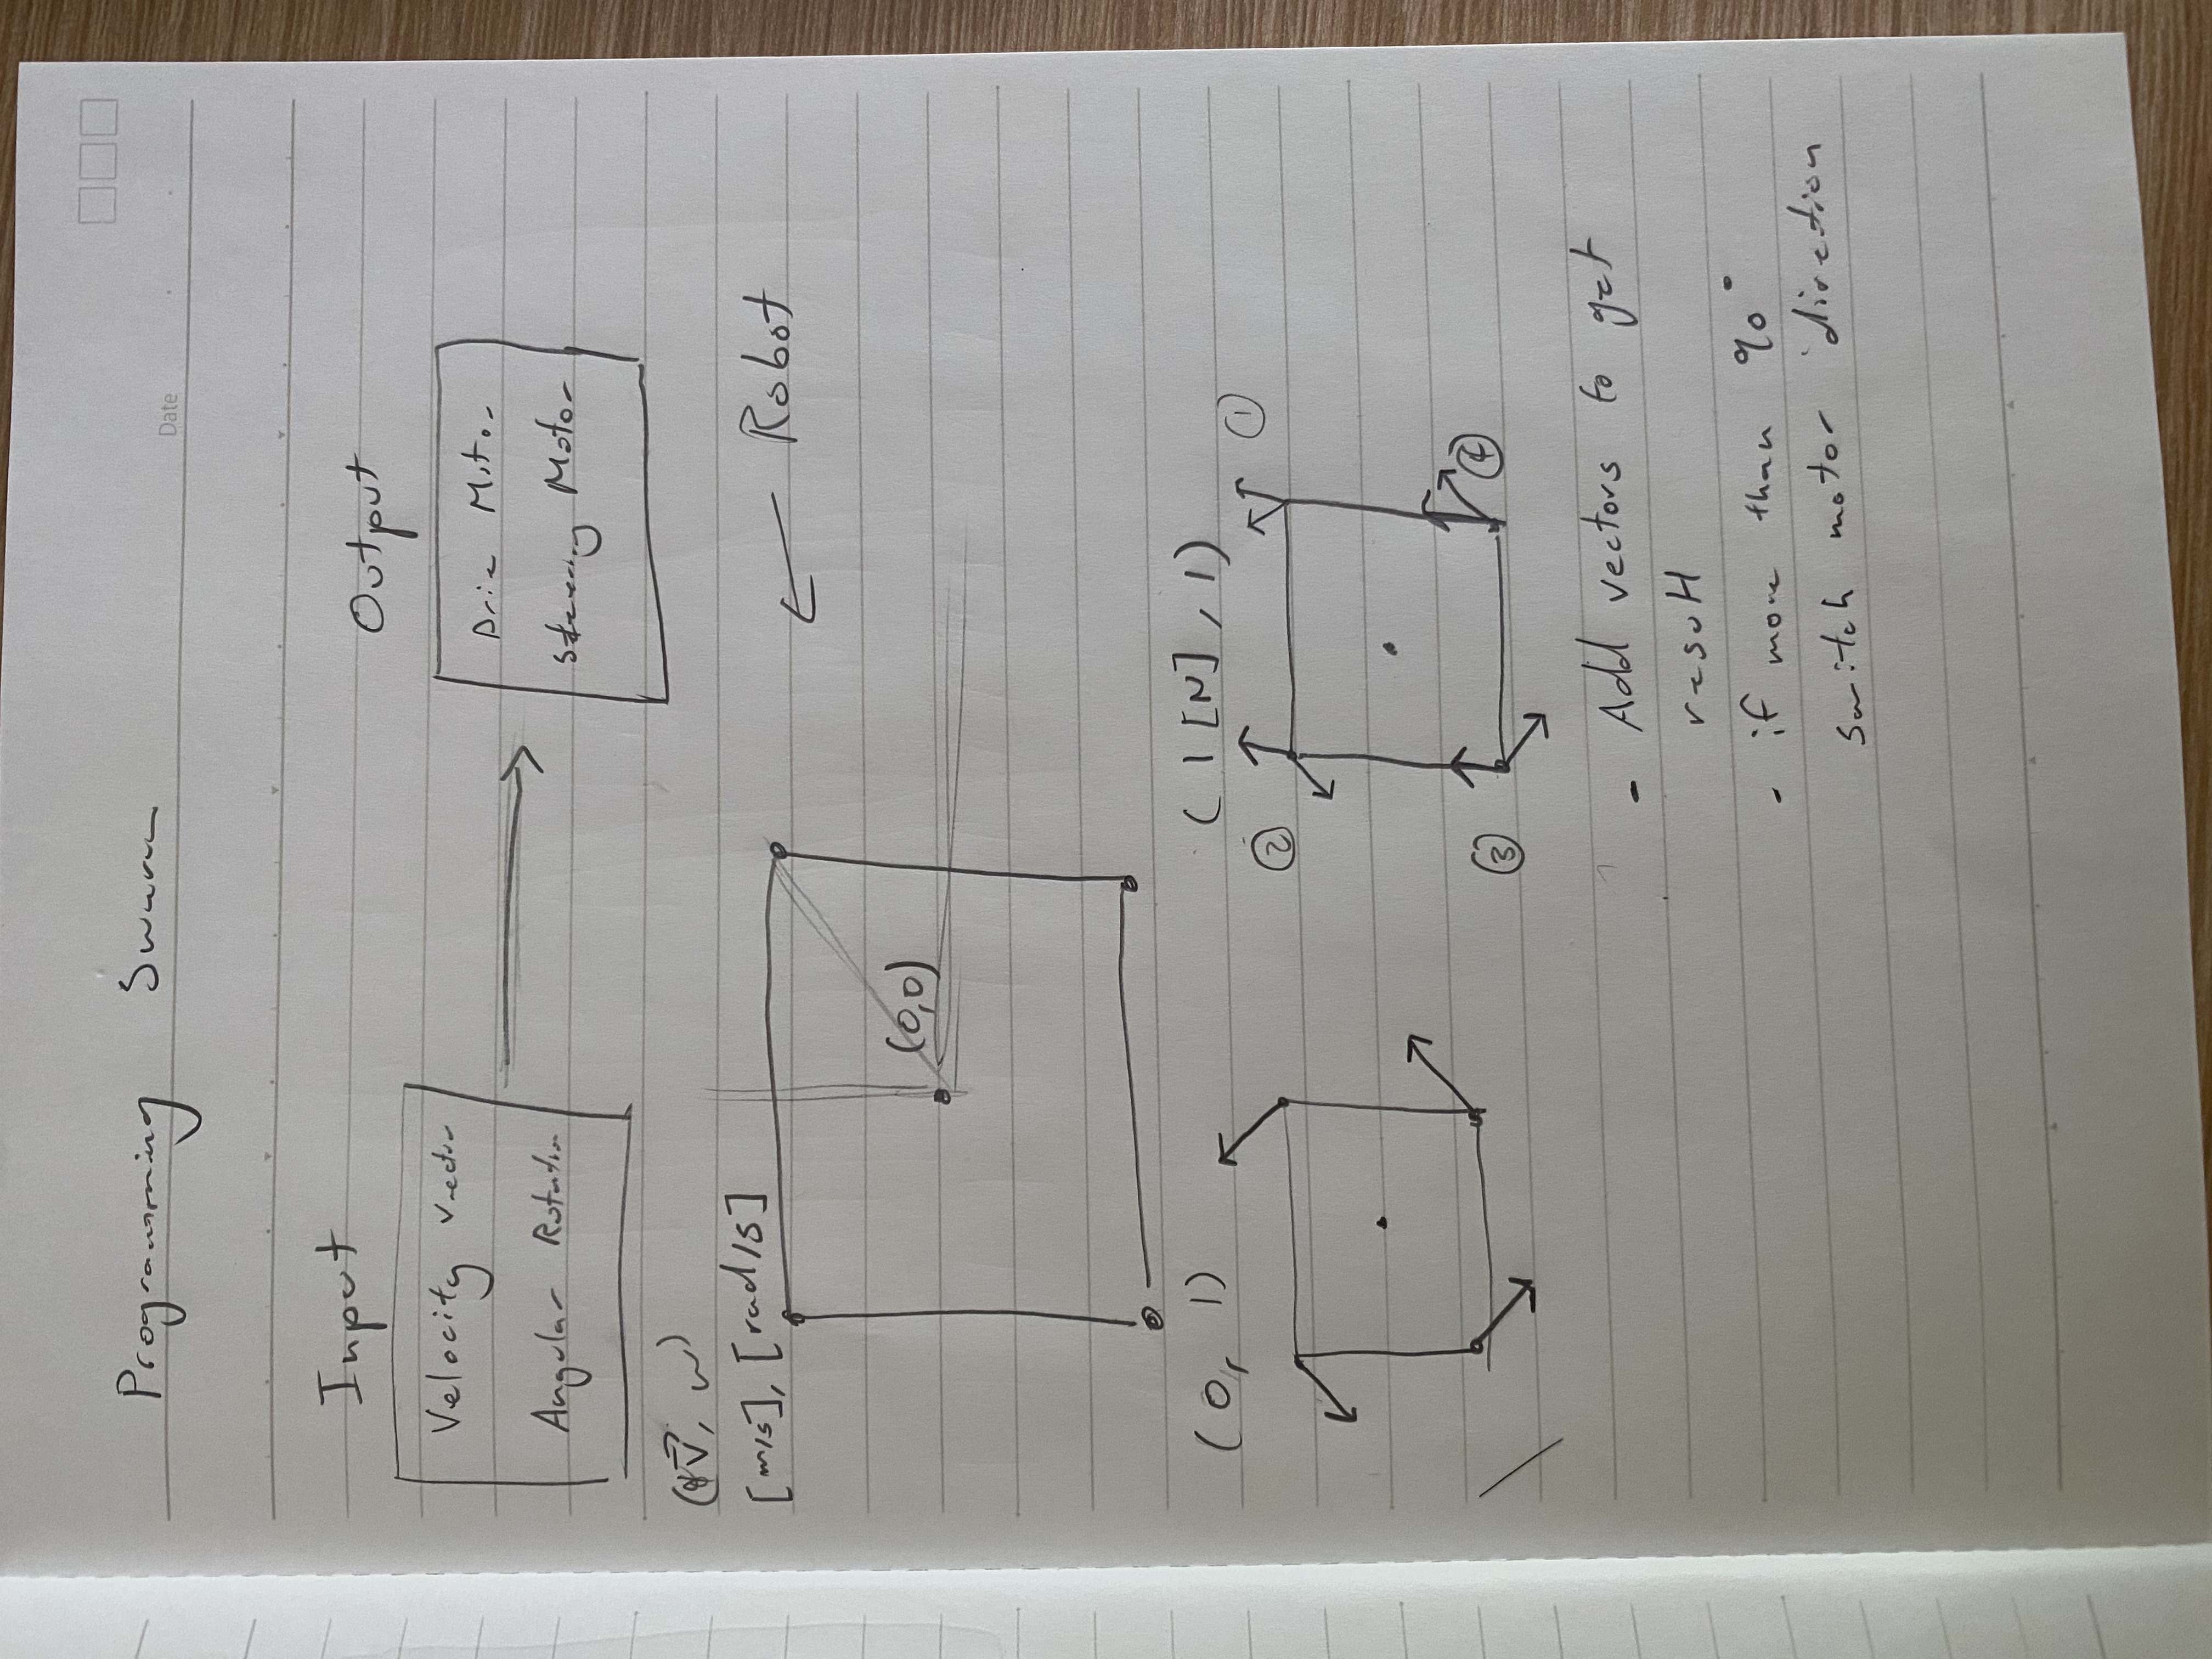
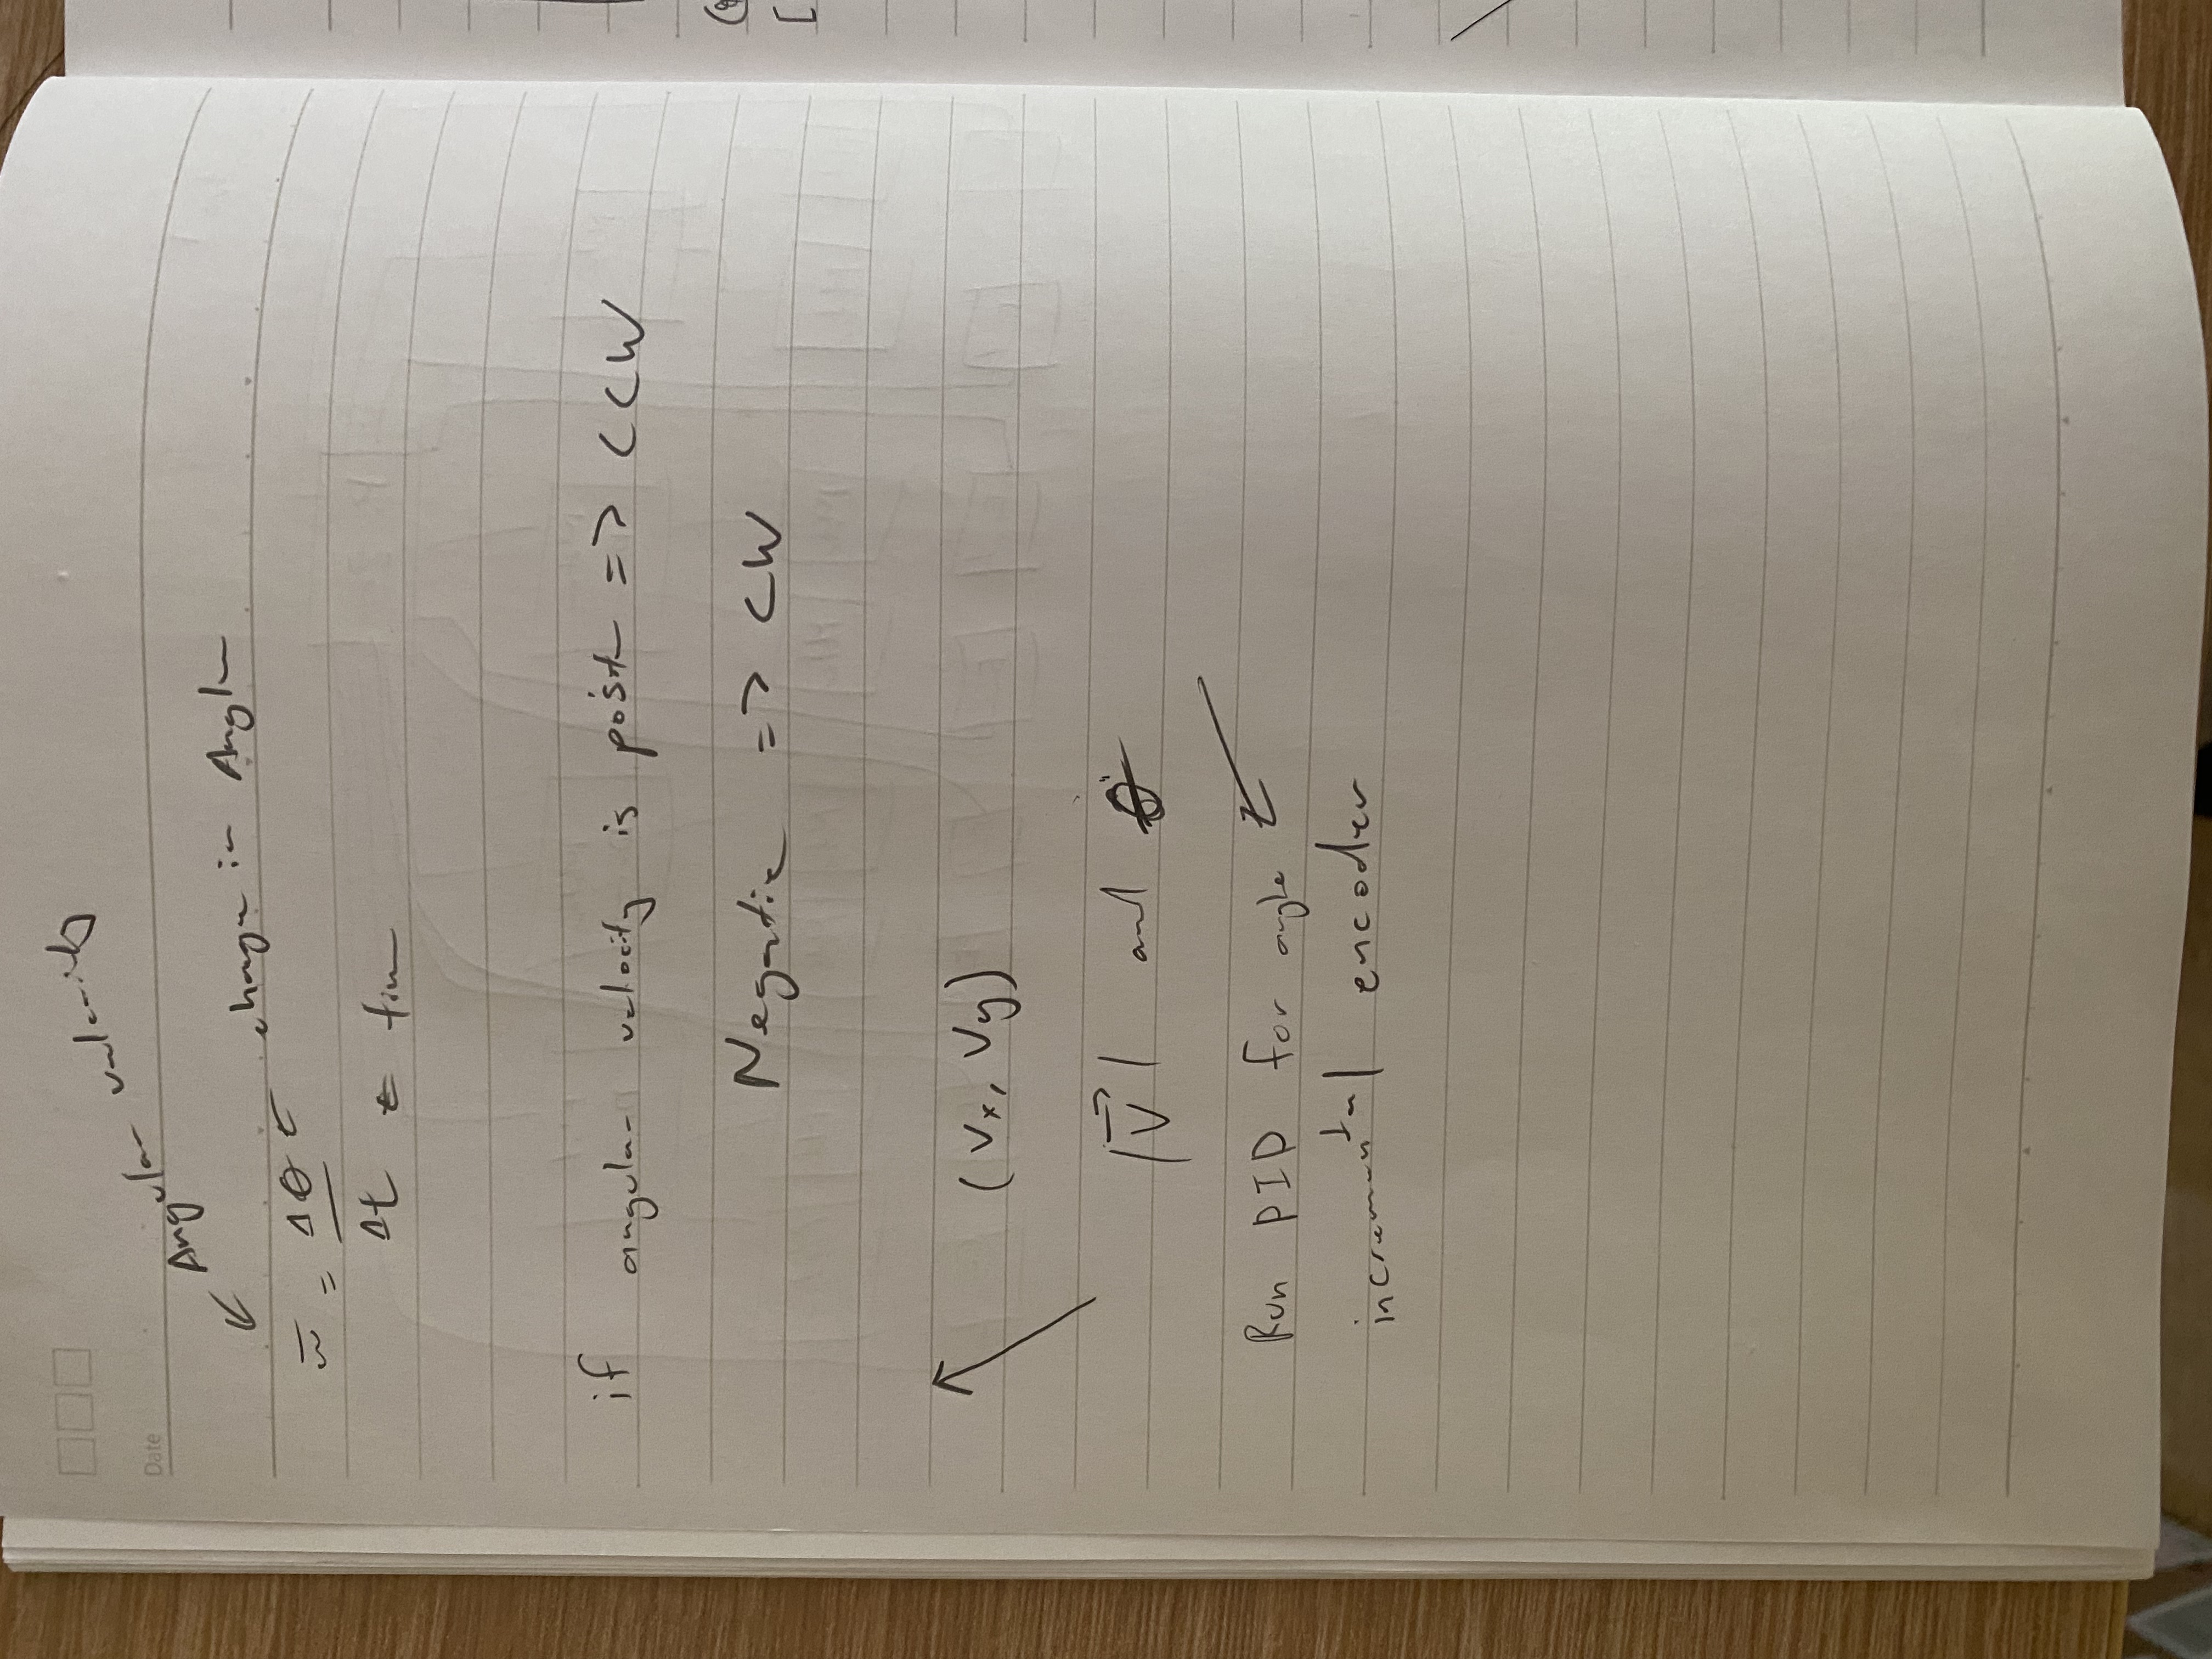
Next, I went to the programming phase. I started by doing research and found this article. This gave me a fundamental understanding. Essentially, I have to add vectors. Finally an application of vectors. https://dominik.win/blog/programming-swerve-drive/
Time Spent: 2 hours
July 1, 2025
The code is very long. I first declared all the electronics that were connected to the arduino mega. I then figured out how to add the vectors and make it have magnitude and direction. I then learned to use pid for the turning of each module. Lastly, I researched the code for using a ps4 controller to connect.
Here are the sources I used:
https://github.com/PaulStoffregen/Encoder/blob/master/examples/Basic/Basic.ino https://github.com/PowerBroker2/ArduPID/blob/main/examples/example/example.ino http://brettbeauregard.com/blog/2011/04/improving-the-beginners-pid-introduction/ https://lastminuteengineers.com/l293d-dc-motor-arduino-tutorial/ https://maker.pro/arduino/projects/how-to-control-an-arduino-robot-with-a-ps4-bluetooth-controller
Time Spent: 5 hours
Jun 21, 2025
I finalized the BOM and wrote the README.md
Time Spent: 1 hour
Build
Aug 9, 2025
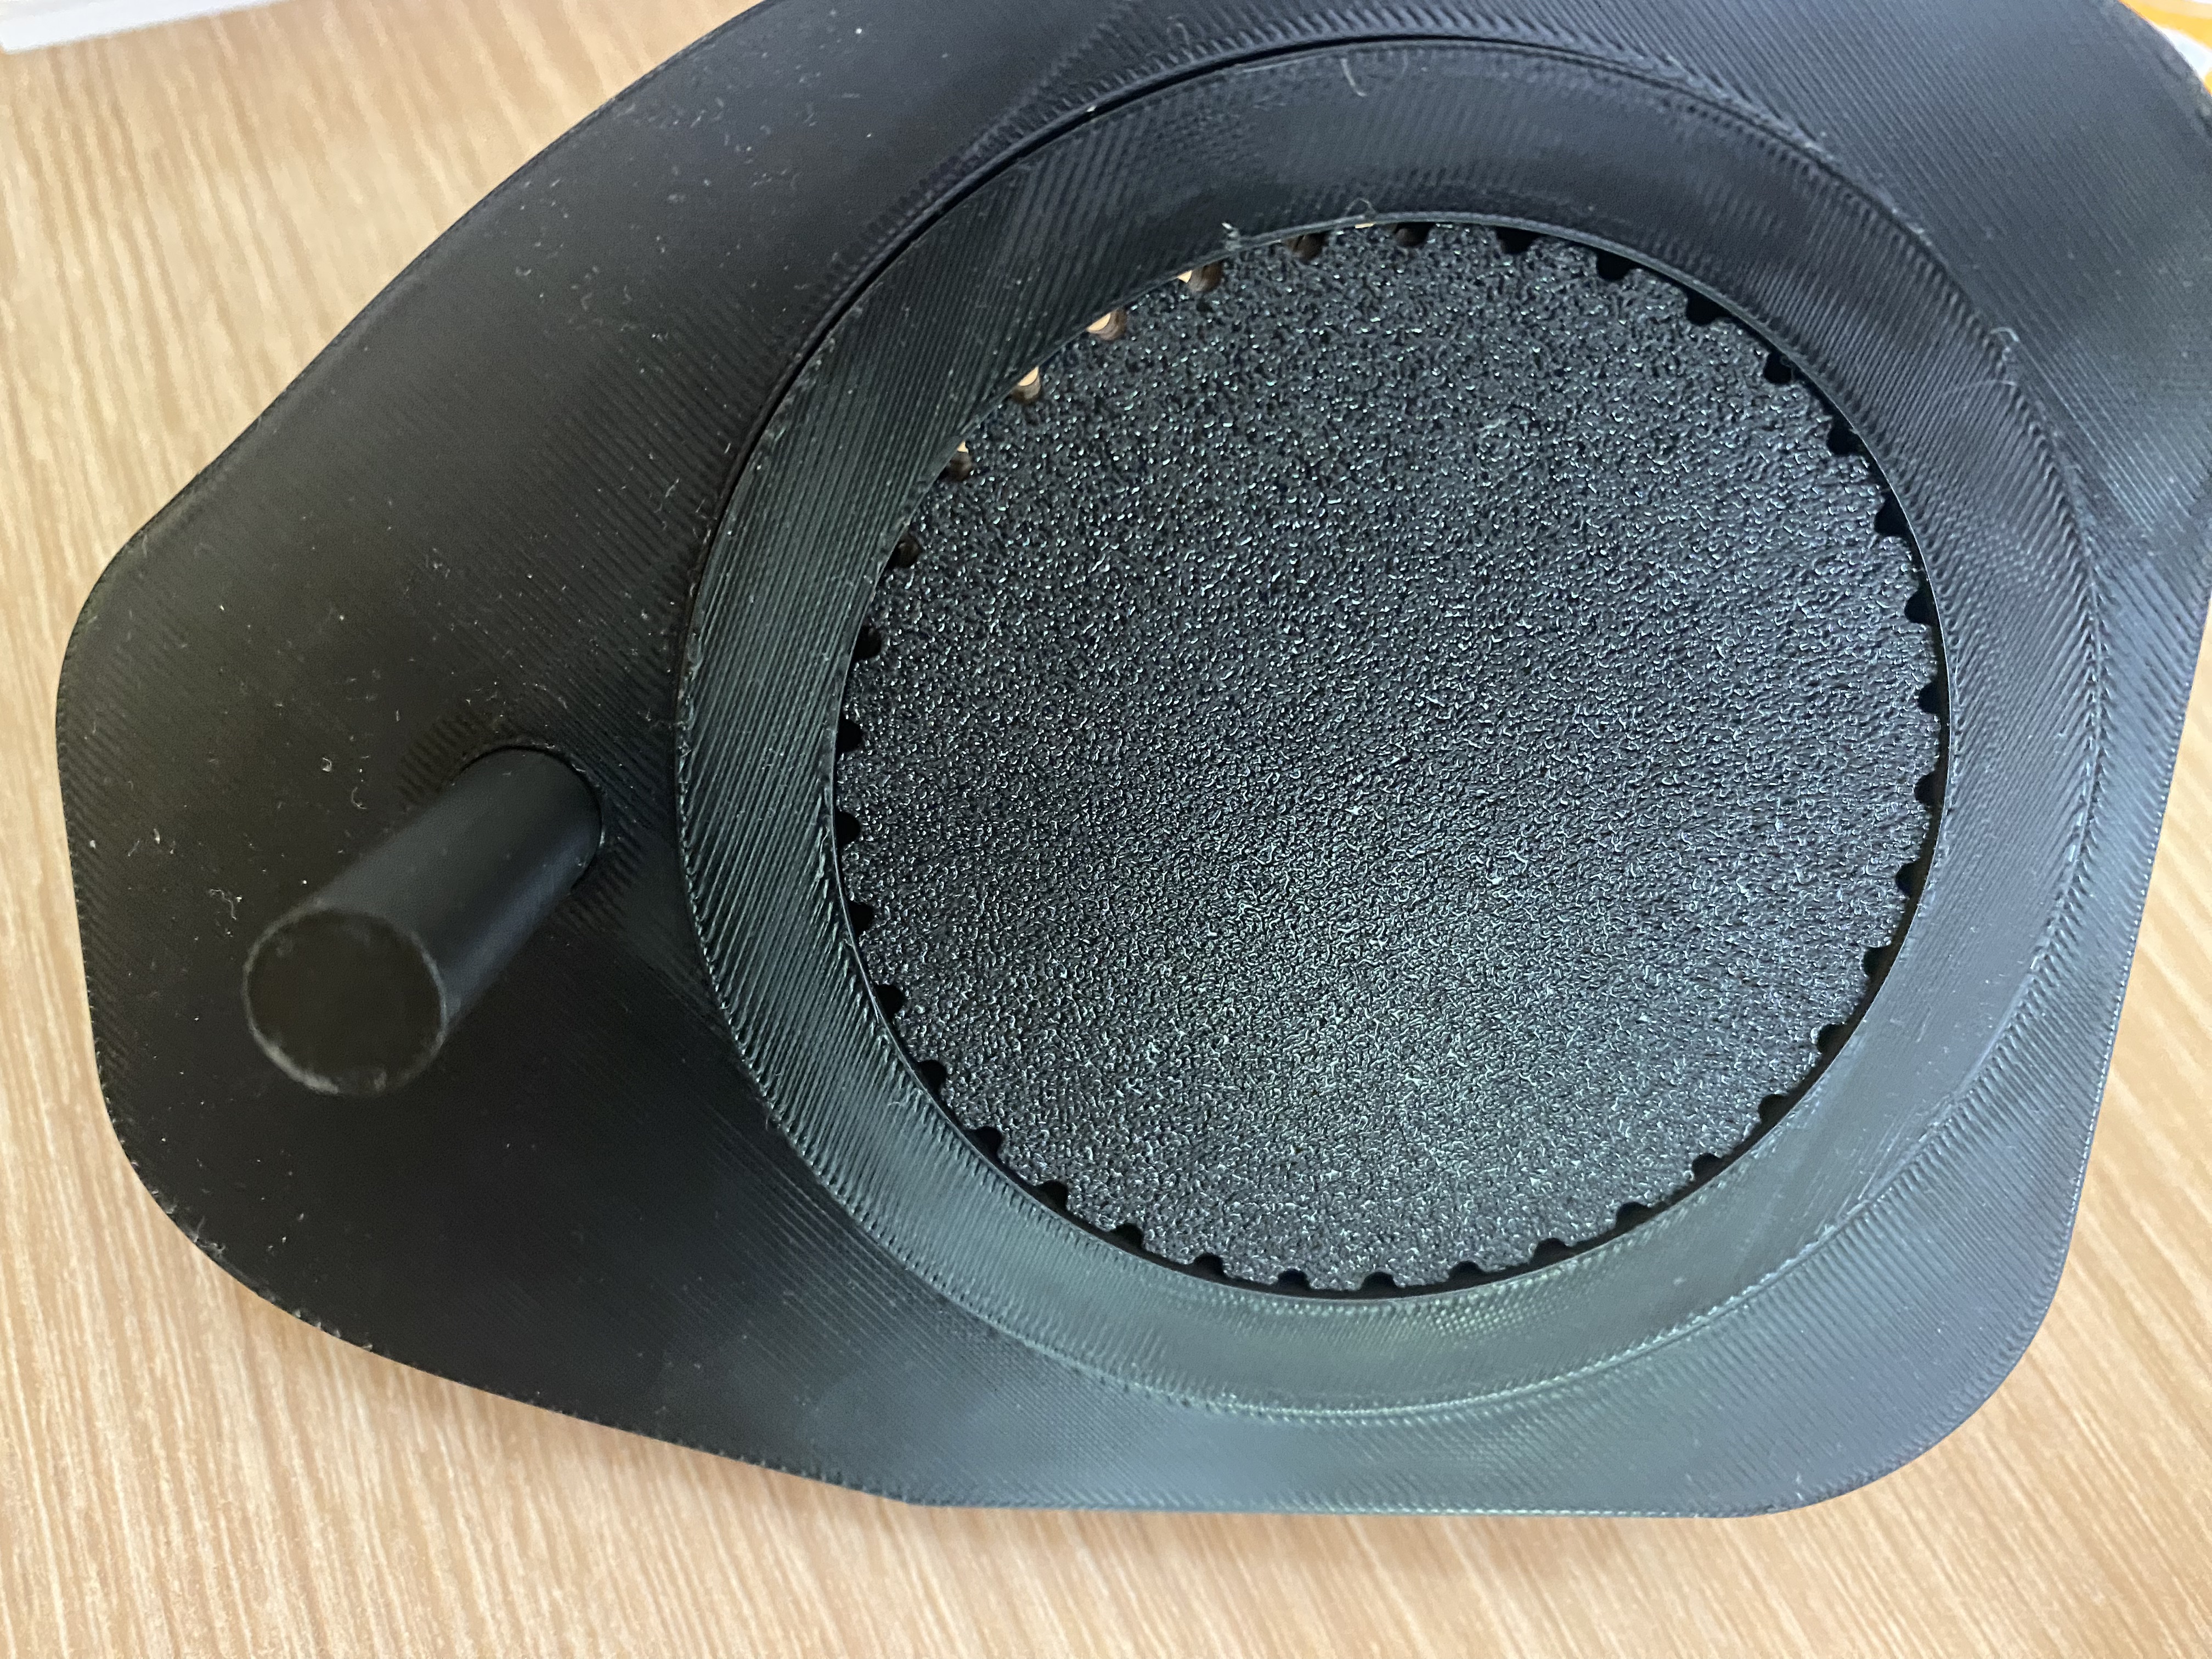
I got most of the parts that I ordered so I can start 3D printing. I started by printing small parts to test the tolerance for each part. It took many tries to get it perfect.

Time Spent: 2 hours
Aug 10, 2025
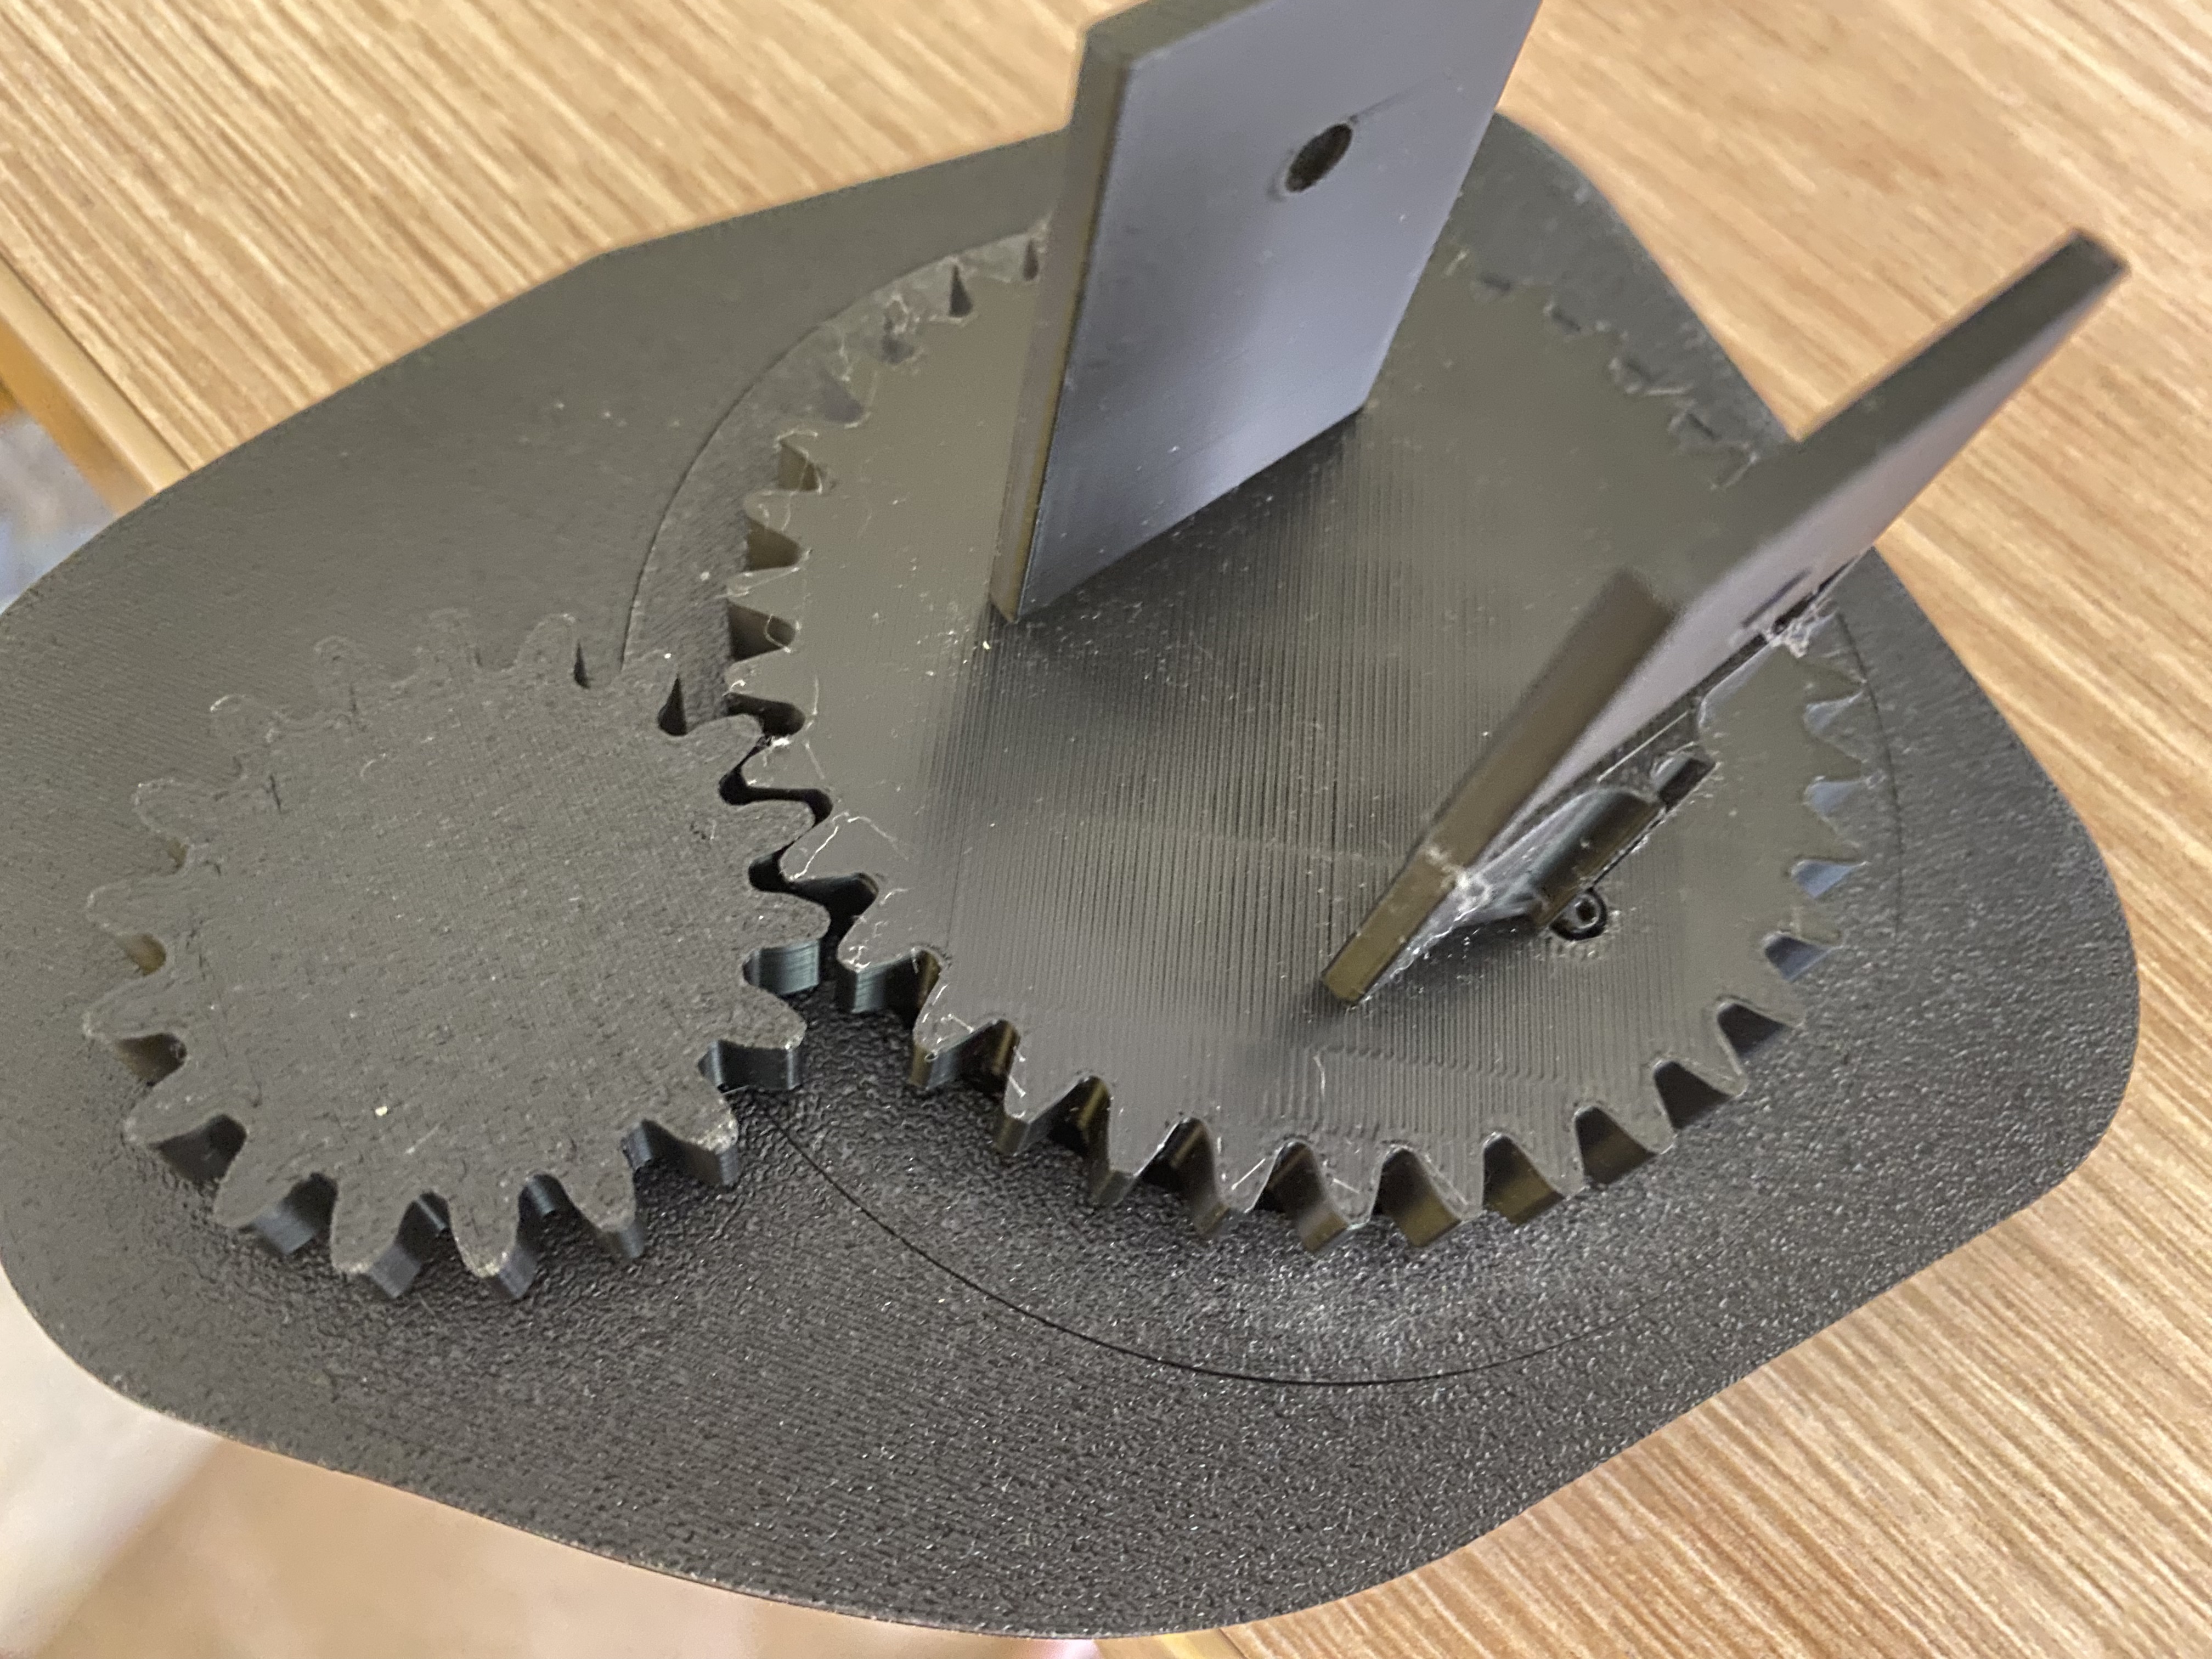
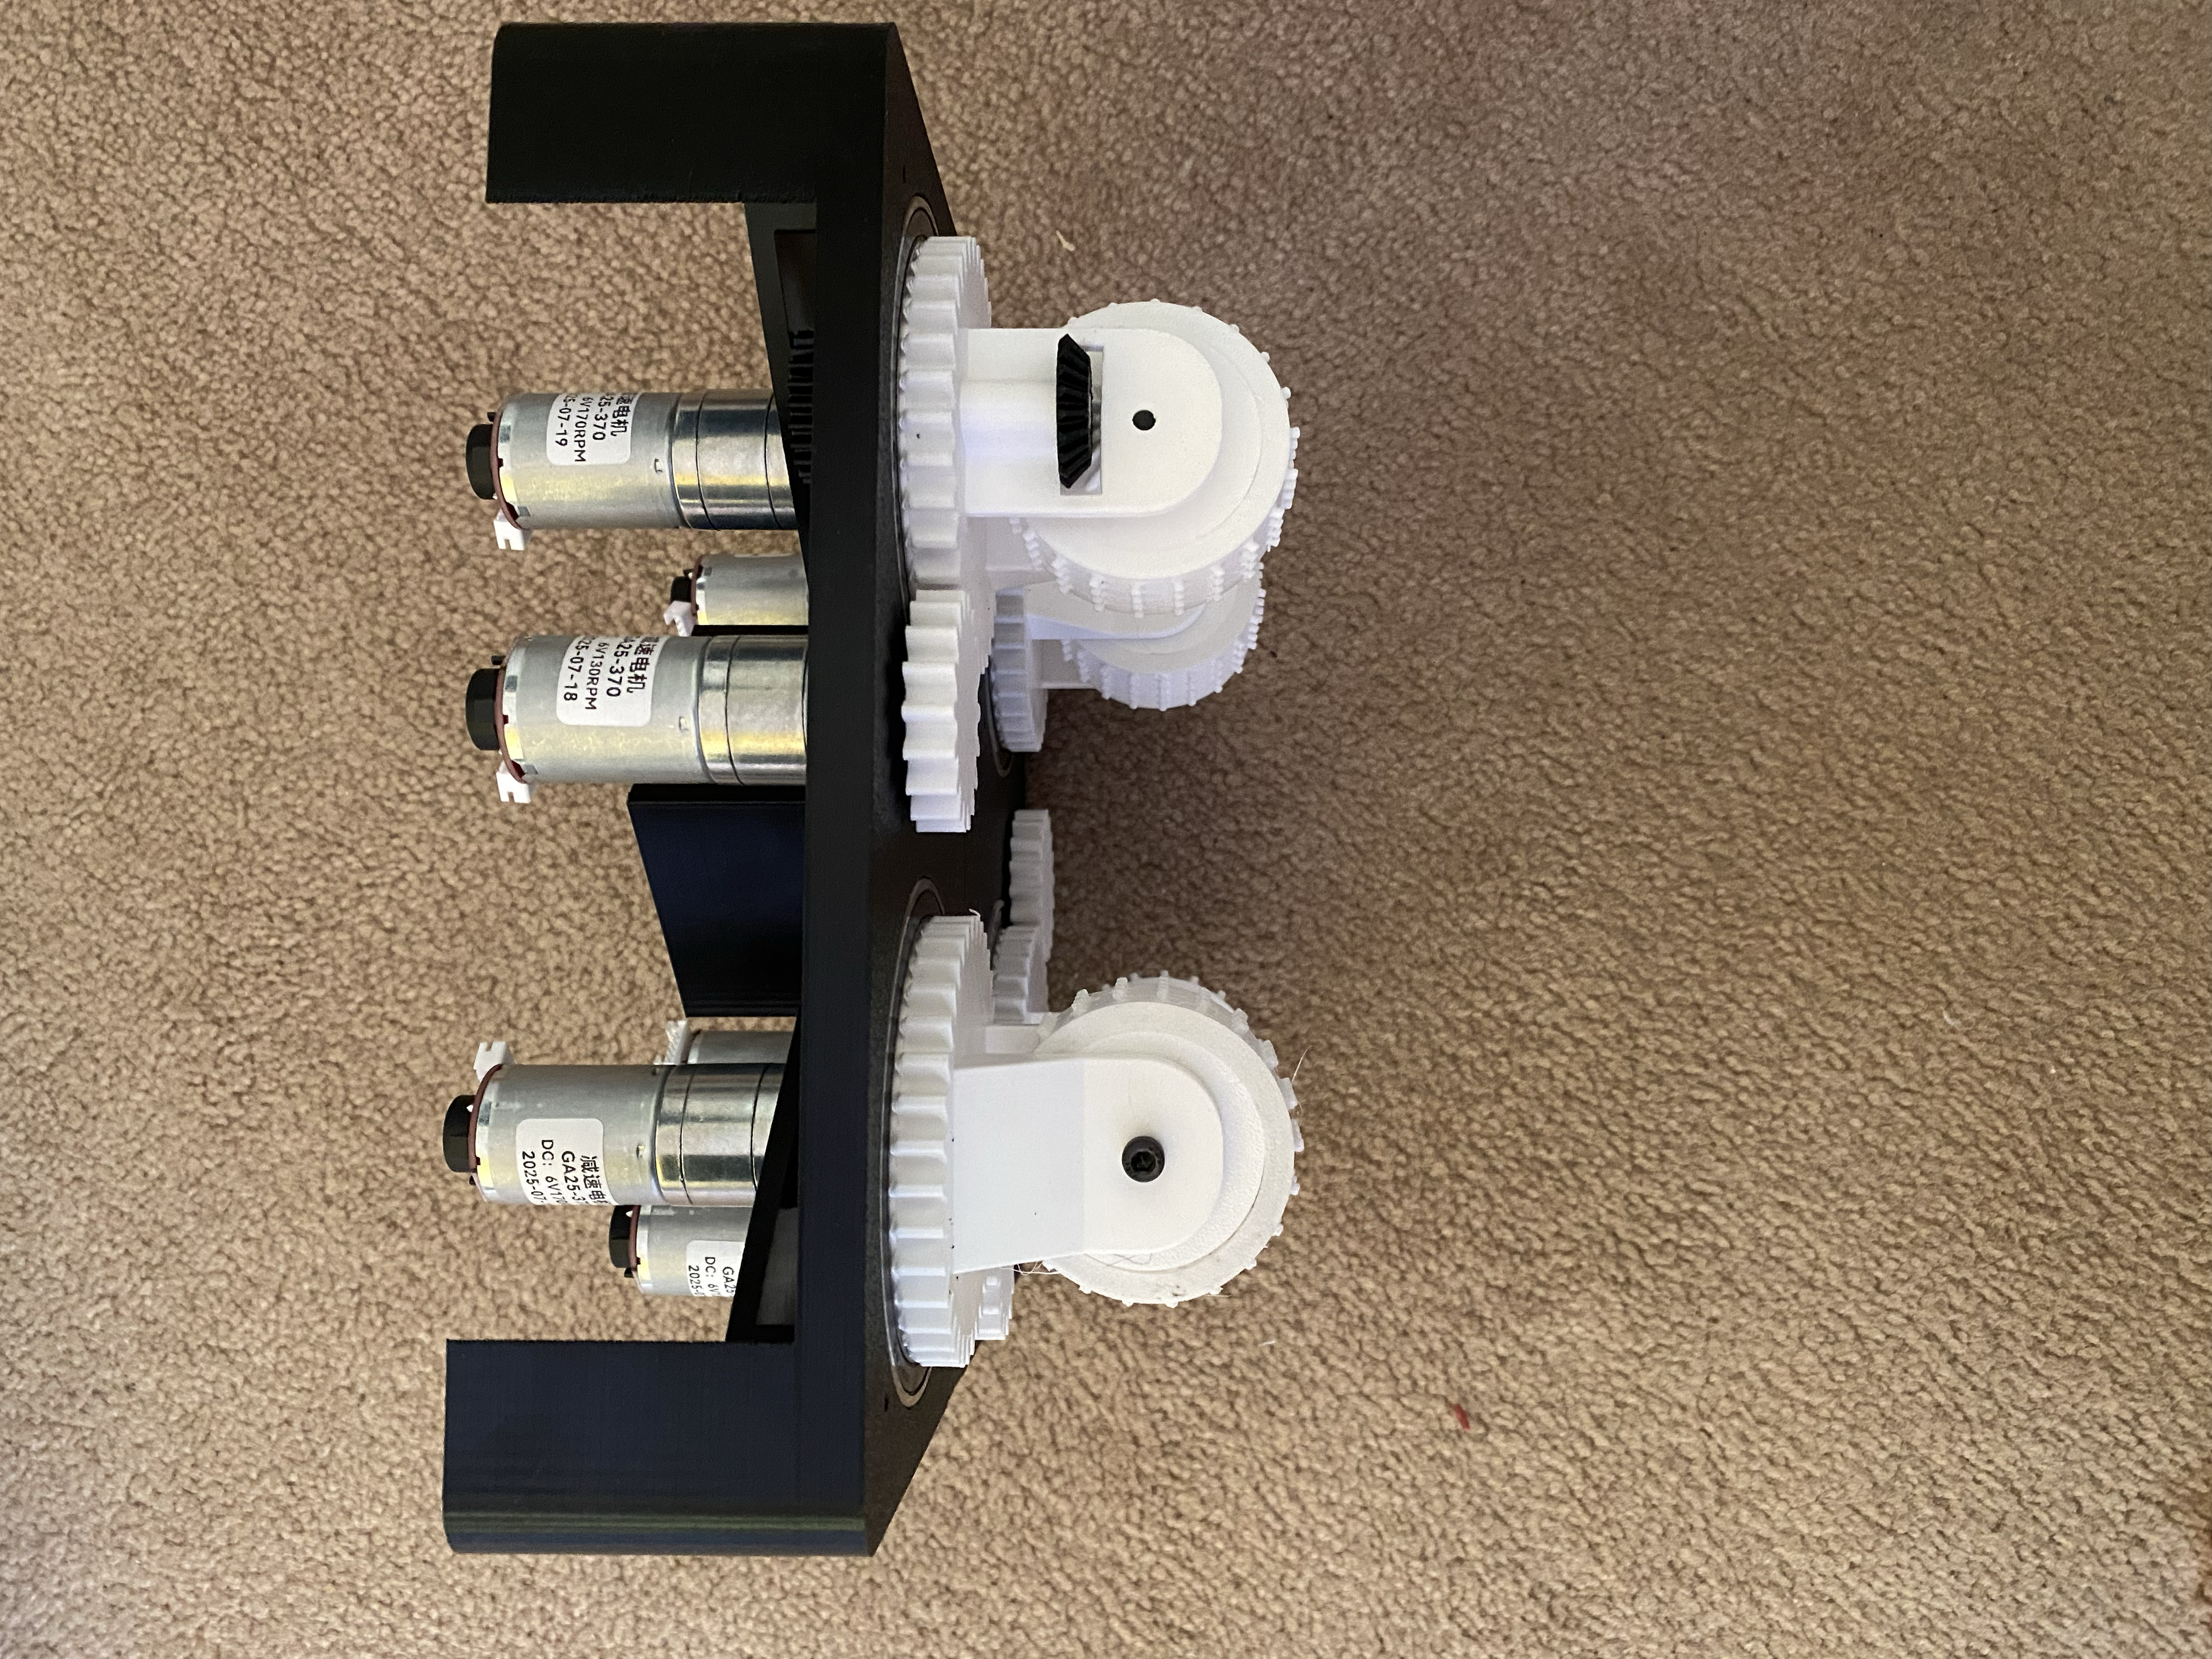
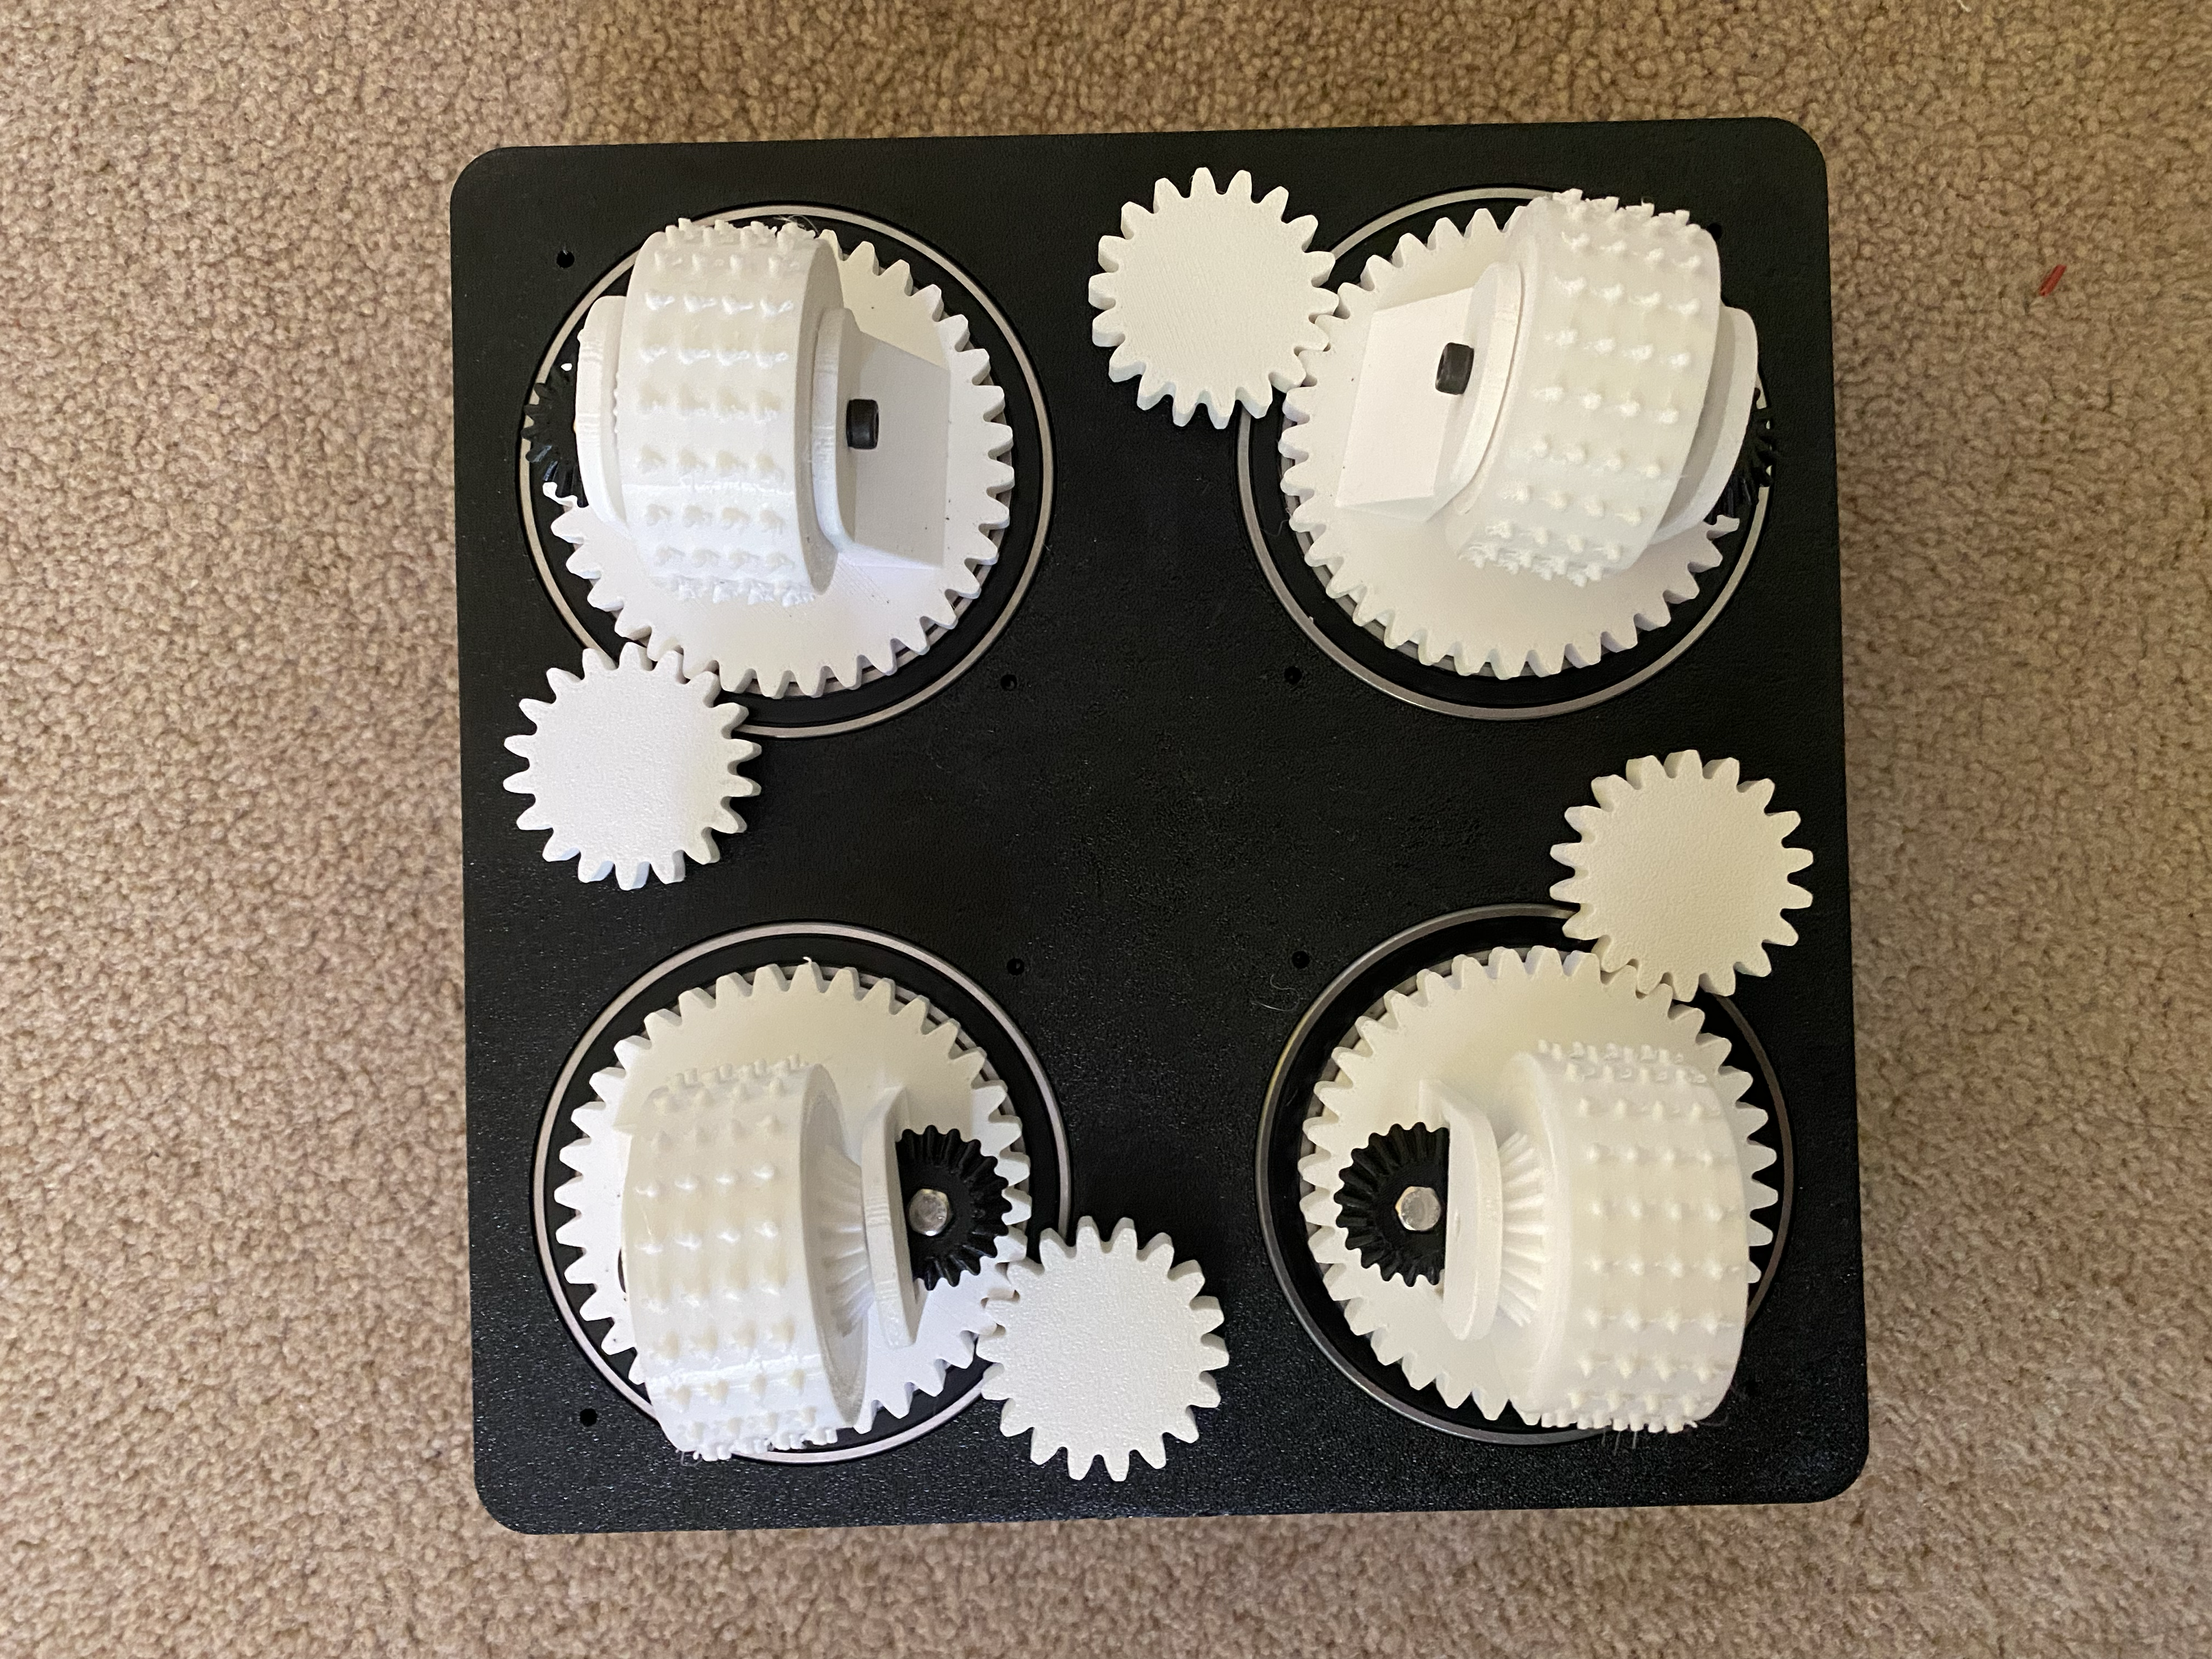
I continued to print the base and drivetrain. I then assembled the parts that was ready.
Time Spent: 2 hours
Aug 11, 2025
I continued to print the base and drivetrain. I assembled everything and it looks amazing.
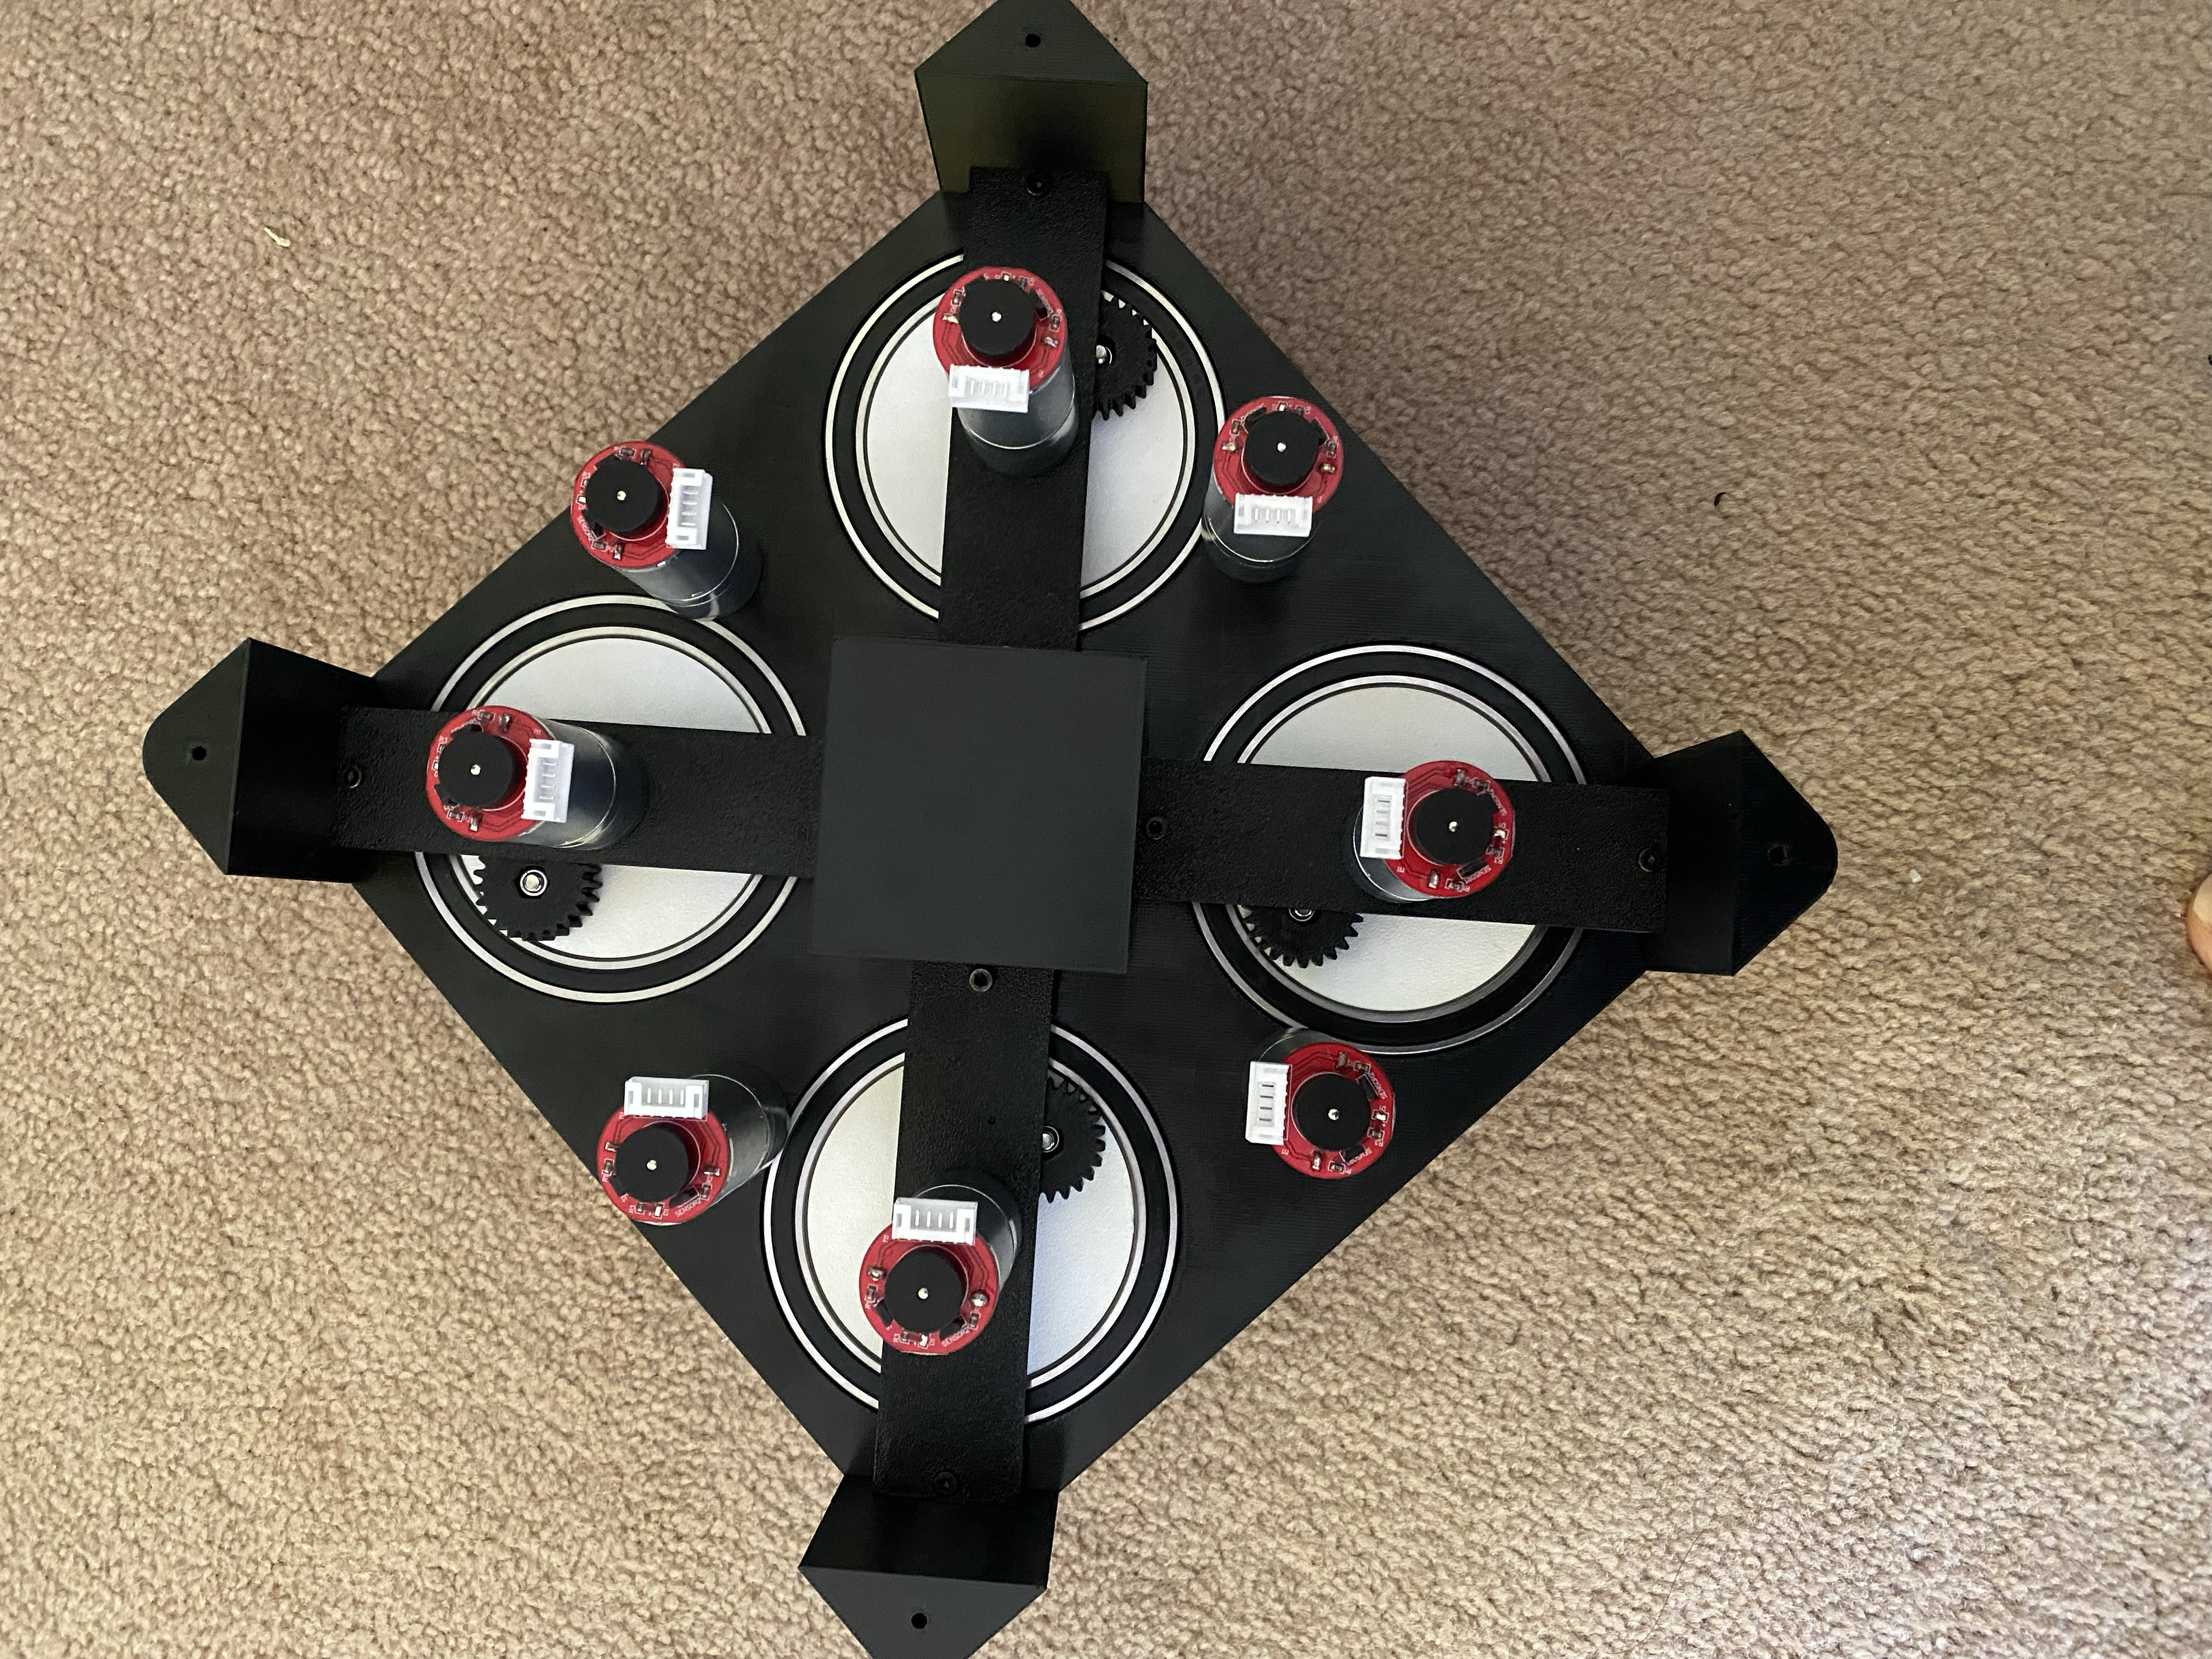
Time Spent: 1 hour
Please note that the photos were taken after I completed the work, and the journal was written afterward. Some parts of the project may have carried over across multiple days. The recorded times are not entirely accurate... I actually spent more time, but noted conservative estimates.
Aug 18, 2025
I received the Arduino Mega, but it did not when the code was uploaded. I tried to find if there was a mode for flashing but nothing worked. I ordered a new one off of amazon this time. Hopefully more reliable. Time Spent: 2 hours
Aug 25, 2025
I received the new Arduino Mega and it worked great. Blink worked which was a relief. I soldered on some connectors for the motor pins so that they would fit the arduino pins and not come out. This took very long as there were 6 wires each for one motor, and I had to solder for 8 motors. I started wiring everything which was a pain.
Time Spent: 7 hours
Aug 26, 2025
I ran some simple code to see if it would work. However, some of the motors worked while others didn’t. I figured out that I wired it incorrectly. I realized that it was going to be a diagnose later because the pins on the arduino mega and the motor controllers were very far from each other. I rewired it so that it would be easier to trouble shoot.
Time Spent: 5 hours
Aug 27, 2025
I ran some basic code to run all the motors which worked great. Then I started to control the angle of the steering. However, PID did not work as only a selected few ports on the mega had pwm output. I then resorted to bang bang control which worked good enough. I then combined everything and that was when it didn’t work. After testing once, some of the motors stopped working. I spent the next 2 hours testing each module. I found that the wires were a problem and they were unreliable. I made my own wires and rewired everything. I tested each mother and it worked.
Time Spent: 8 hours
Aug 28, 2025
Now that the motors were reliable, I could test my code once again and debug. It took some time, but overall it works really well.
Time Spent: 4 hours