
Omega Keyboard
OMEGA
total hours spent: 21 hrs
Day 1 - May 22nd
time spent: 0.5
Today is the first day of starting the split keyboard project, named the Omega Grid
. For this keyboard, my whole goal is to add features that I find missing in my current keyboard. I've made a list of things the Omega needs to have for it to be the perfect
keyboard for me.
Features: * A slim keyboard, with low profile switches * A Wireless split keyboard * Orttholinear layout * Unique designs * Hot swabable
Day 2 - May 30th
time spent: 0.5 hrs
Now that I know what features I want in my keyboard, I need to know what parts of the keyboard I need to make these features real.
MCU: I see lots of recommendations for the nice!nano v2. And there's reasons for it. Its super slimm, which fits for my Slim keyboard and it has the nRF52840 chip which is good for bluetooth. In addition, it supports ZMK which I will use for my firmware.
Screen: For my screen on my keyboard, I will use the nice!view. Yes this is a bit expensive but honestly worth it. Its 30hz, draws low power (big win for wireless keyboards), and decent display.
Switches: Choosing my switches wasn't hard, I chose the Red Kailh Low Profile Choc Switches. They have good ergonomics, sound good, and comfortable to type on.
Case: My case will be 3d print, making it easy to make custom designs and cheap.
Day 3 - July 4th
time spend: 5hrs
I just spent a lot of time on creating a budget and doing more research on the parts I chose in day 2. So I have only change. I need to remove the screen from my project. This is because the nice!view is way too expensive and I rather just save up for a nice!view later on when I have the keyboard intead of using a cheap oled.
Budget
| Item | Price (USD) |
|---|---|
| Nice!Nano | $51.10 |
| Lithium Battery | $8.76 |
| Solder Sockets | $14.60 |
| PCB (idk price) | $21.90 |
| 3D printed case | $5.11 |
| Switches | $12.64 |
| KeyCaps | $21.90 |
| Diodes | $1.01 |
| Kalih Hotswaps | $1.01 |
| Power Switch | $2.19 |
| Reset Button | $2.19 |
| Battery Jack | $1.46 |
| Screws Kits | $3.23 |
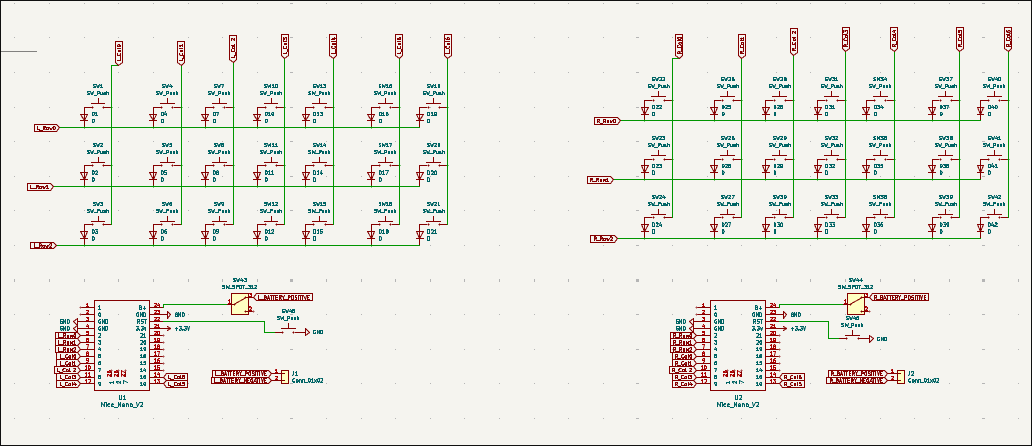
In addition, I also did my schematics:
Day 4,5,6 - June 5th - 7th
time spent: 10hrs
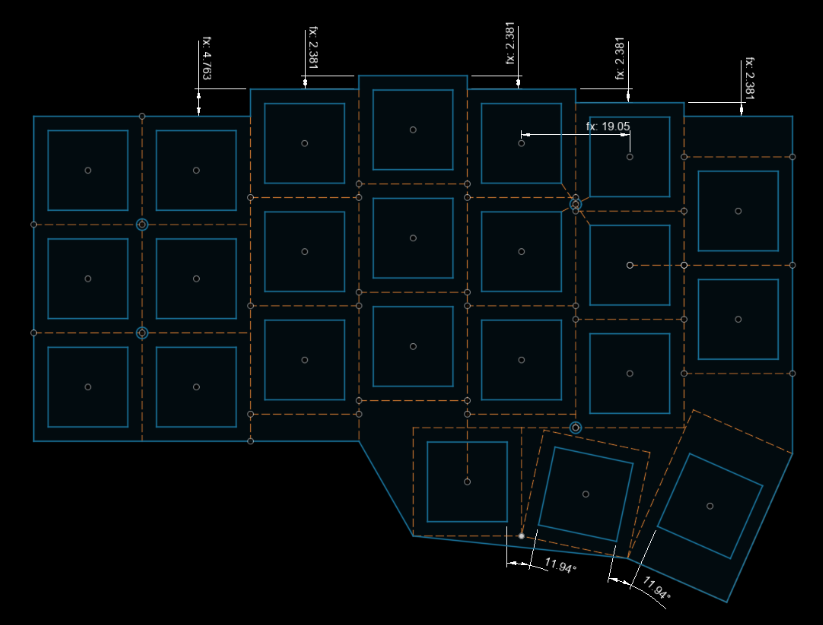
After reflecting more about my componenet choices on day 3, I choose to use a normal 128x32 oled screen from aliexpress instead of a nice!view since I still really want a display but dont want to pay that much. In addition, I have tweaked a bit of things in the budget like alternating some of my items to aliexpress (solder sockets, etc). For these 3 days, I have been focusing on building my pcb and schematics and having a efficient pcb which suits my needs. I've also done lots of research of how I was going to make the layout of my pcb. A great source that helped me was the this repo with a great diagram here:
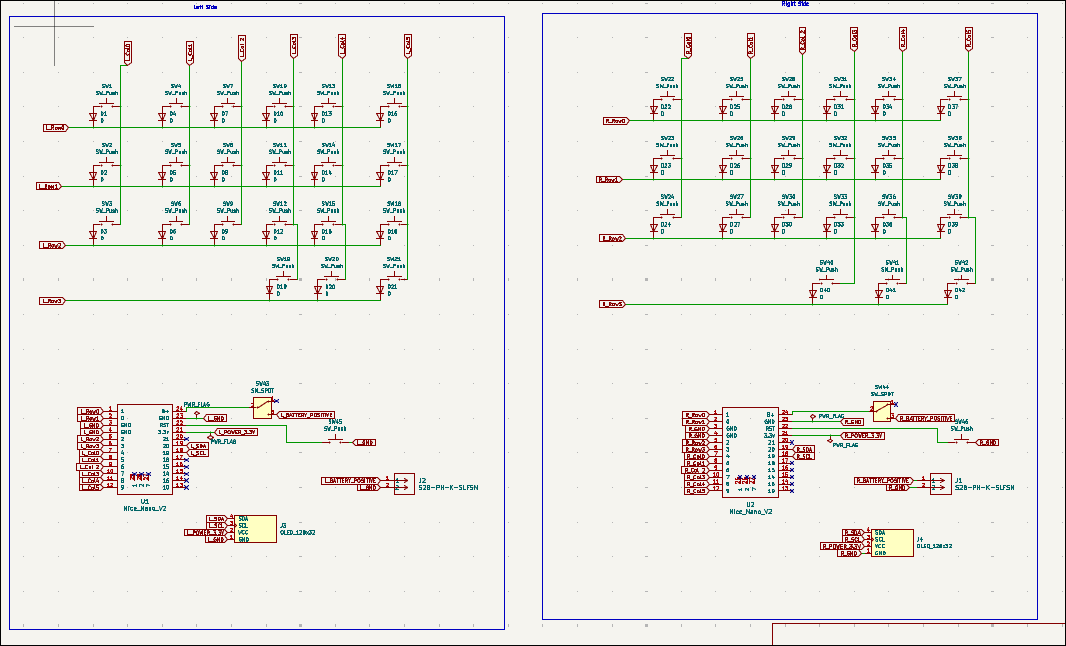
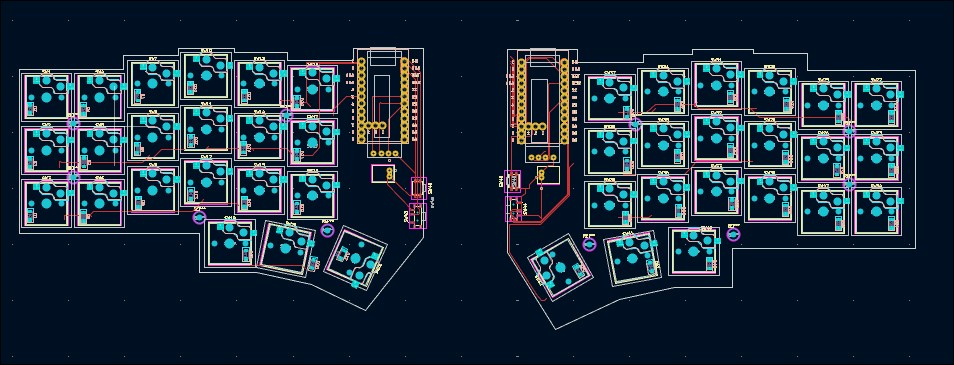
My current building status for my pcb and schematics are not 100% finished but they are mostly finished I would say. Here is the progress:
Schematics:
PCB:
Day 7 - June 8th
time spent: 5hrs
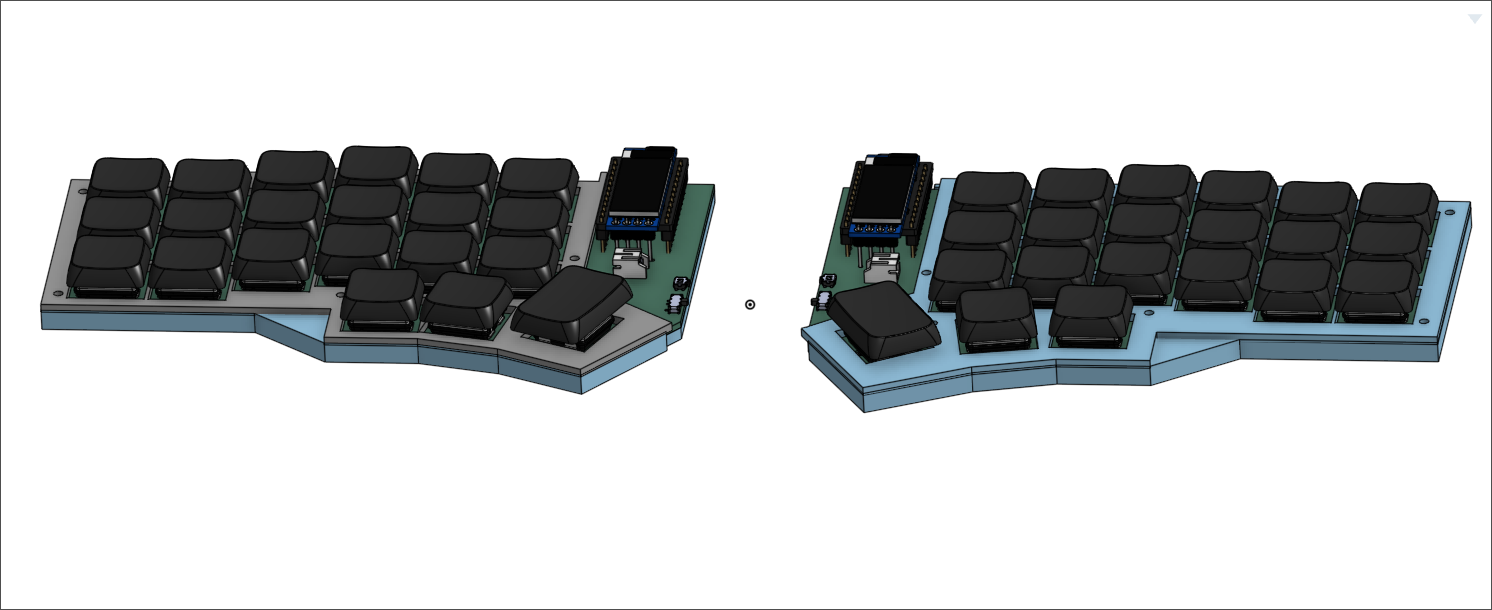
FINALLY! Today is the day I finished the Omega Project! In Day 7th, I doubled checked my schematics and pcb and made a case in onshape to 3d print. I also did the firmware (ZMK) which didnt take much time at all. The case isnt really complex at all, its just a bottom case and top case with the mounting holes, I also made sure it was low profile for my build.
Here is the case design:
THANK YOU FOR READING